|
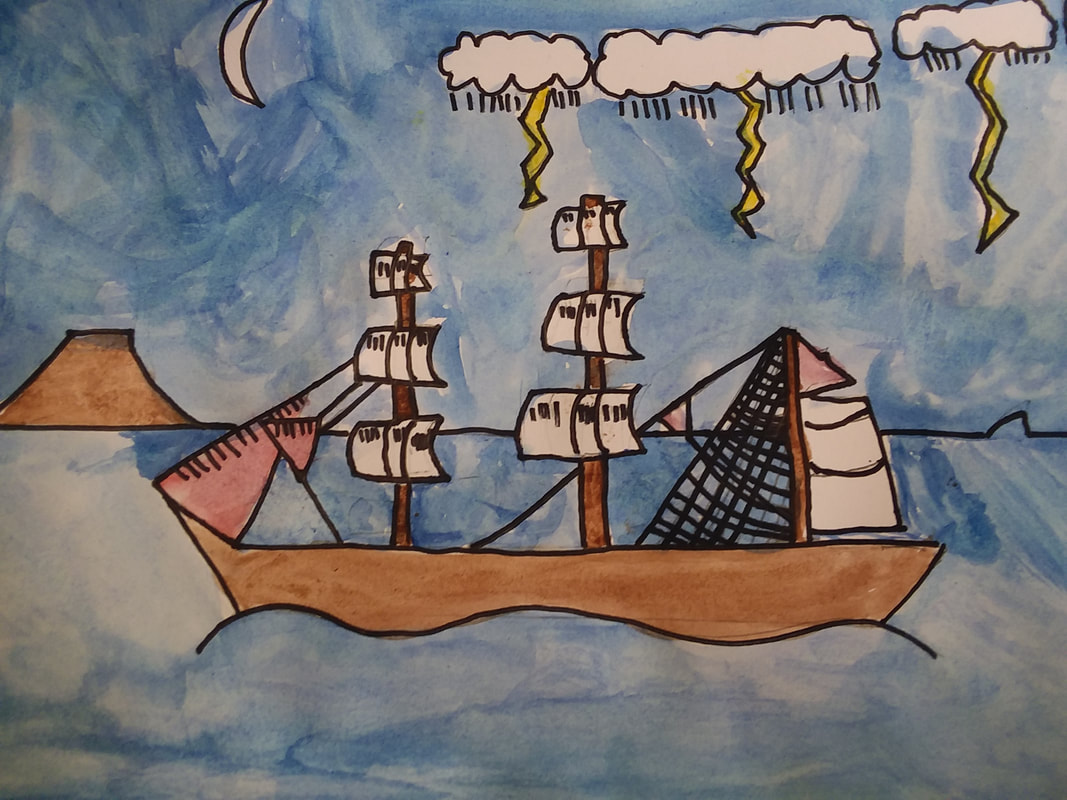
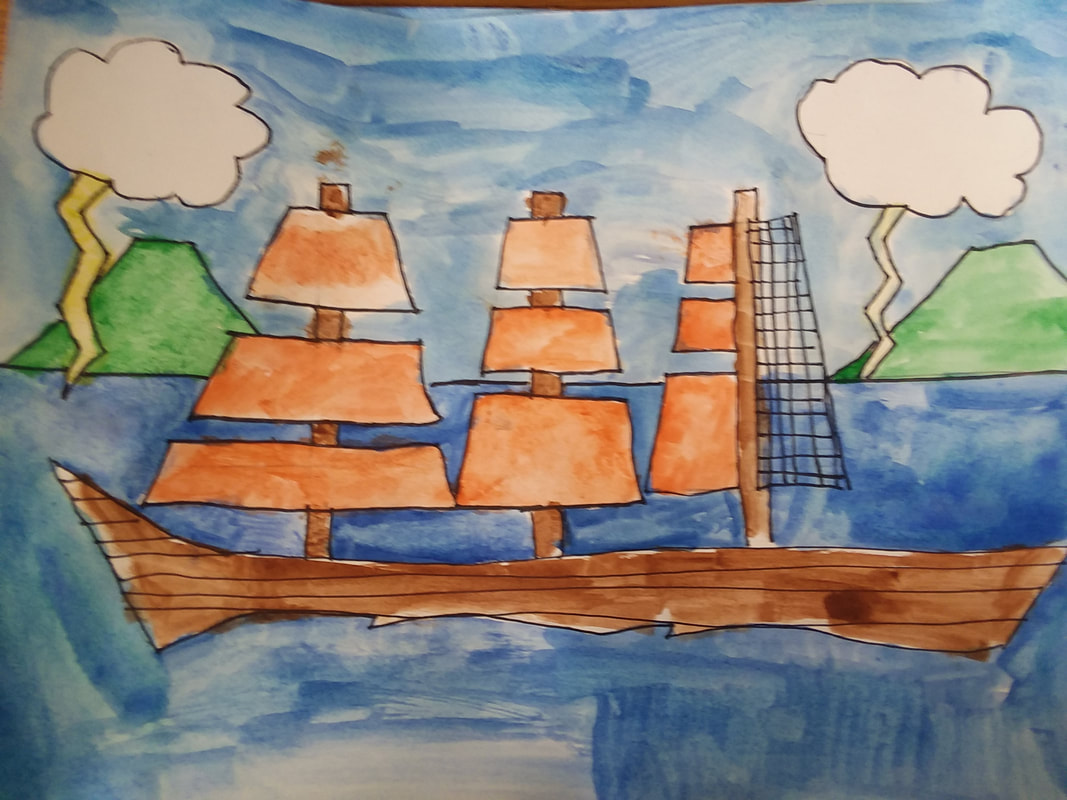
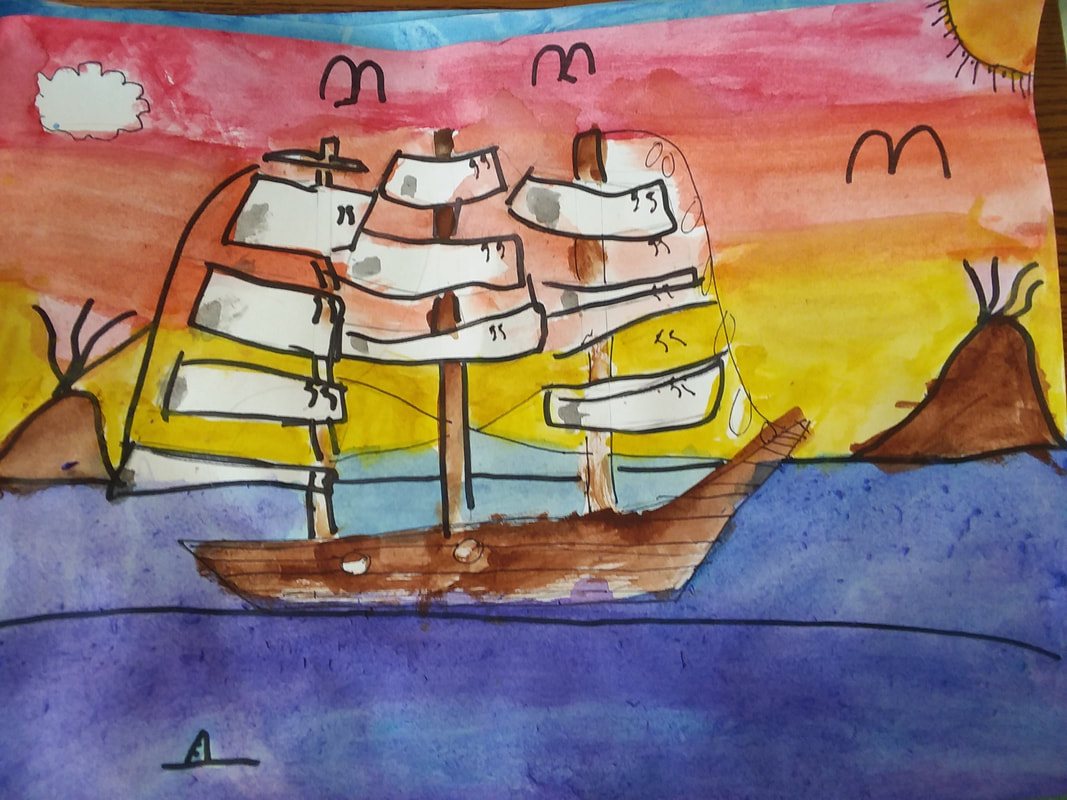
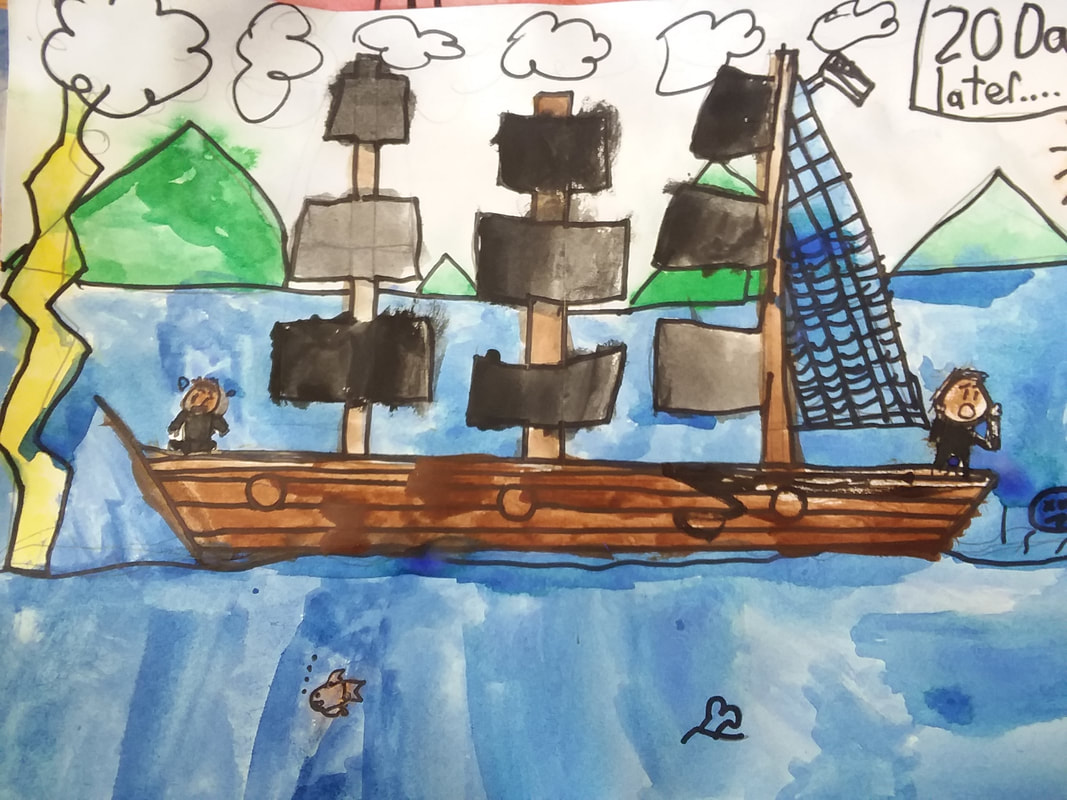
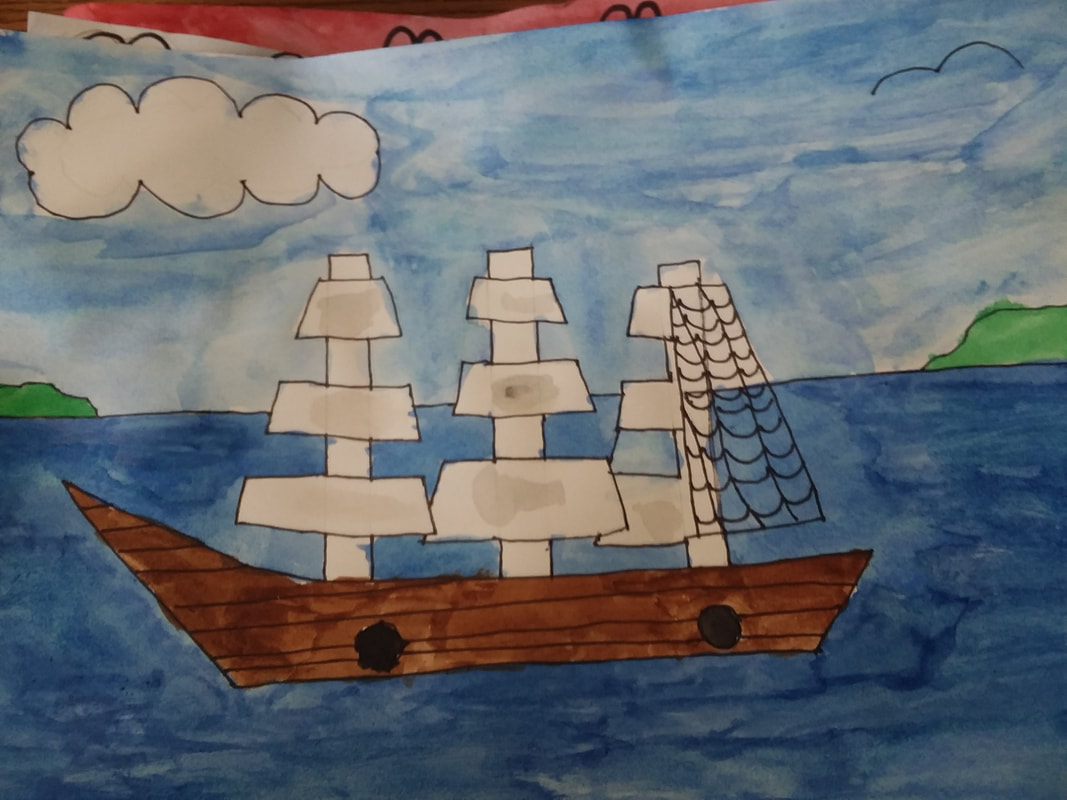
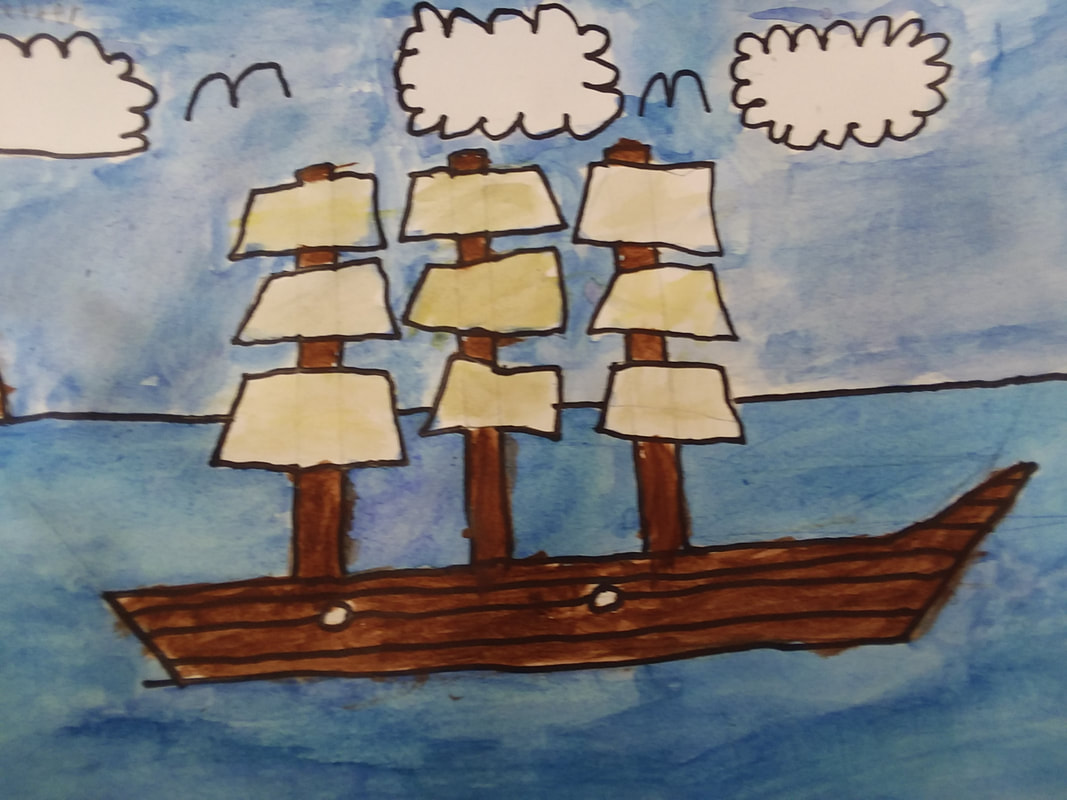
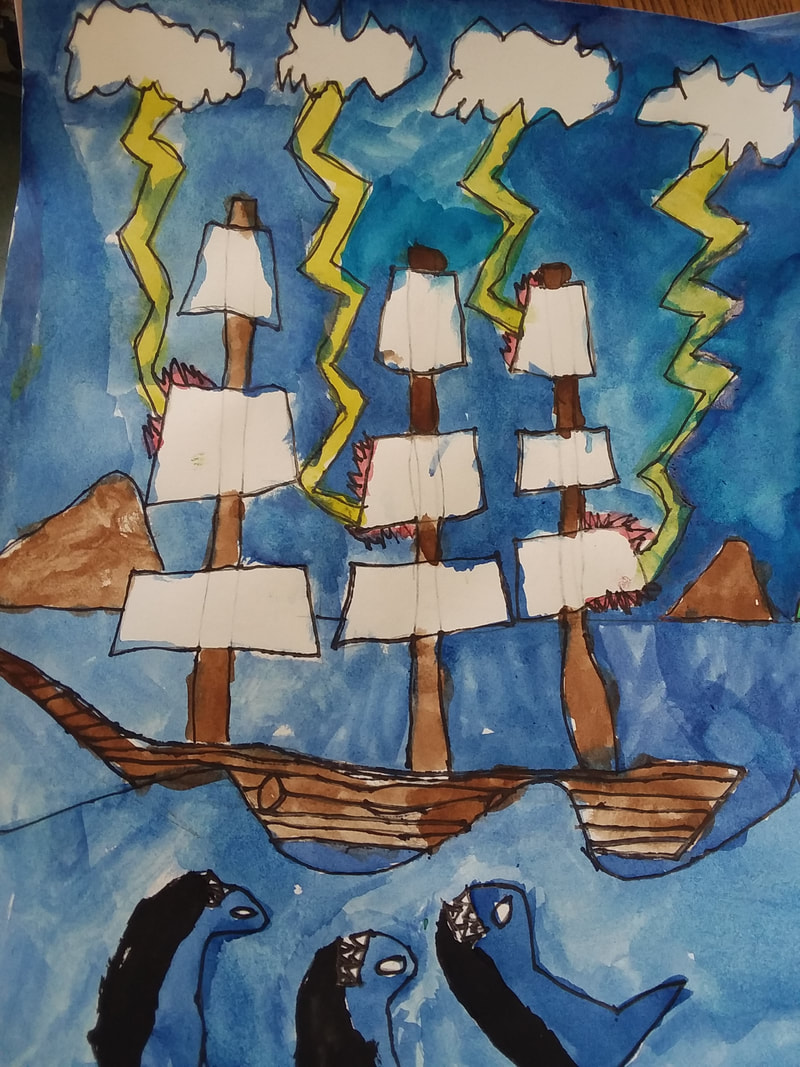
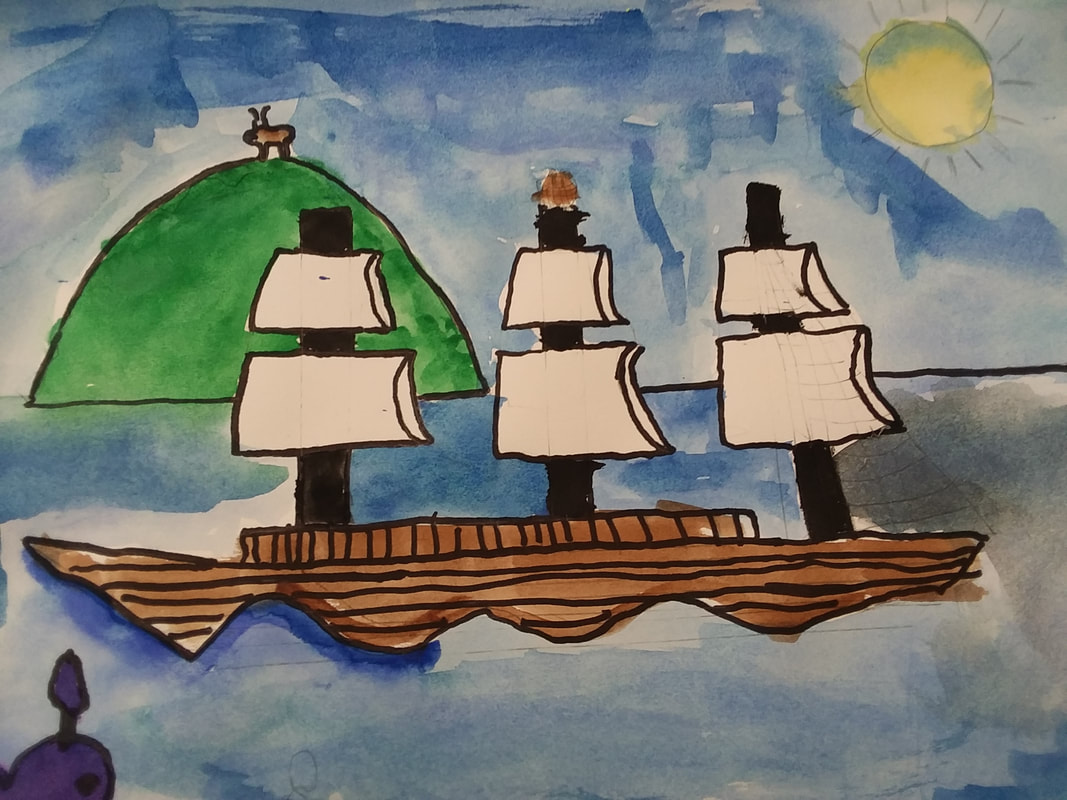
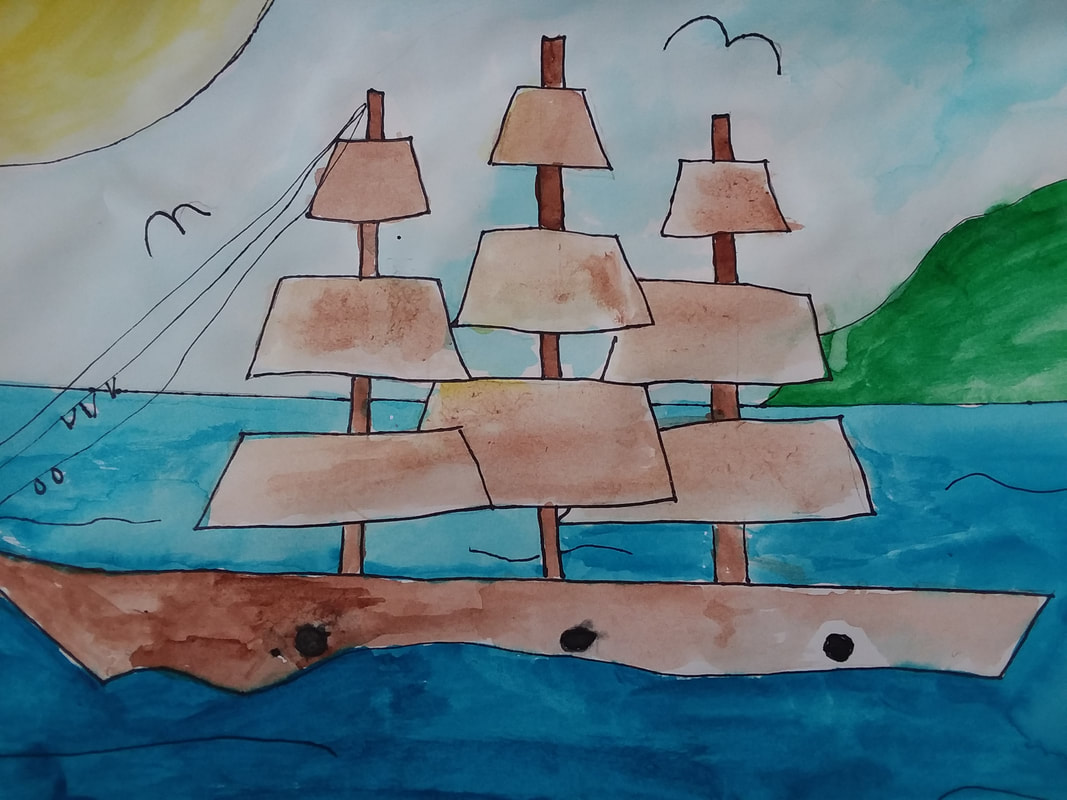
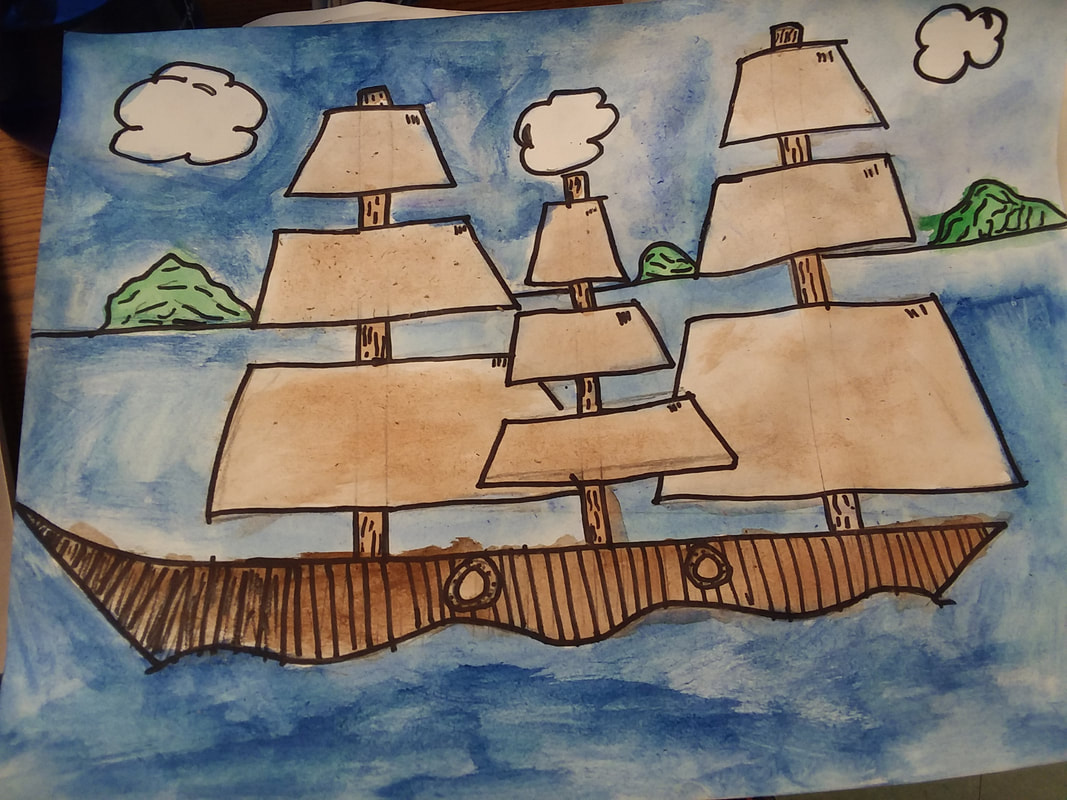
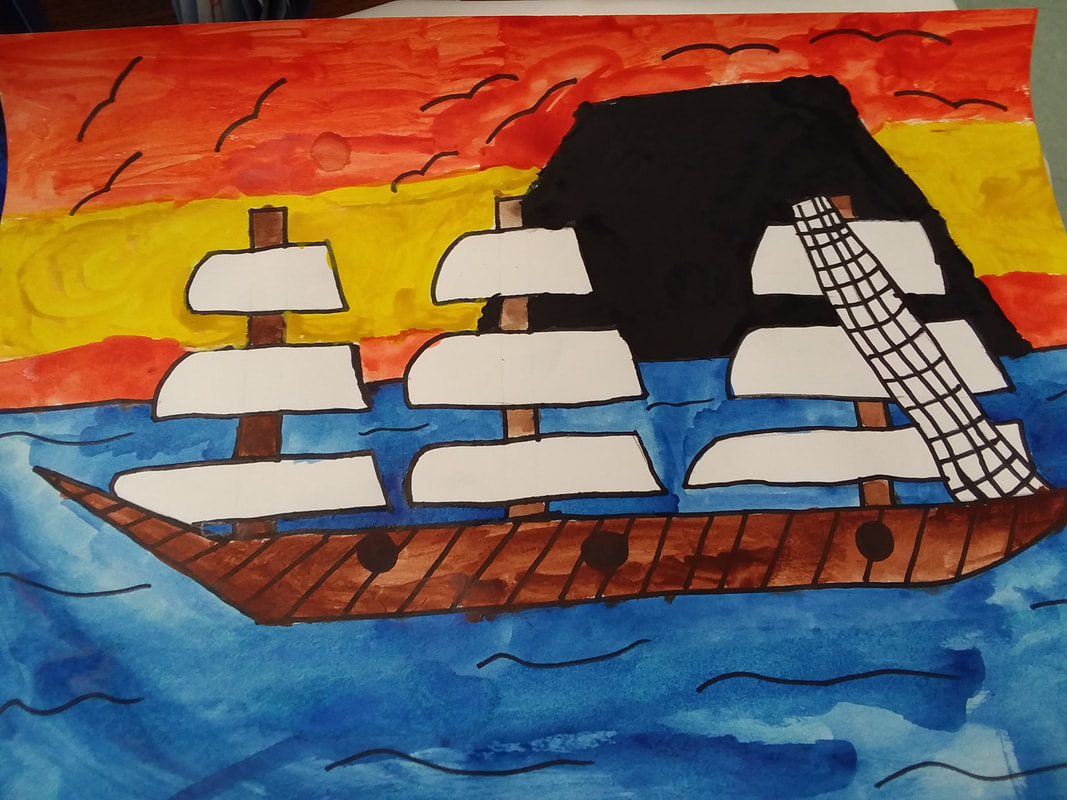
Unit Overview: Students studied historical 17th century clipper ship design and learned about the history of the Mayflower in order to create their own Mayflower paintings using sharpie and watercolor paint. It's Thanksgiving time. And with Thanksgiving comes the history of the Mayflower. Surprisingly, a lot of students don't understand the hardship that early settlers faced to come to the New World. I think that this unit is important not only for art, but also for students to understand what kind of situations and circumstances those before us faced in order to seek out life, liberty, and the pursuit of happiness. For this lesson, I started by showing students clips from "This Is America, Charlie Brown: The Mayflower Voyagers". There is so much history in this 20 minute video. It makes the Mayflower voyage related to students. After discussing the history, we talk about the look and design of 17th century clipper ships. I use the lesson "Clipper Ships" from Deep Space Sparkle to help guide students to drawing a detailed clipper ship. Often, students feel defeated from the get go. But we always start with a practice drawing before moving to our final. I always remind students that when learning something new, there is a challenge. If we never feel challenged, we never grow. And even in art, we want to grow. That is why we must sometimes draw hard things. In the end, each student felt accomplished. They achieved something that had never tried before. That is a great feeling to leave students with. 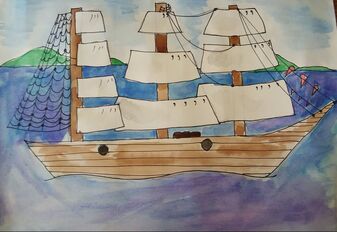 My teacher example
0 Comments
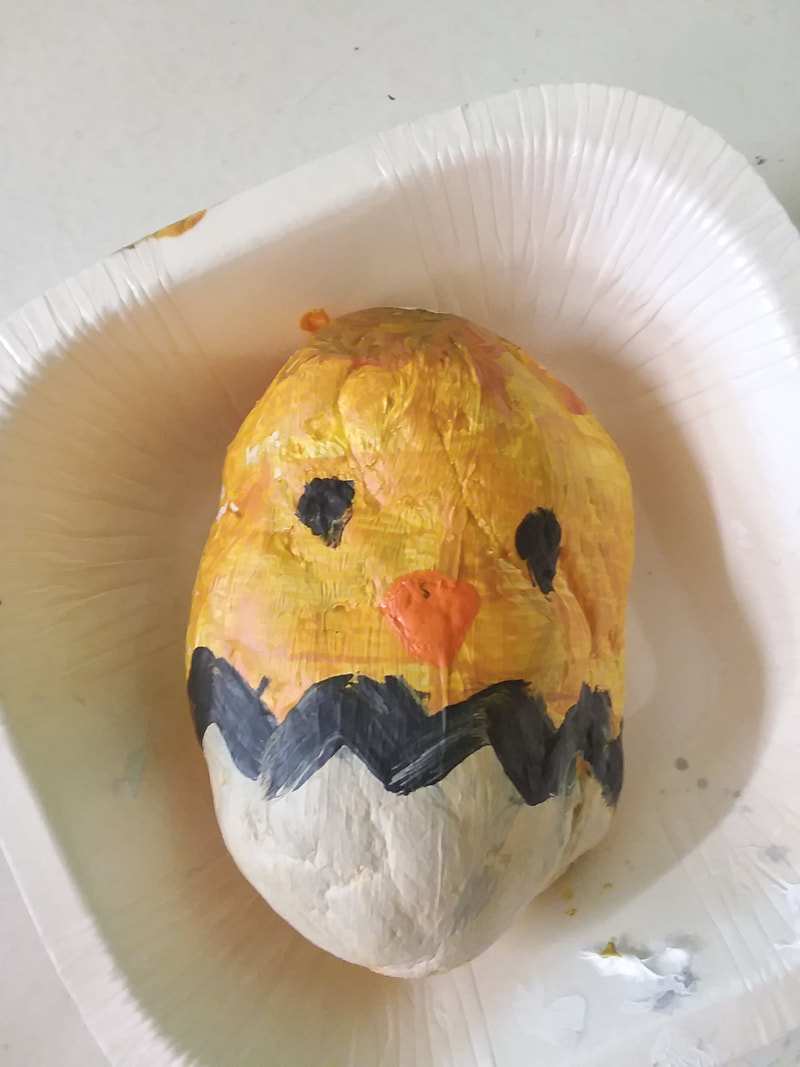
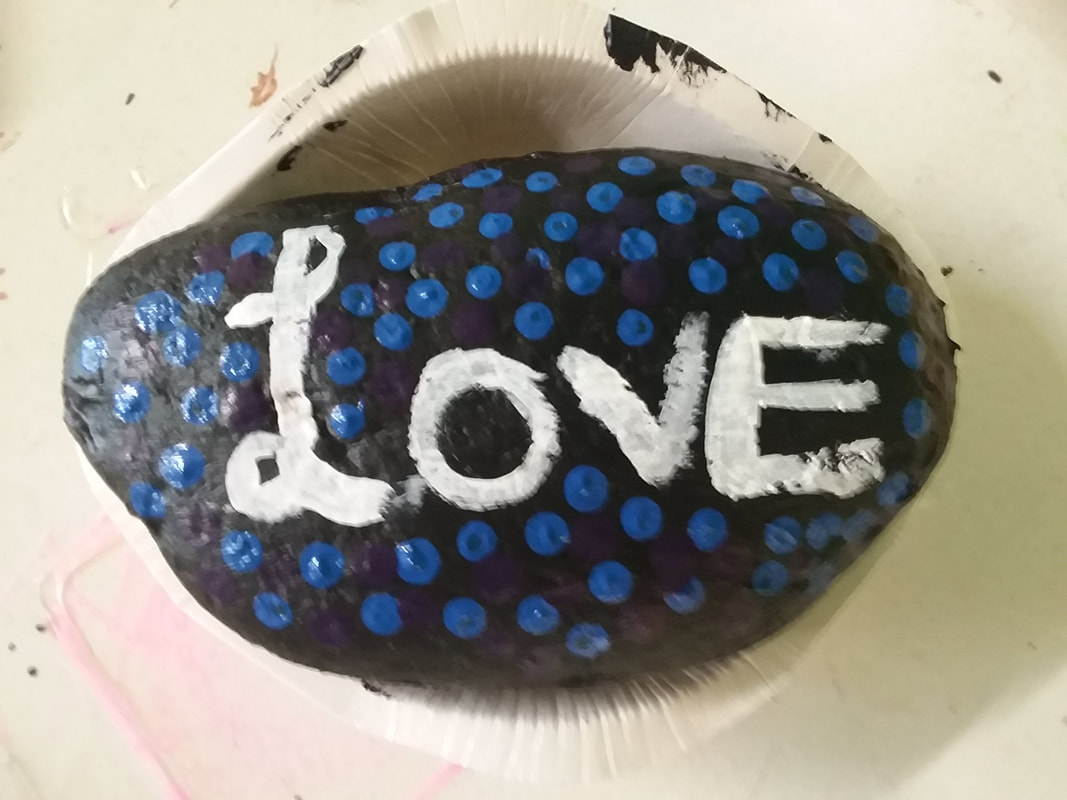
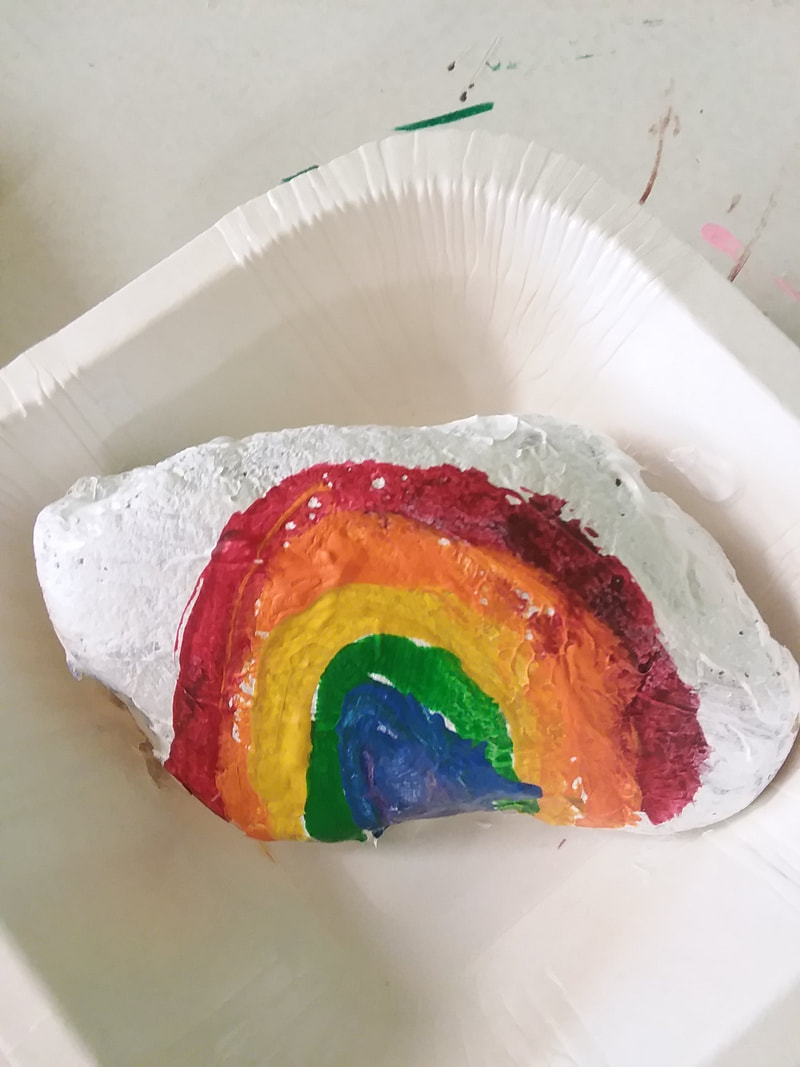
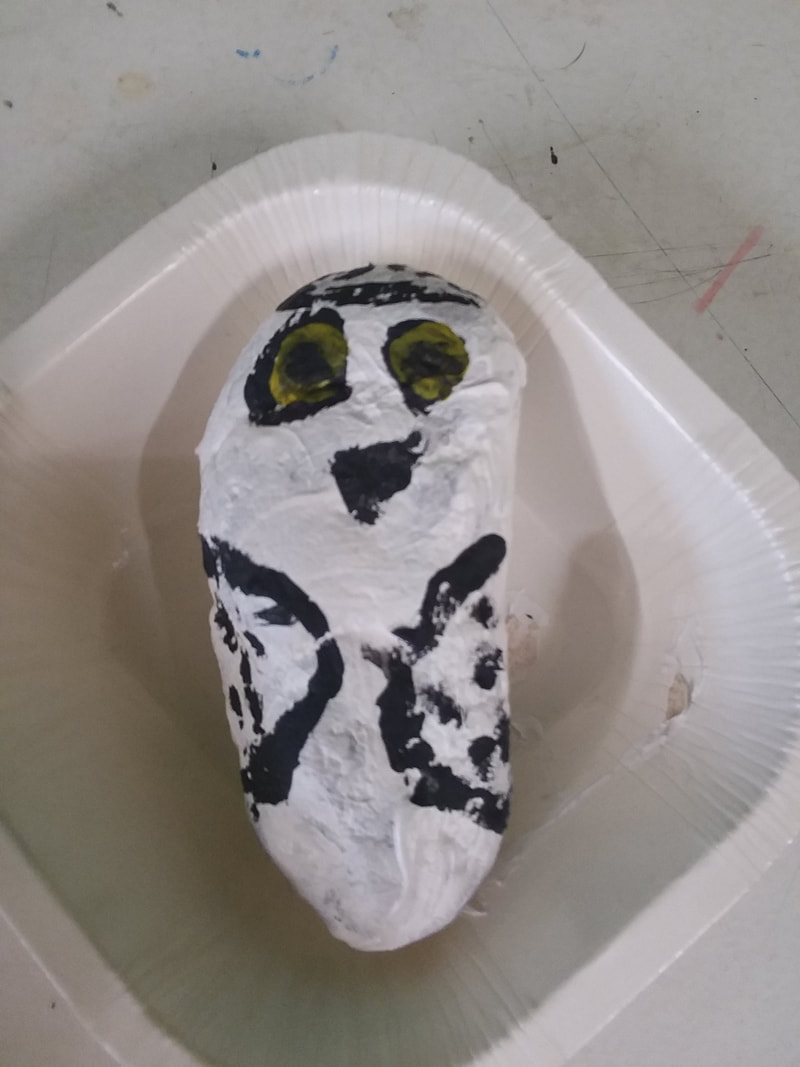
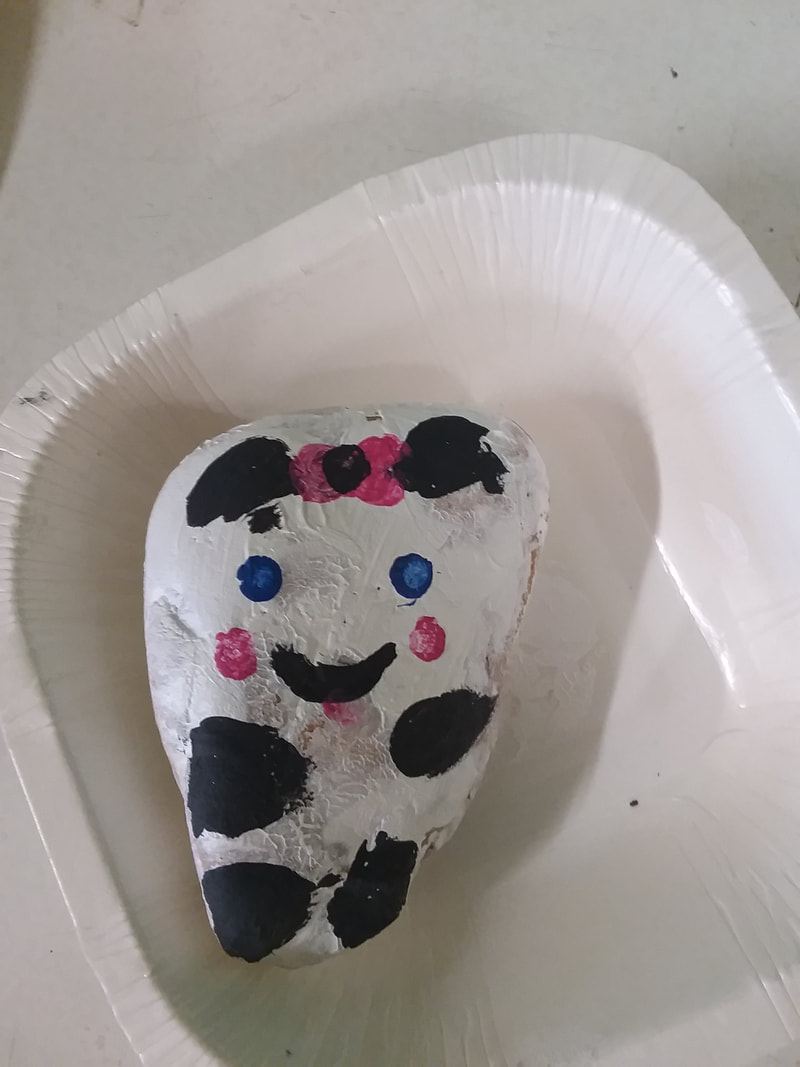
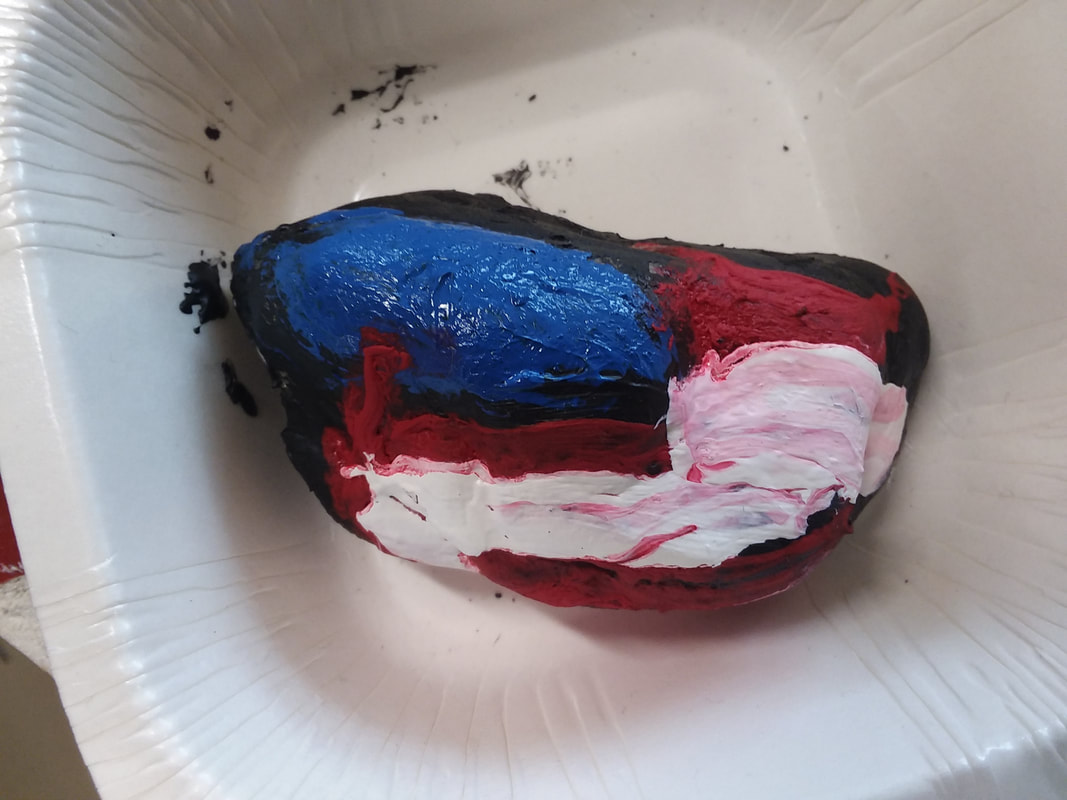
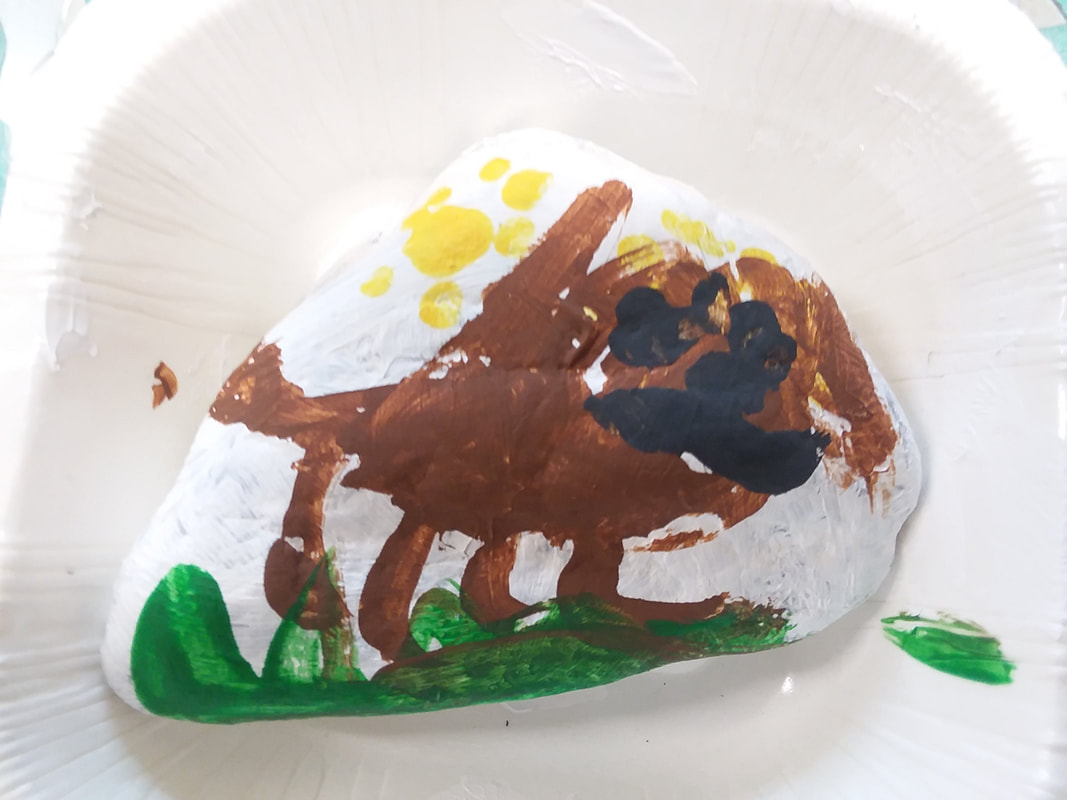
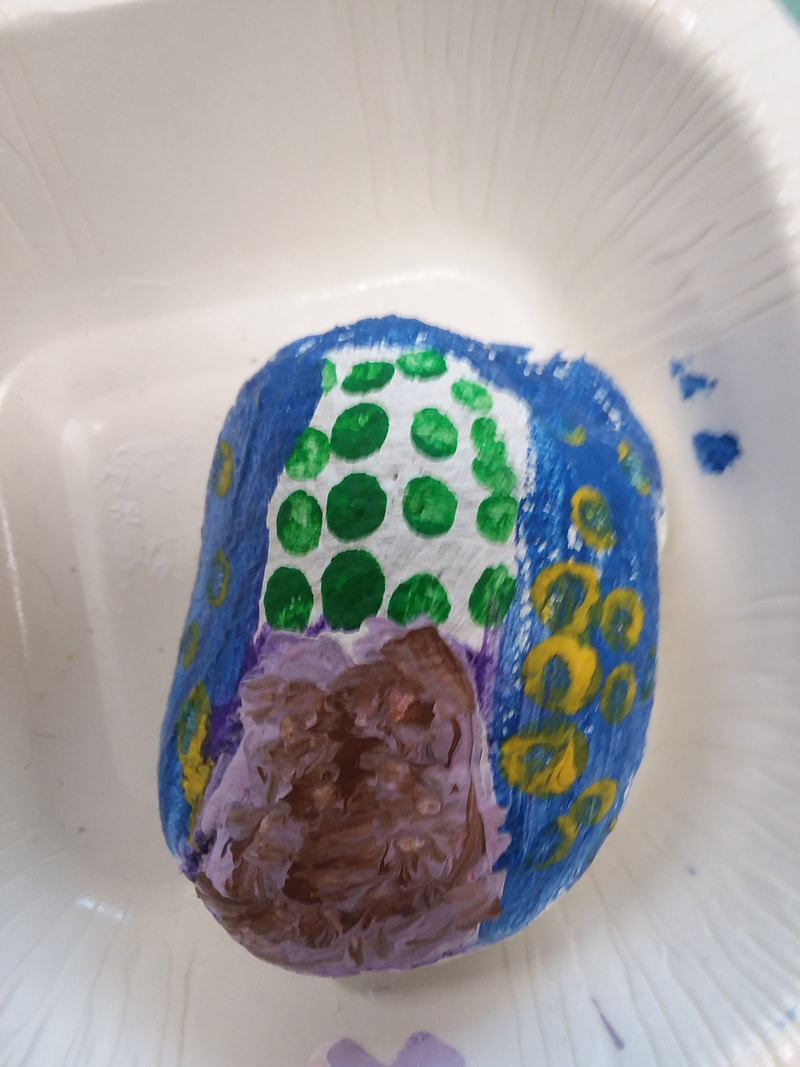
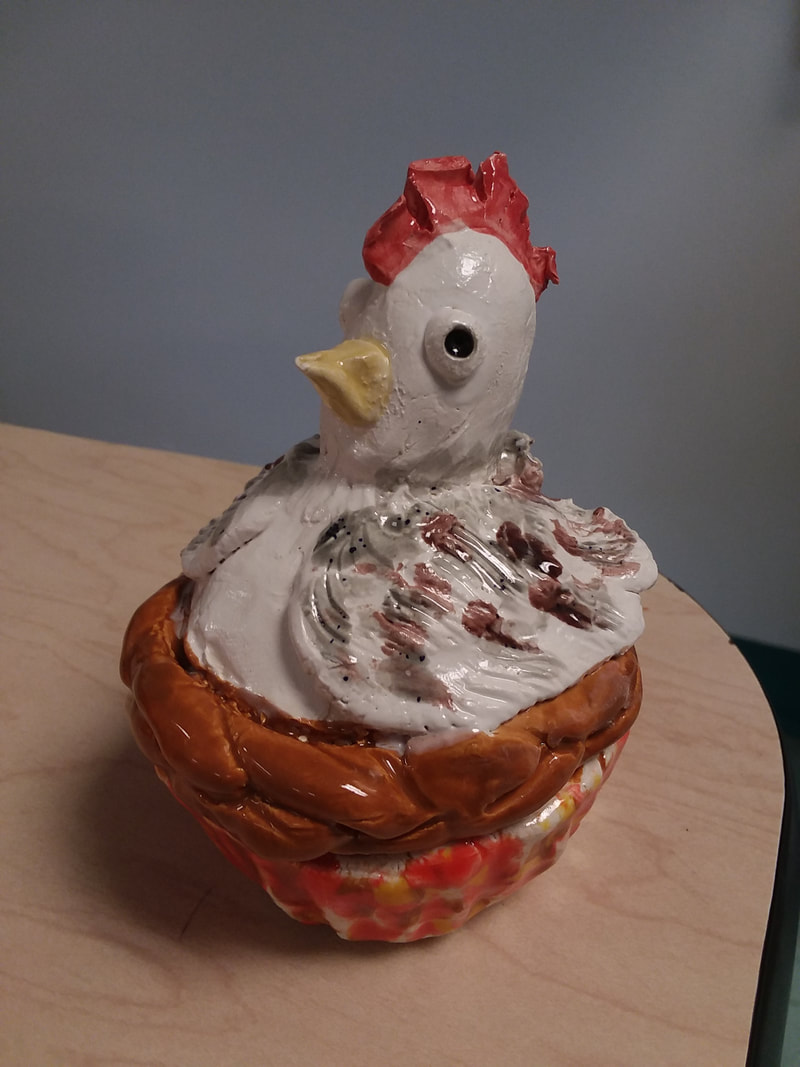
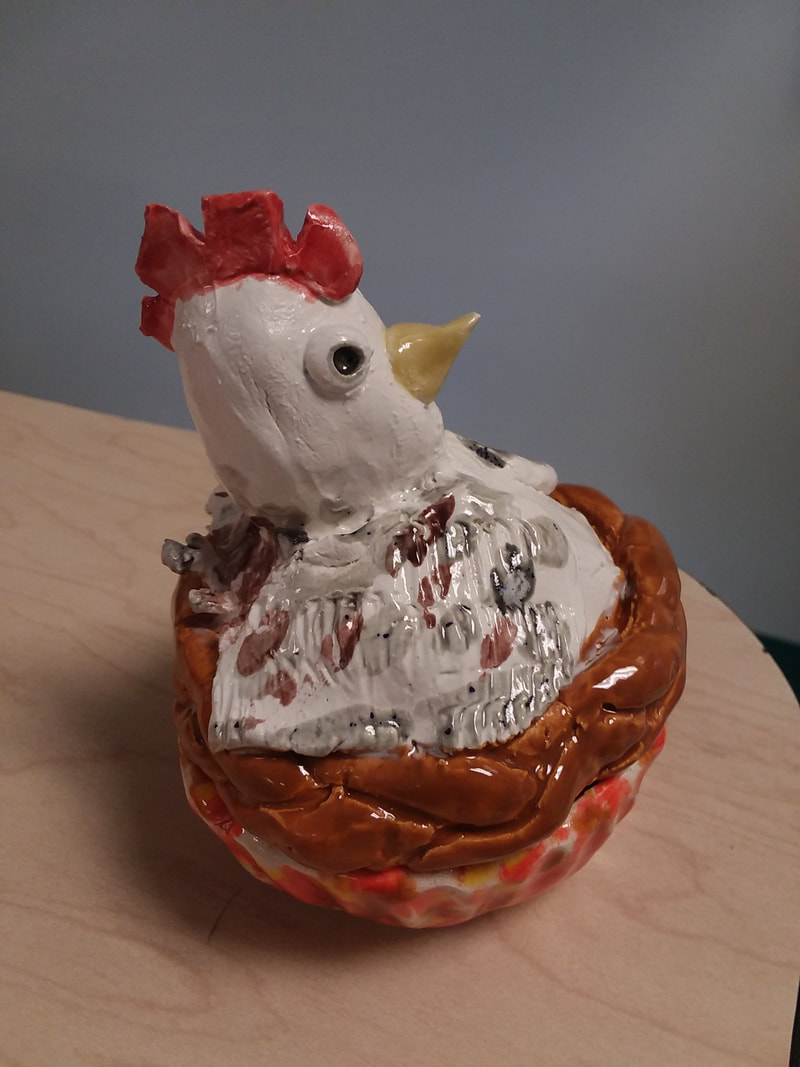
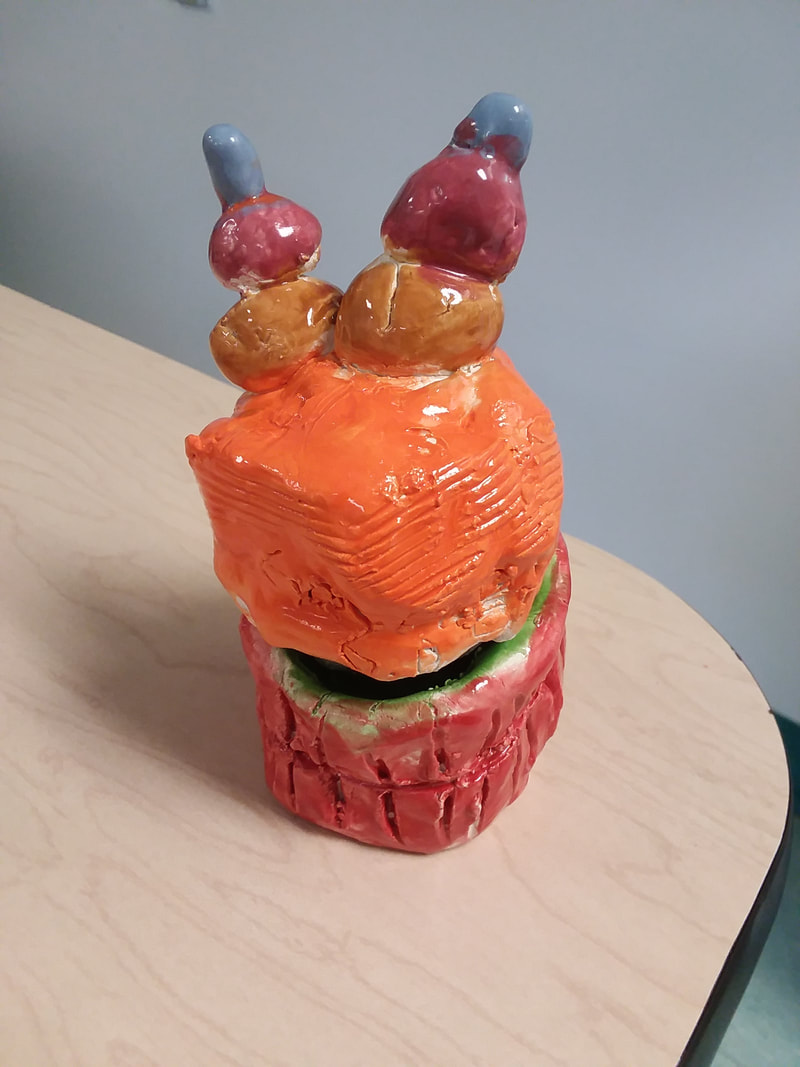
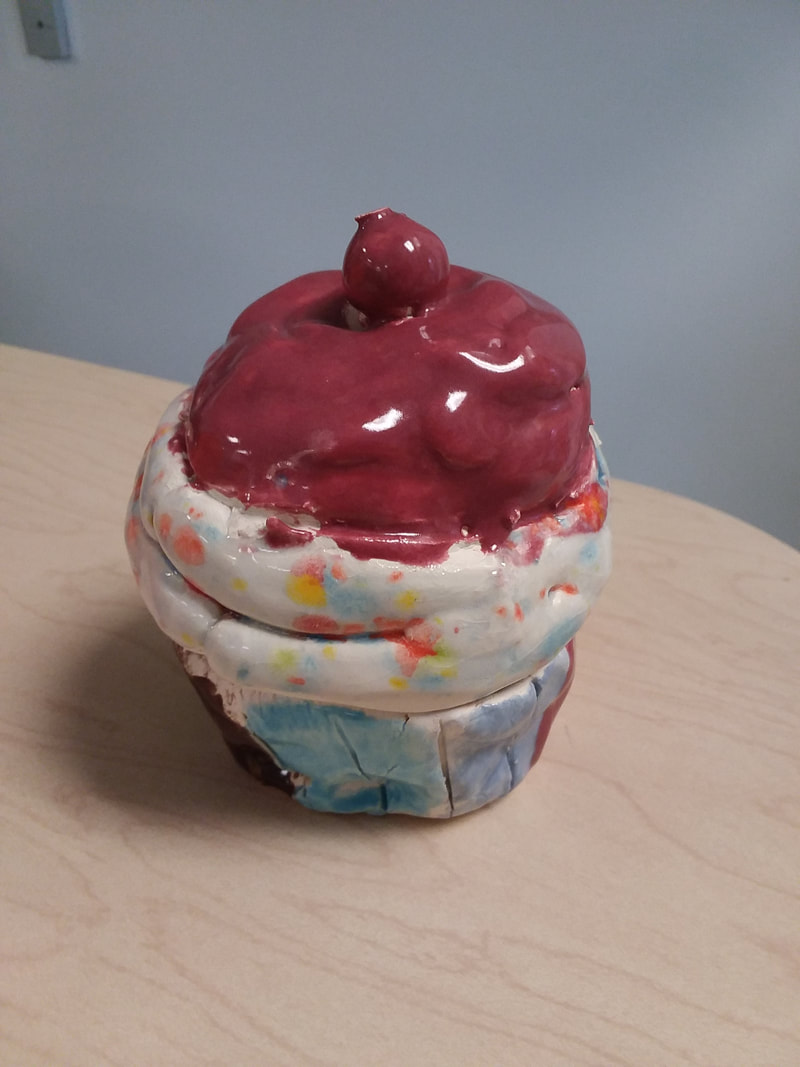
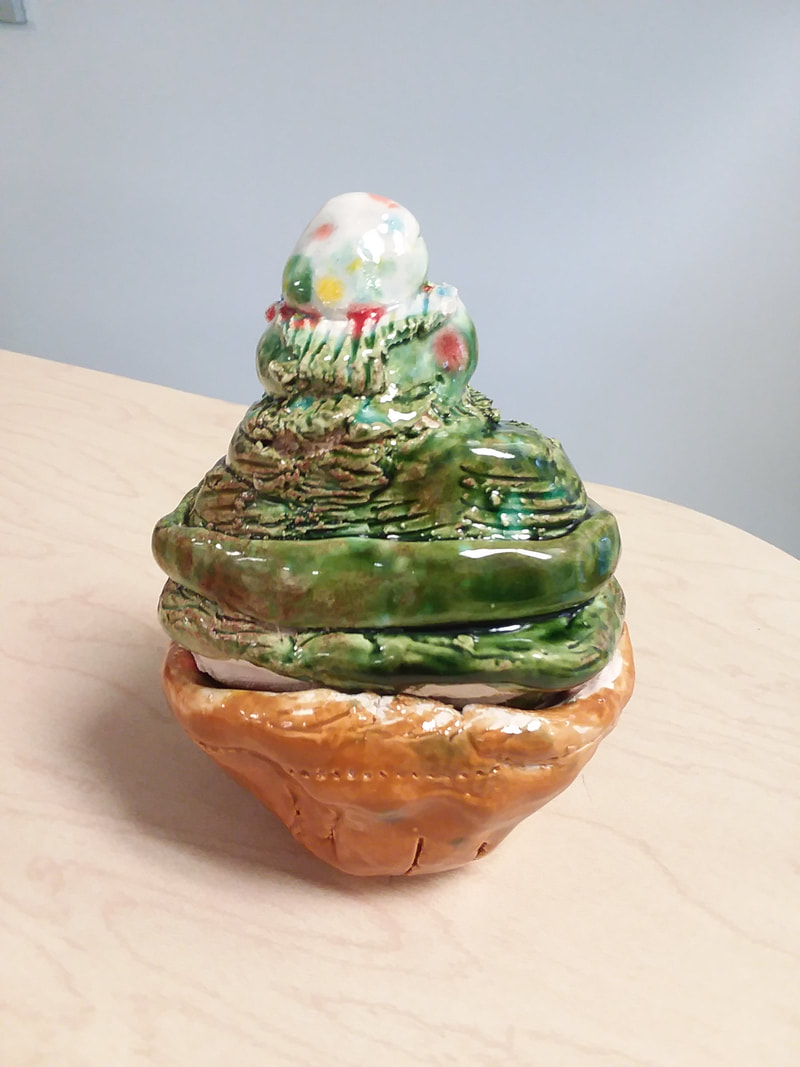
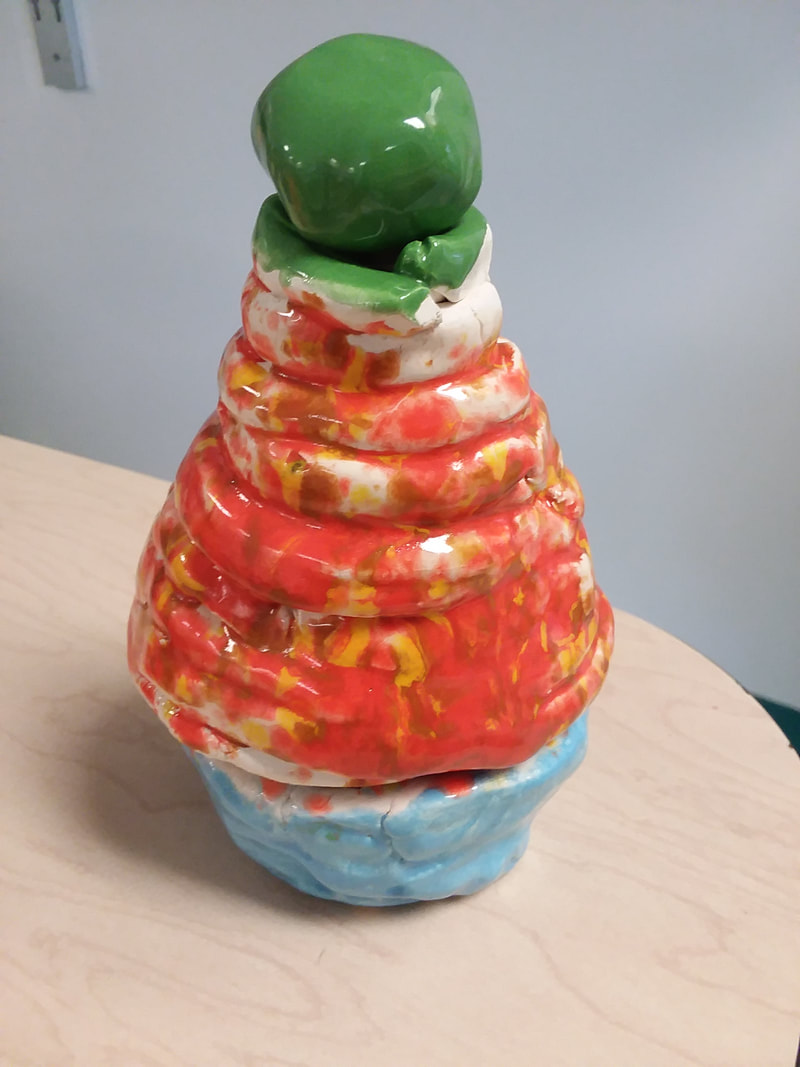
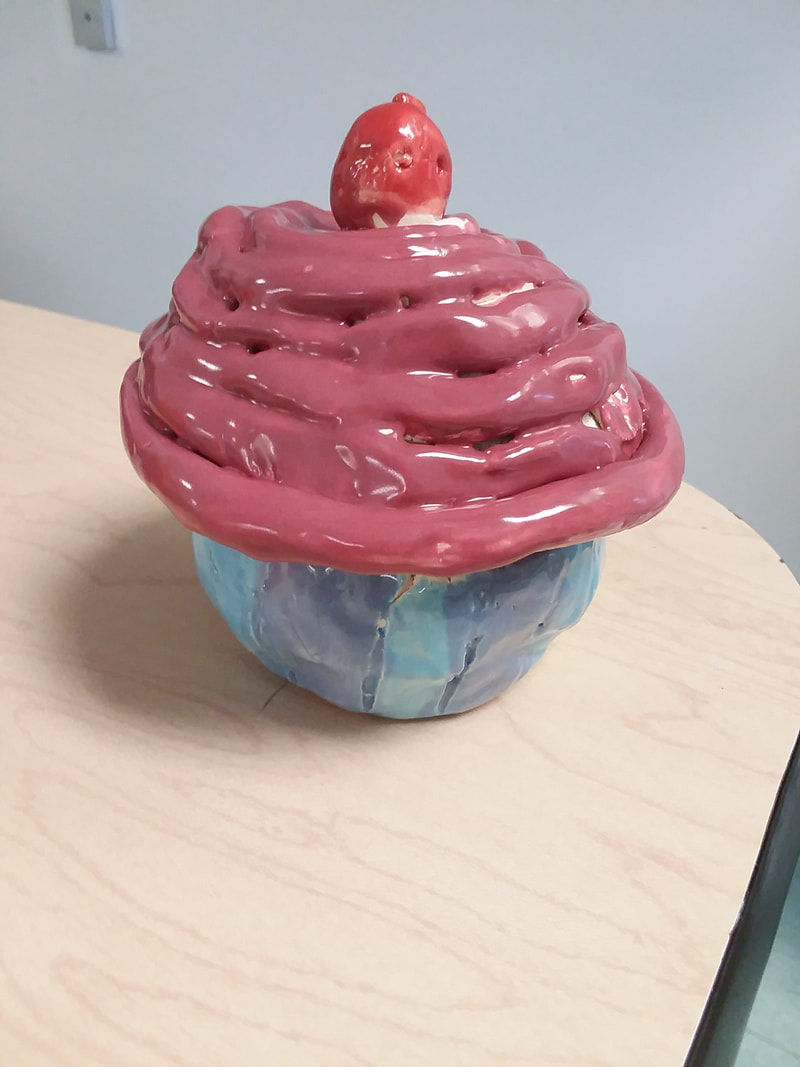
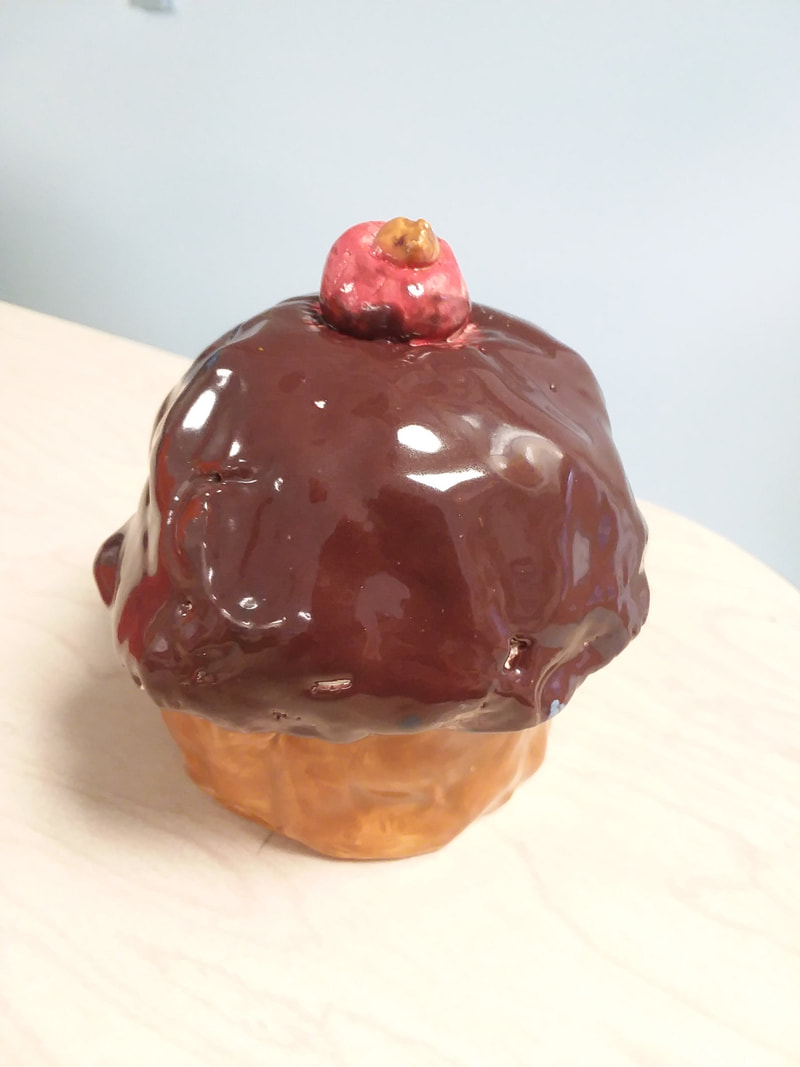
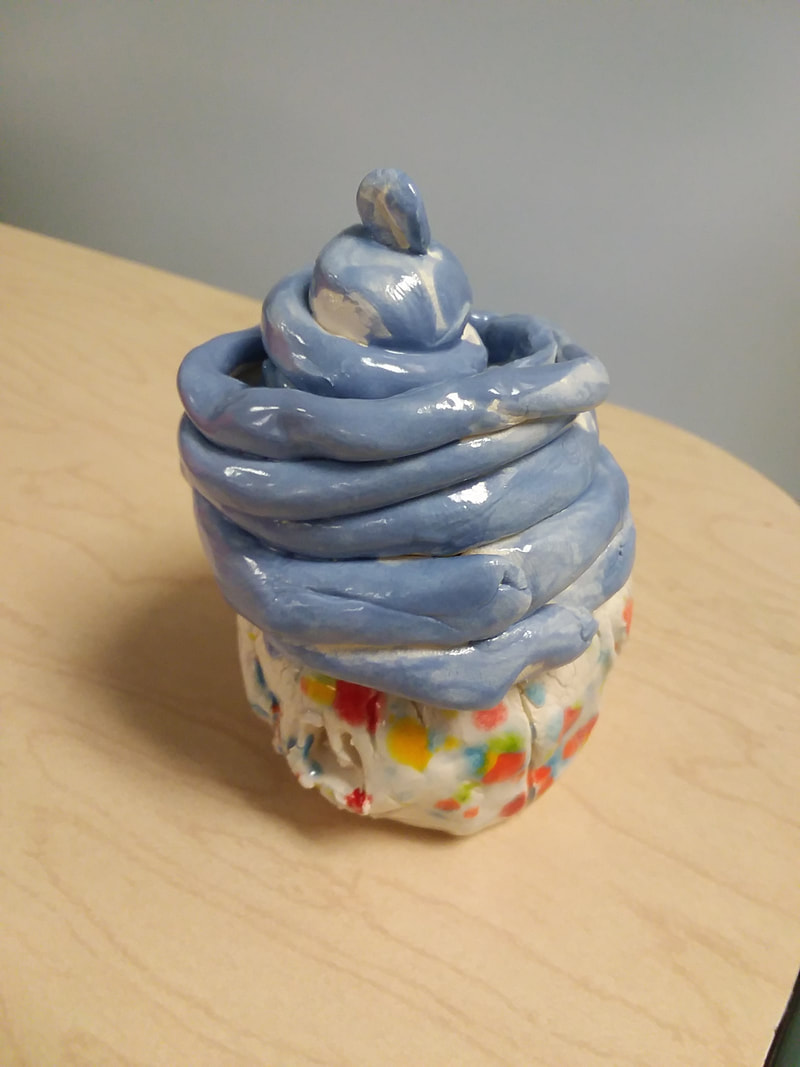
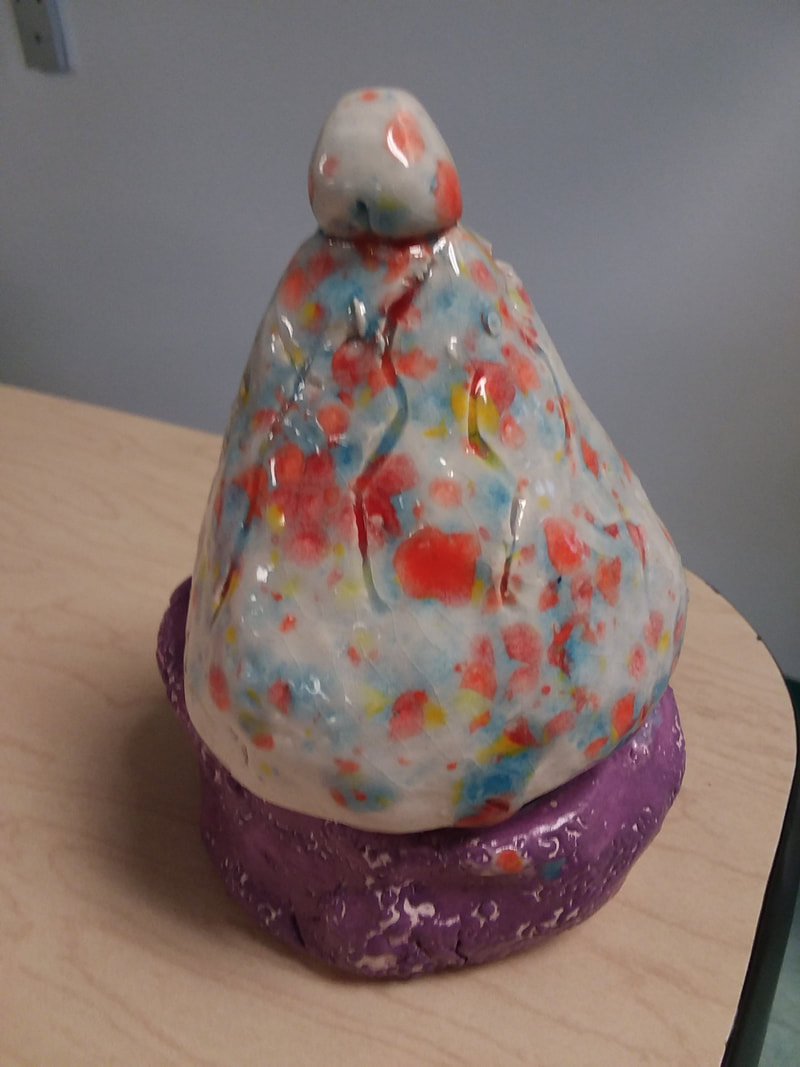
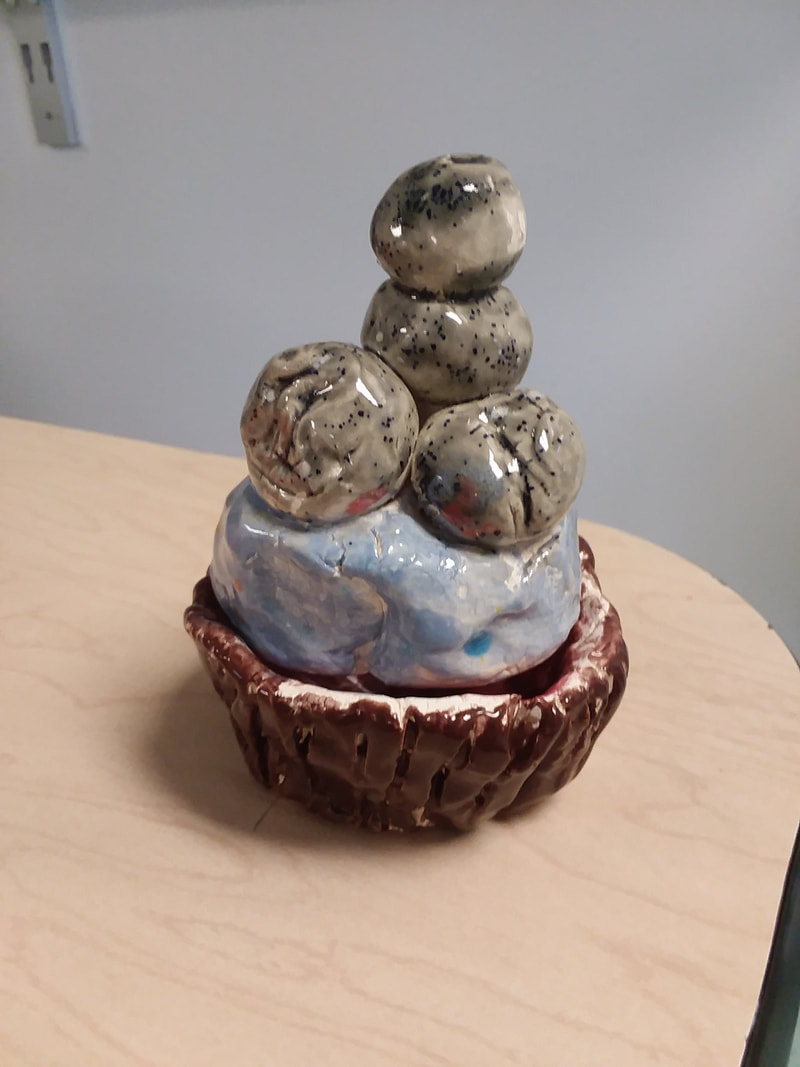
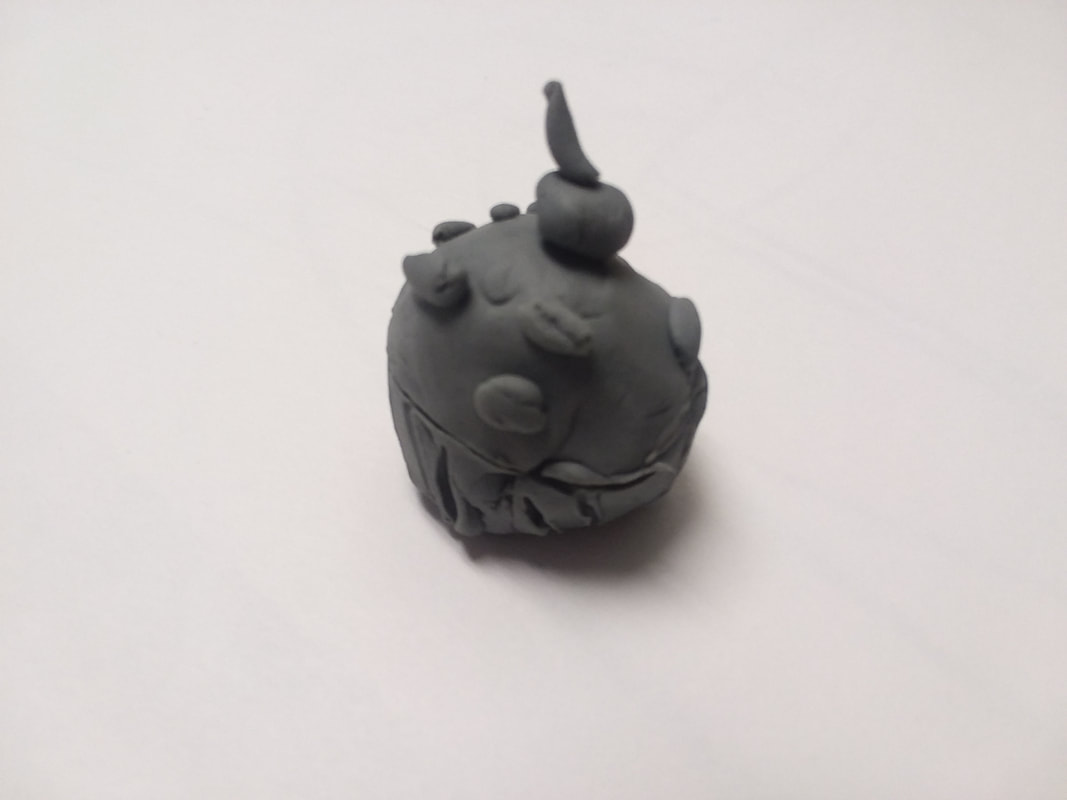
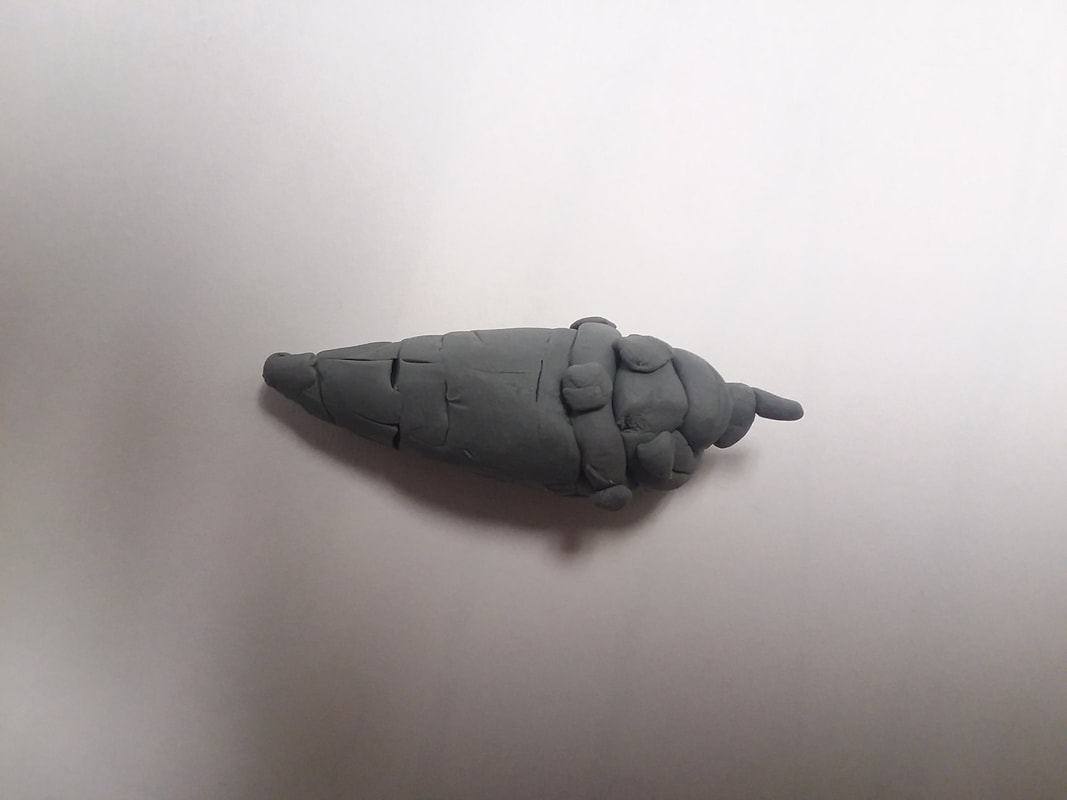
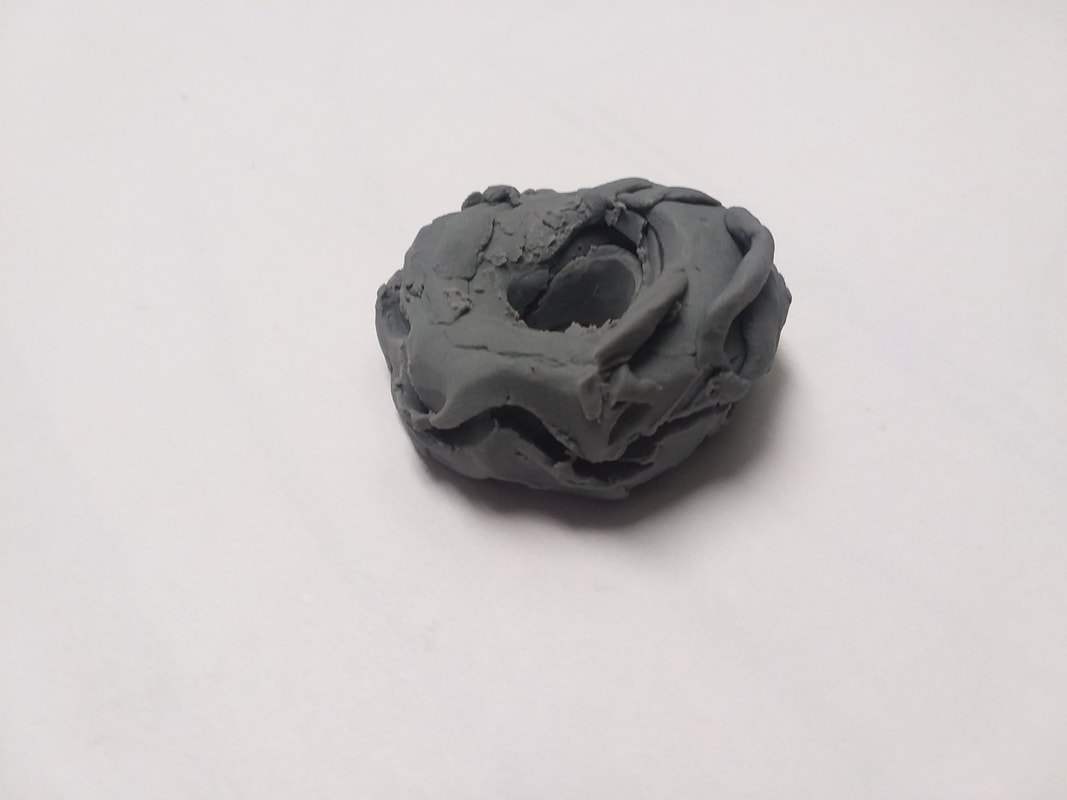
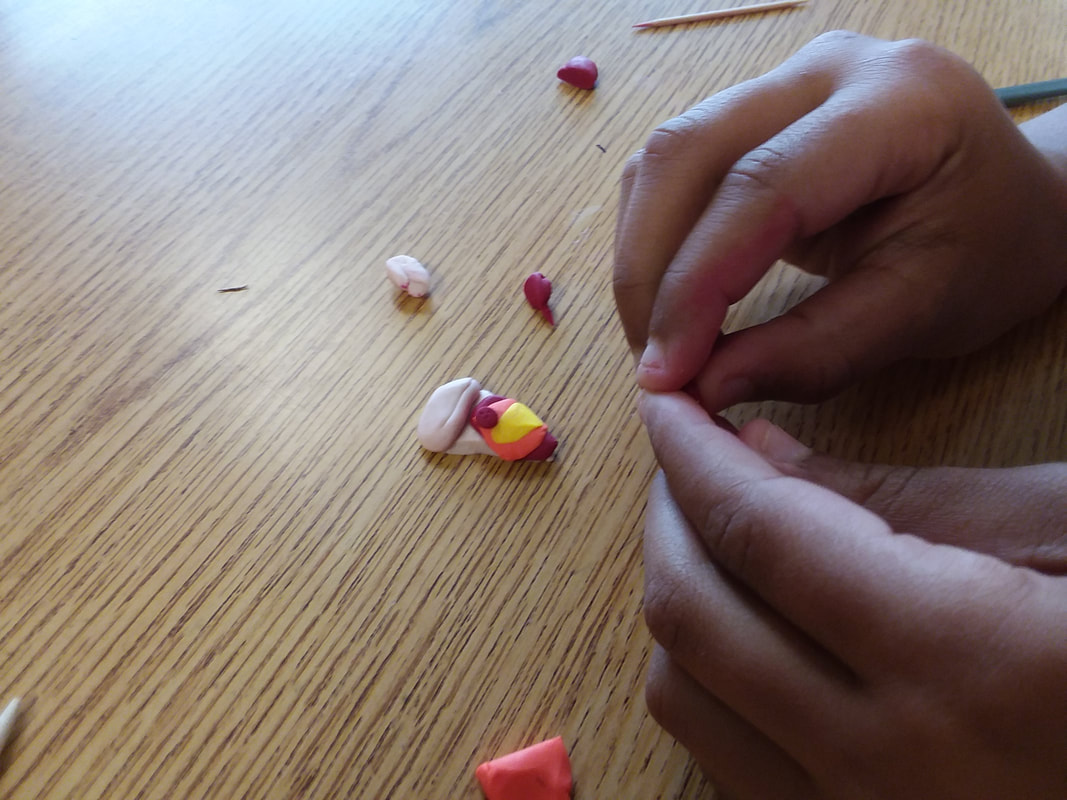
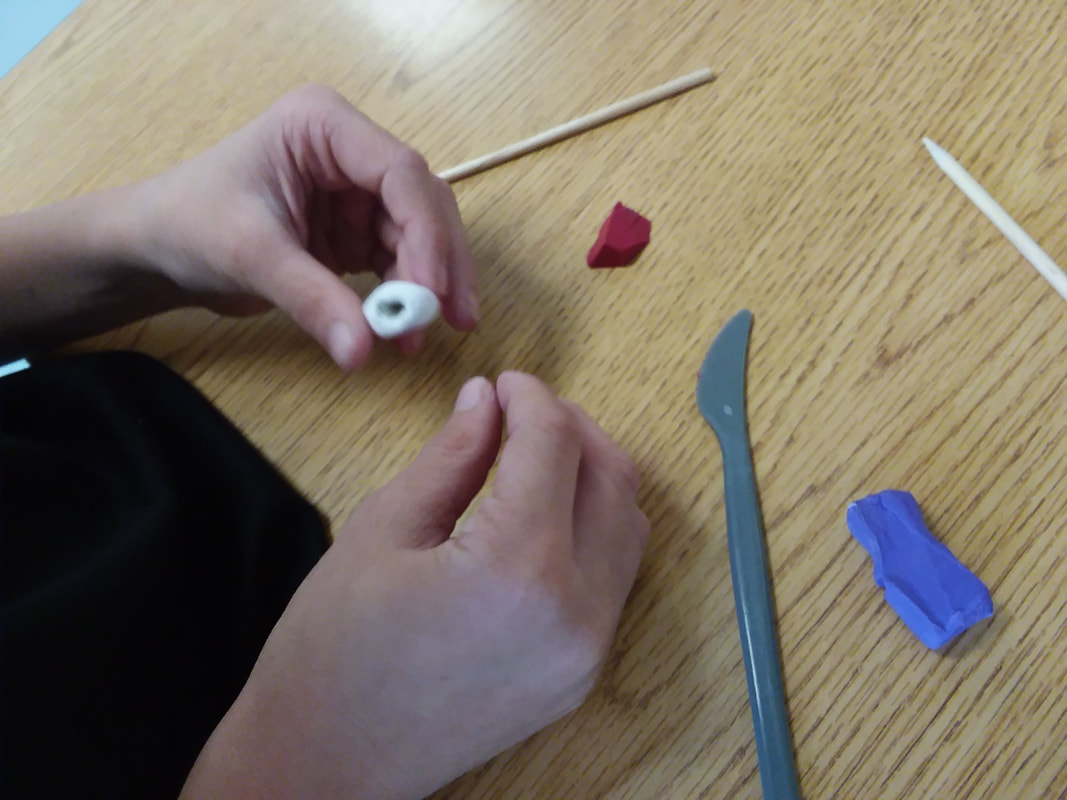
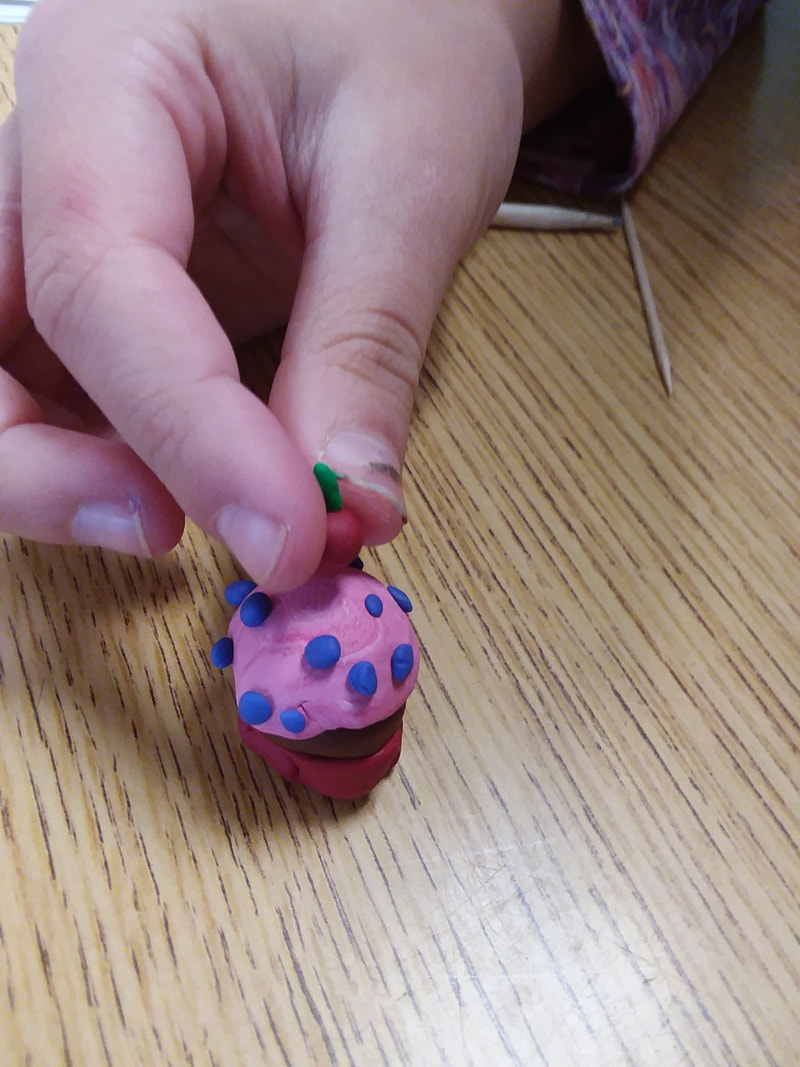
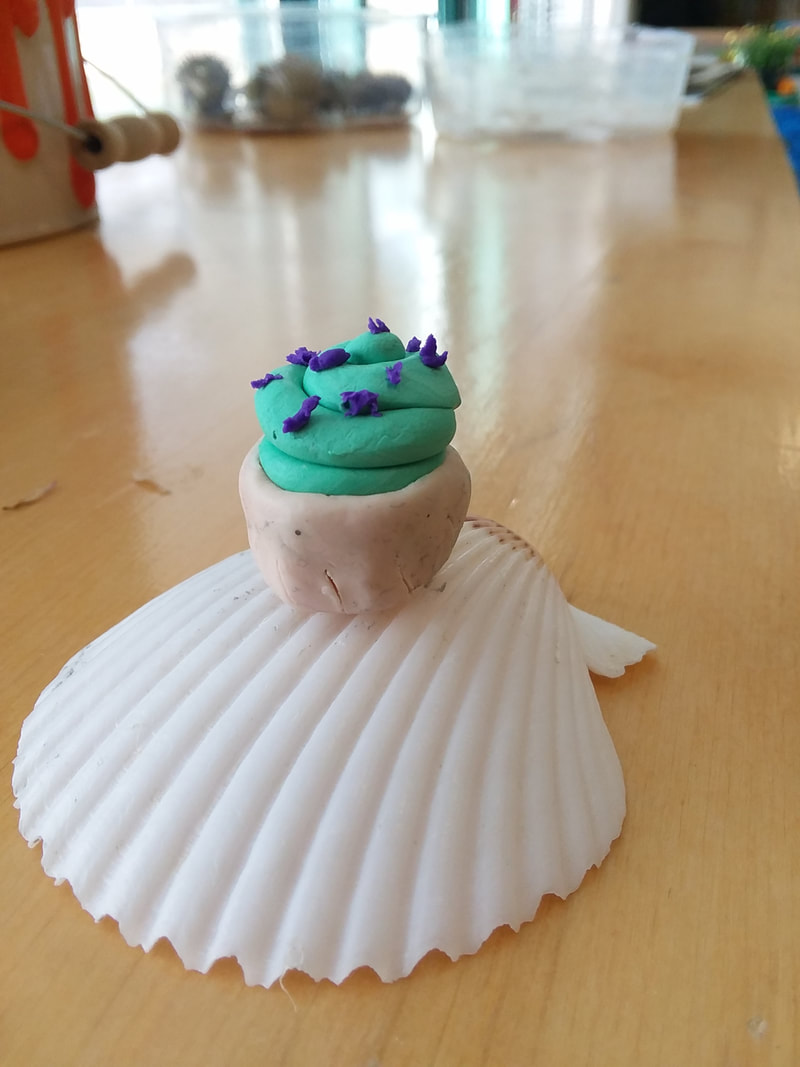
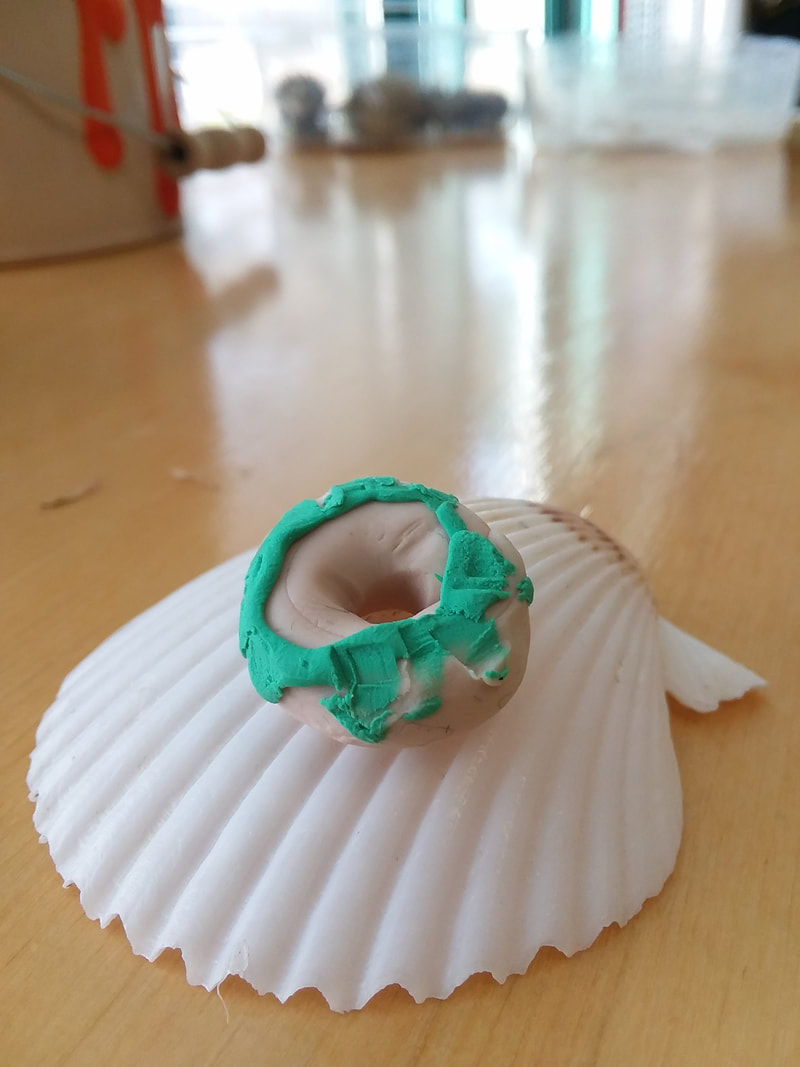
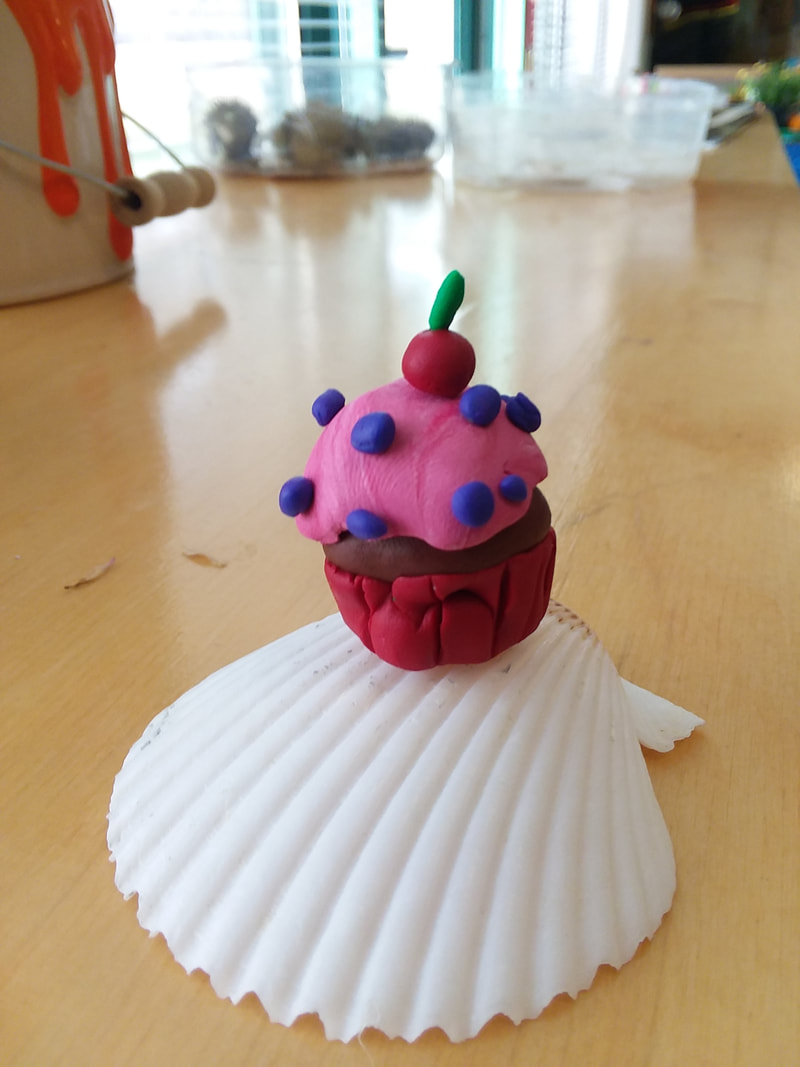
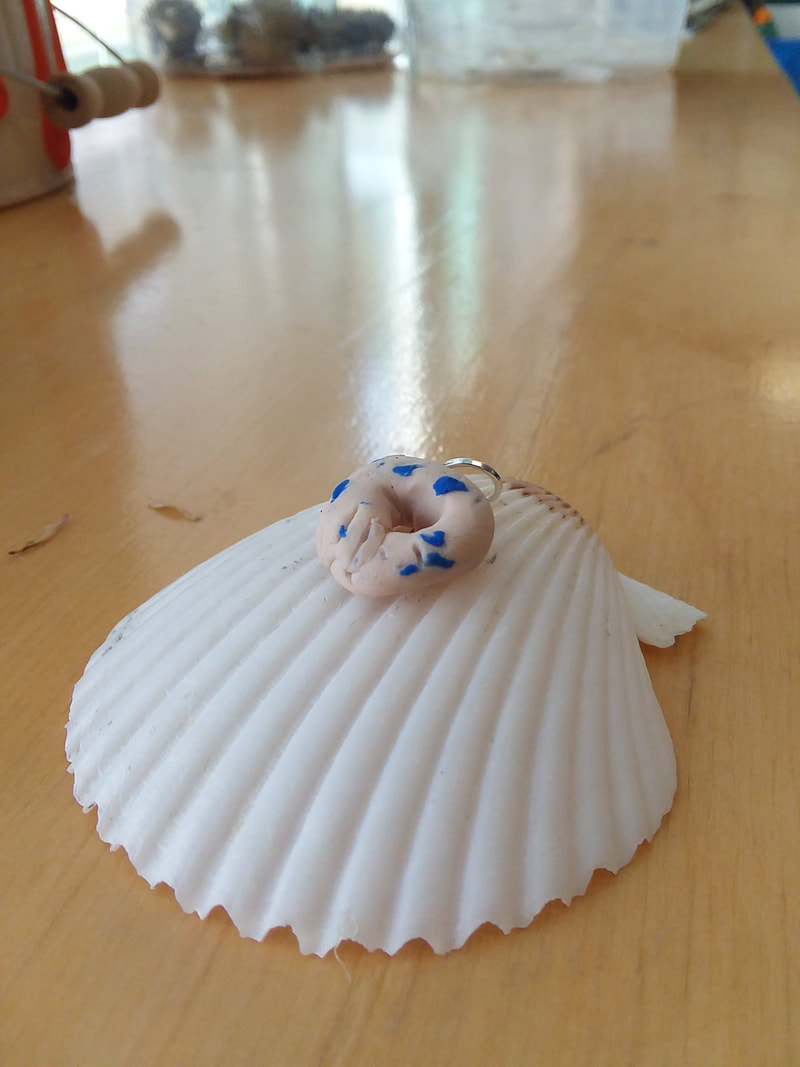
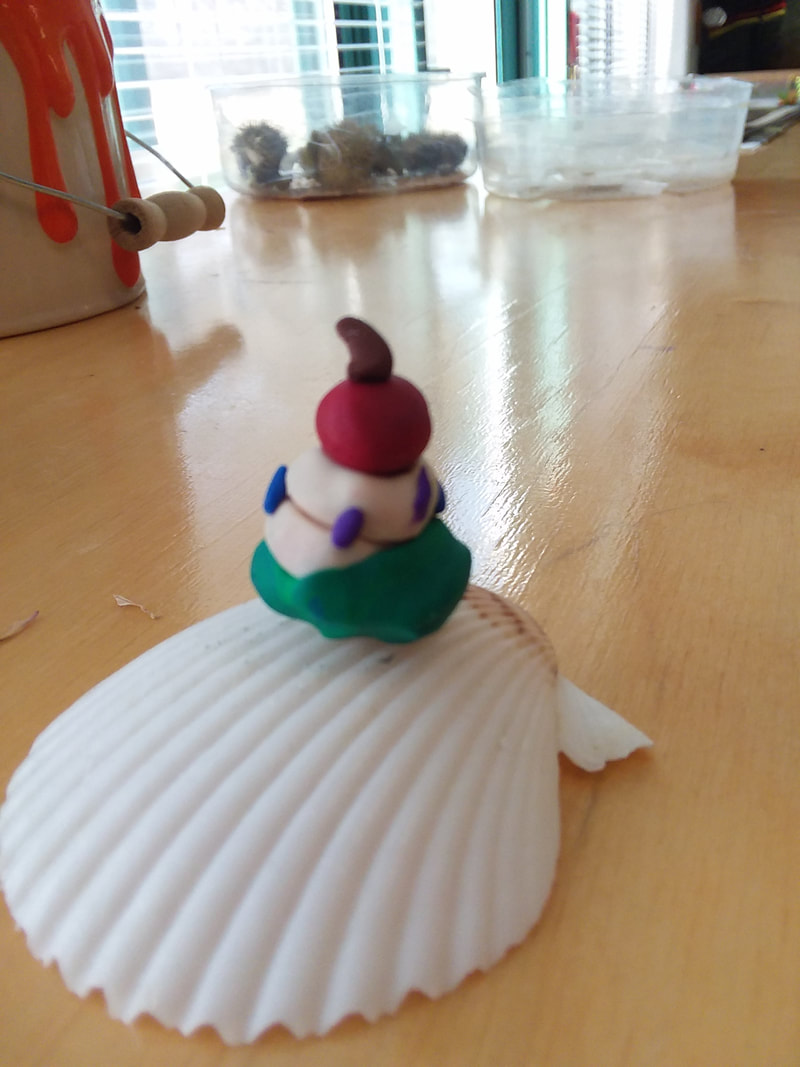
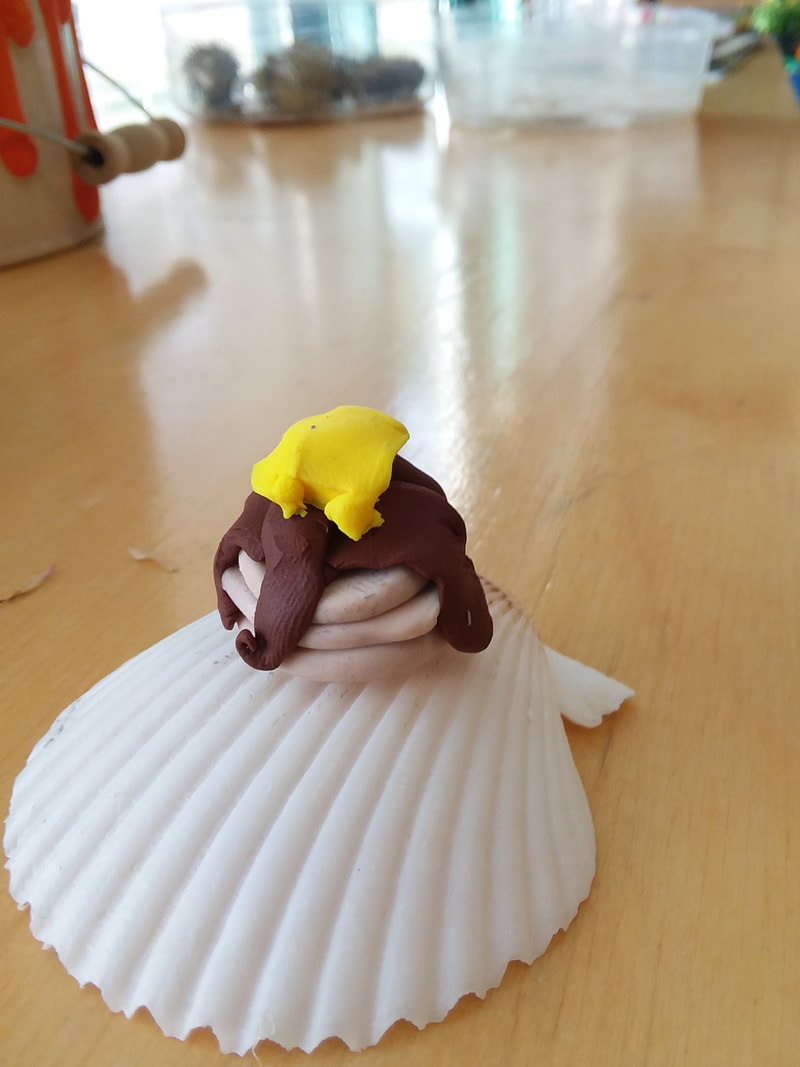
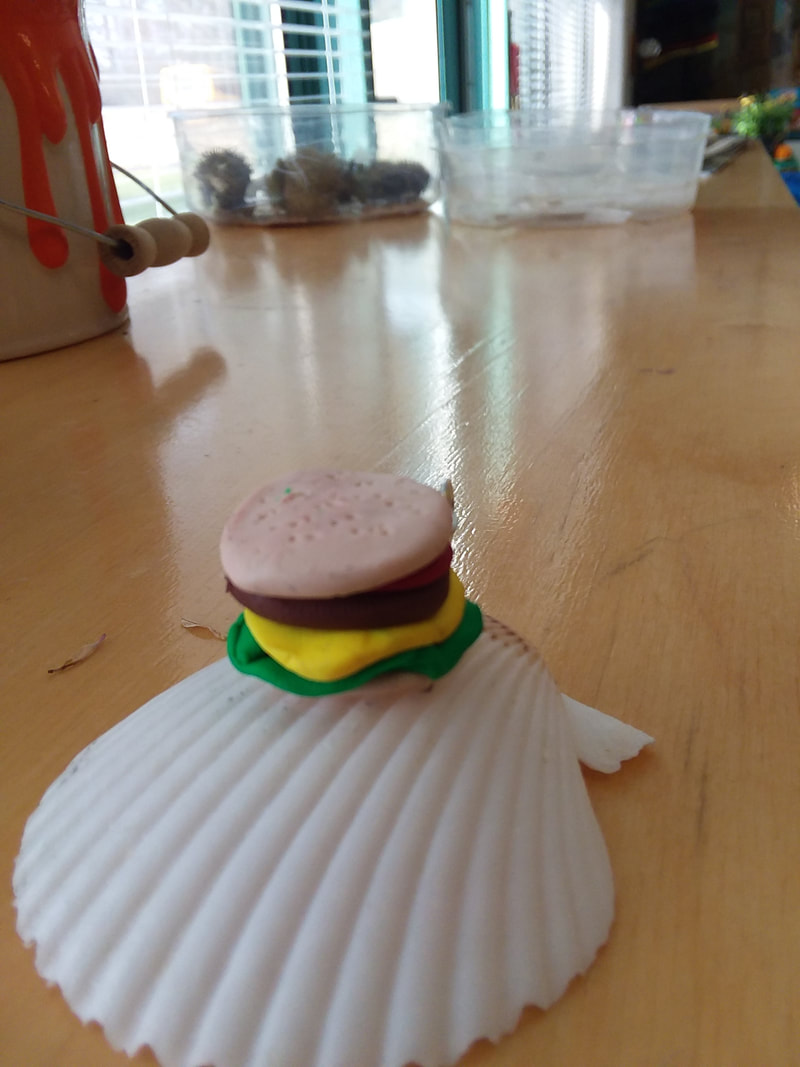
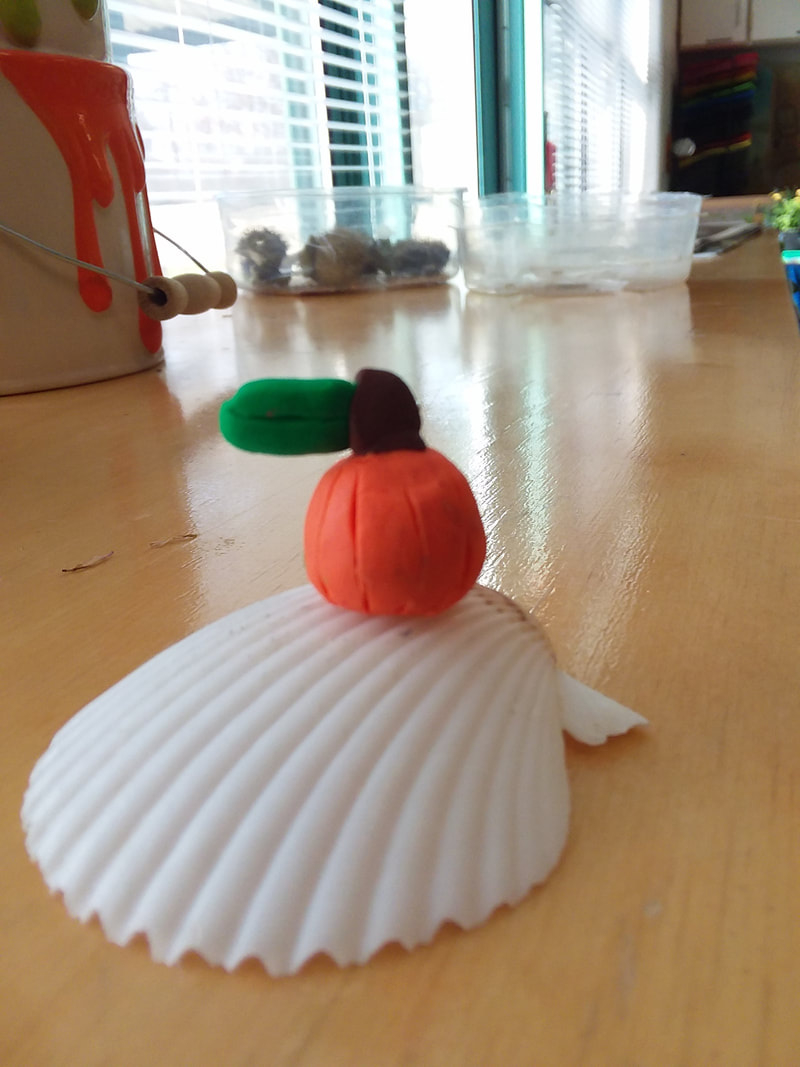
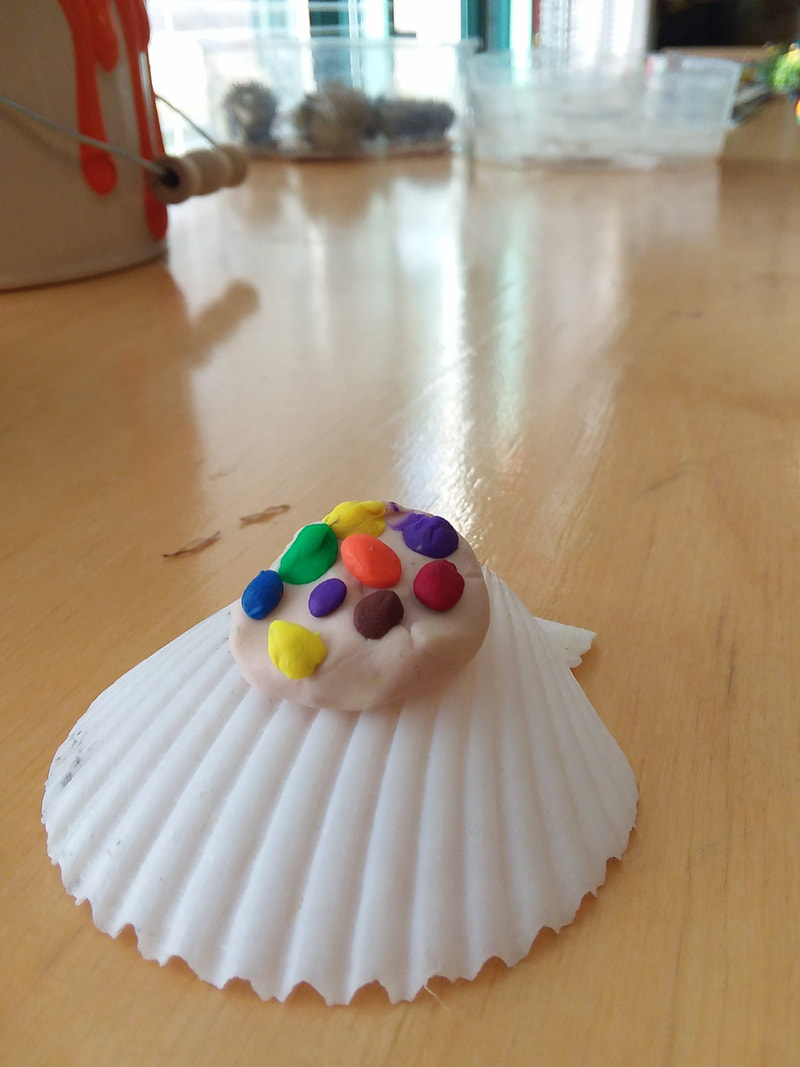
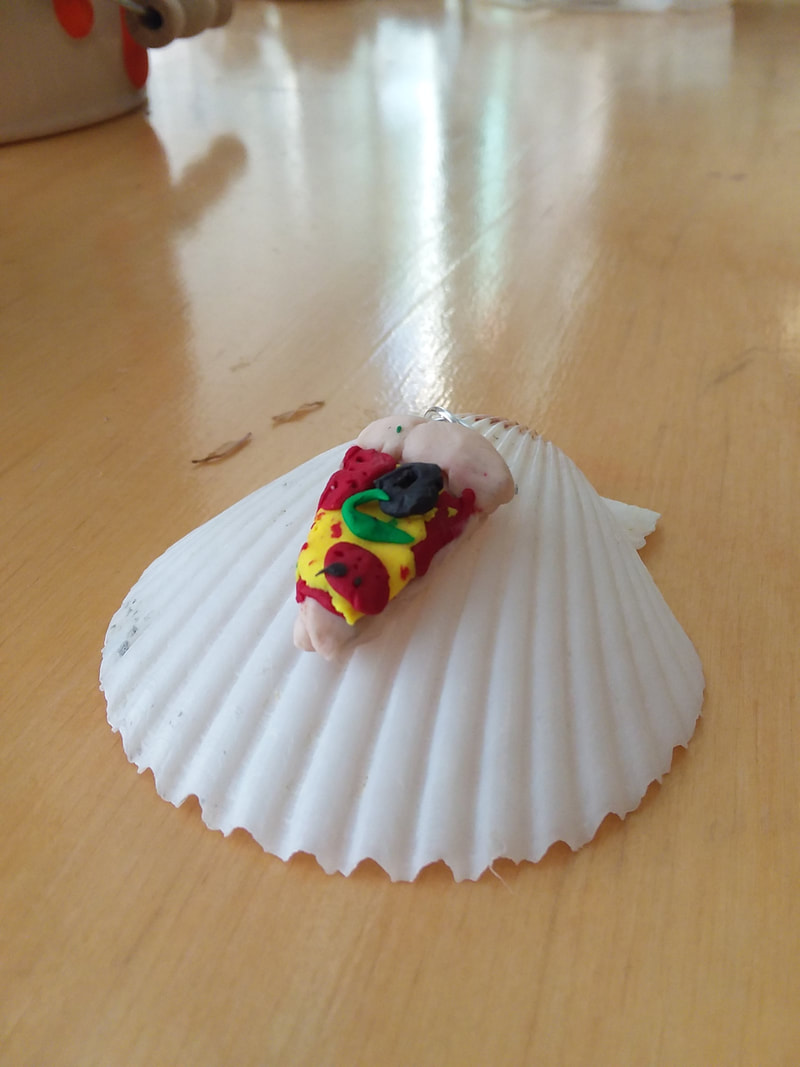
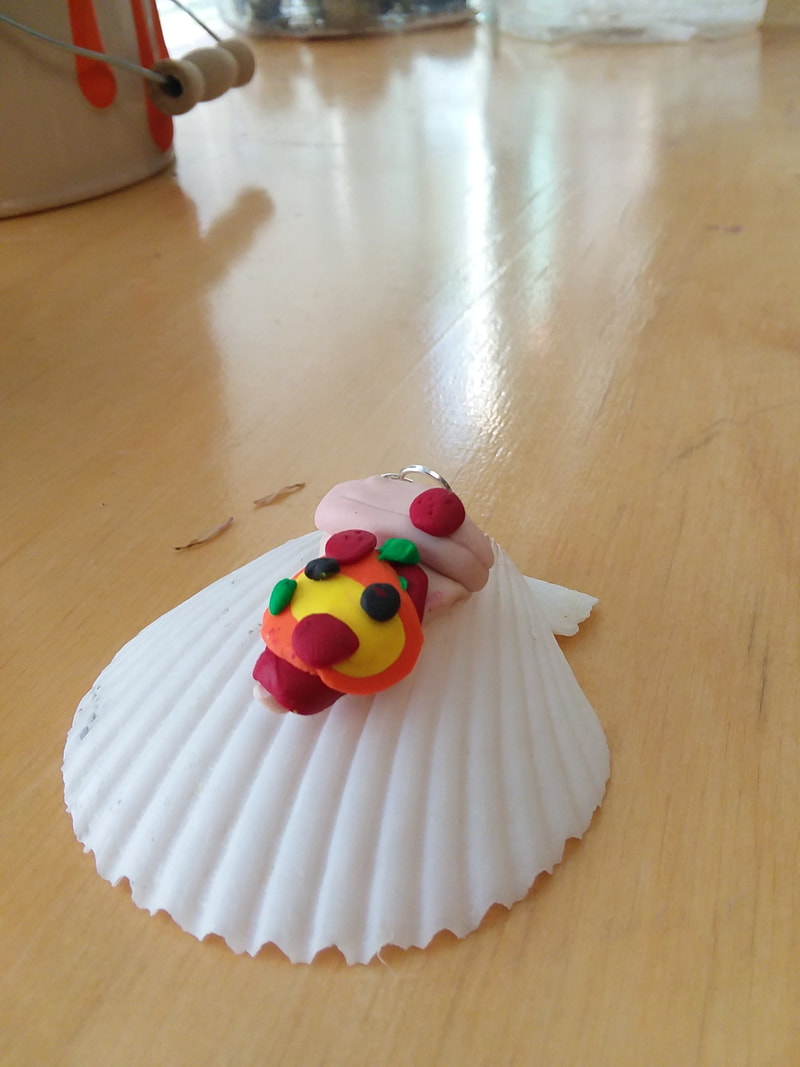
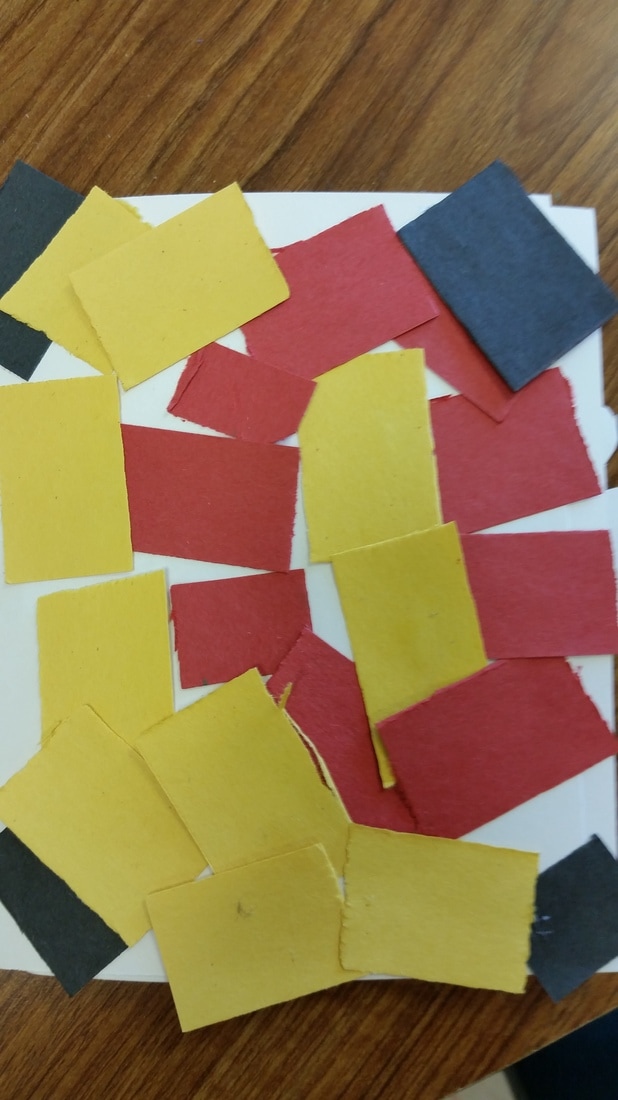
Unit Overview: Students collected rocks in order to create a painted rock design using acrylic paint. I know, painted rocks. So cliché. However, there is an important artistic principle here: Shape is important. Seems simple, right? If only. I had students pick rocks and then develop their painted rock idea on the shape of their rock. Not all rocks are the same. Therefore, it is important to develop your artistic idea based on the shape, size, and weight of the rock. This is different from our typical standpoint of develop the idea first, then collect items. For our rocks, I had students paint a primer - a base coat of either black or white - on first. The reason why is to ensure more vivid colors for the final. Students who wanted lighter paints used a white primer - students who wanted dark paints used a black primer. Side note: Don't return painted rocks back to the environment. The paint can chip and flake and cause harm to wildlife. If you choose to do painted rocks, keep them in your own garden or flower pots. Or make yourself a rock garden. If you ever dispose of these rocks, put them in the trash. It is the only way to ensure that wildlife isn't harmed. Unit Overview: Students learned how to create a closed ceramic vessel using clay, clay tools, and pinch pot technique in order to create a personal ceramic cupcake. Fourth grade made ceramic cupcakes. For this project, we reviewed how to make a pinch pot by making both the bottom and lid using a pinch pot form. Next, we studied how to properly "score and slip". I have a special rhyme I use to get students to remember how to score and slip. It goes, "Scratch, scratch, water, attach". For every piece of clay that is used to attach, the score and slip method must be used. Otherwise, the whole project falls into one giant mess. These cupcakes are so cute! Mine is a chicken. I plan on buying little chocolate eggs to put inside the vessel so when you lift the lid, the chicken has left you some eggs. Unit Overview: Students created miniature artworks using Sculpey clay in order to discuss how miniature art is made, who makes miniature art, and why miniature art is important. We all know that cute things often come in small packages. But what about making the cute thing in small packages. Well, that's a bit harder. However, thanks to Cassie Stephens (shout out!), I was inspired to use a DIY project of hers as an art lesson: Miniature Food Charms. It was November. There's a common theme for me in the month of November. Food. So we talked about miniature art and food. I showed them incredible miniature artists like Tanaka Tatsuya. Holy burritos. He is an amazing artist. We began our miniature food art adventure by practicing creating small forms using modeling clay. The students didn't get to keep the modeling clay pieces. However, it was good practice. And we evaluated the struggles, challenges, and achievements or working small. Finally, we were ready for Sculpey. The kids loved it! Usually, my kiddos hate it when I get snapshots of their hands (nobody wants to be the art hand model). But during this lesson, they loved it! For reference, I photographed these charms on a seashell. All the charms photographed are the same size or smaller than a quarter. Yeah . . . impressive for fourth grade.
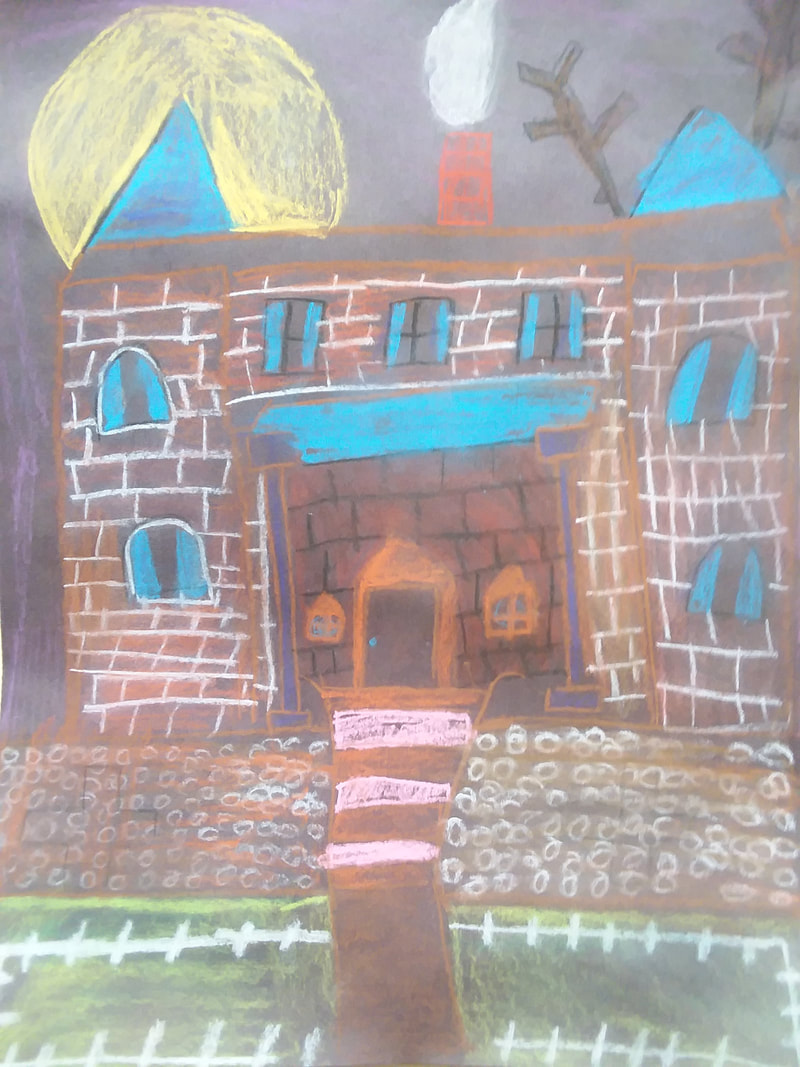
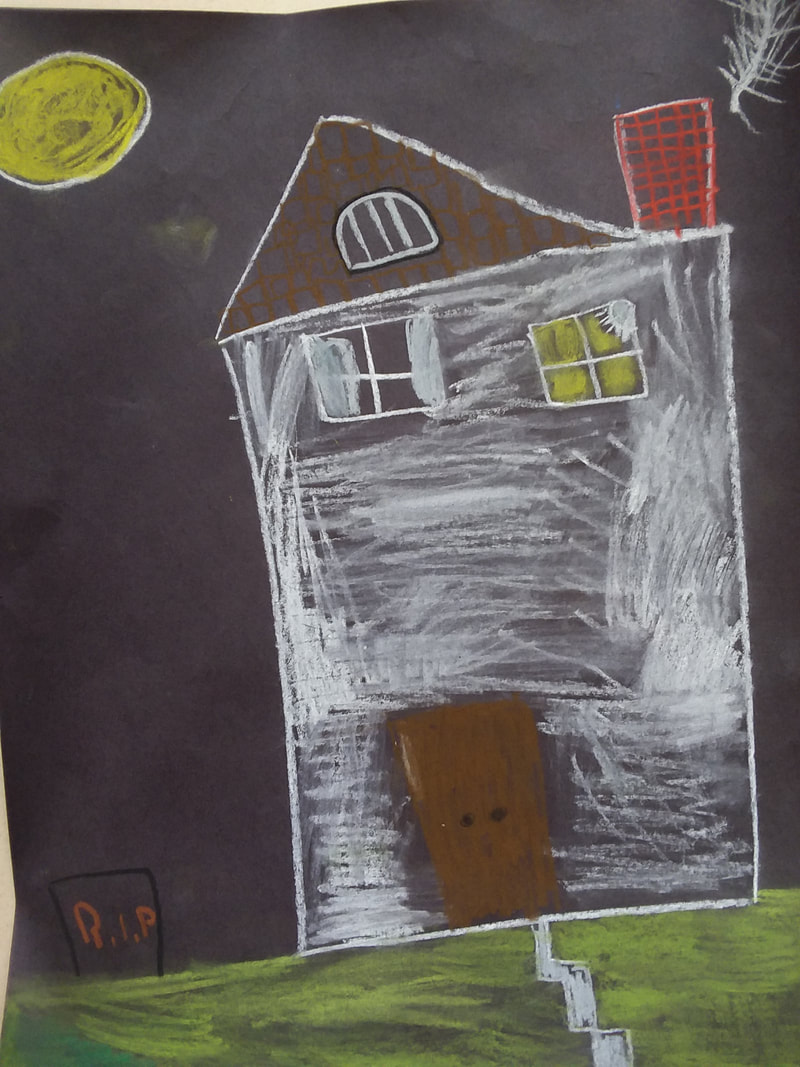
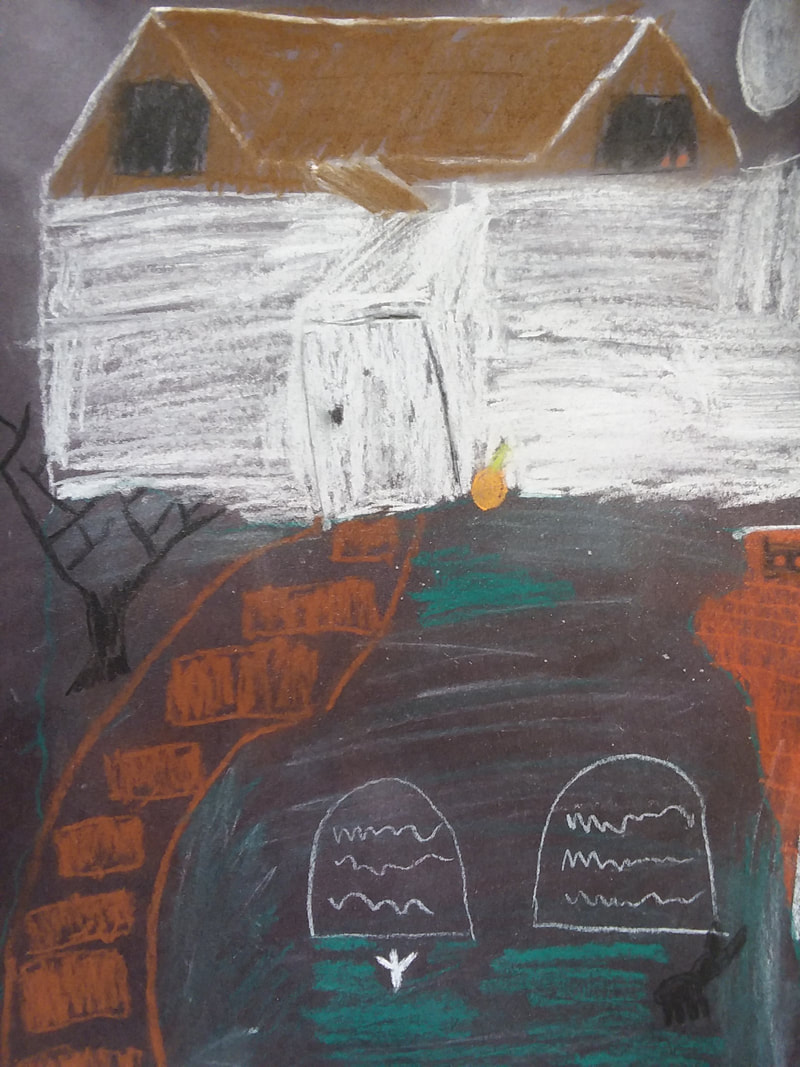
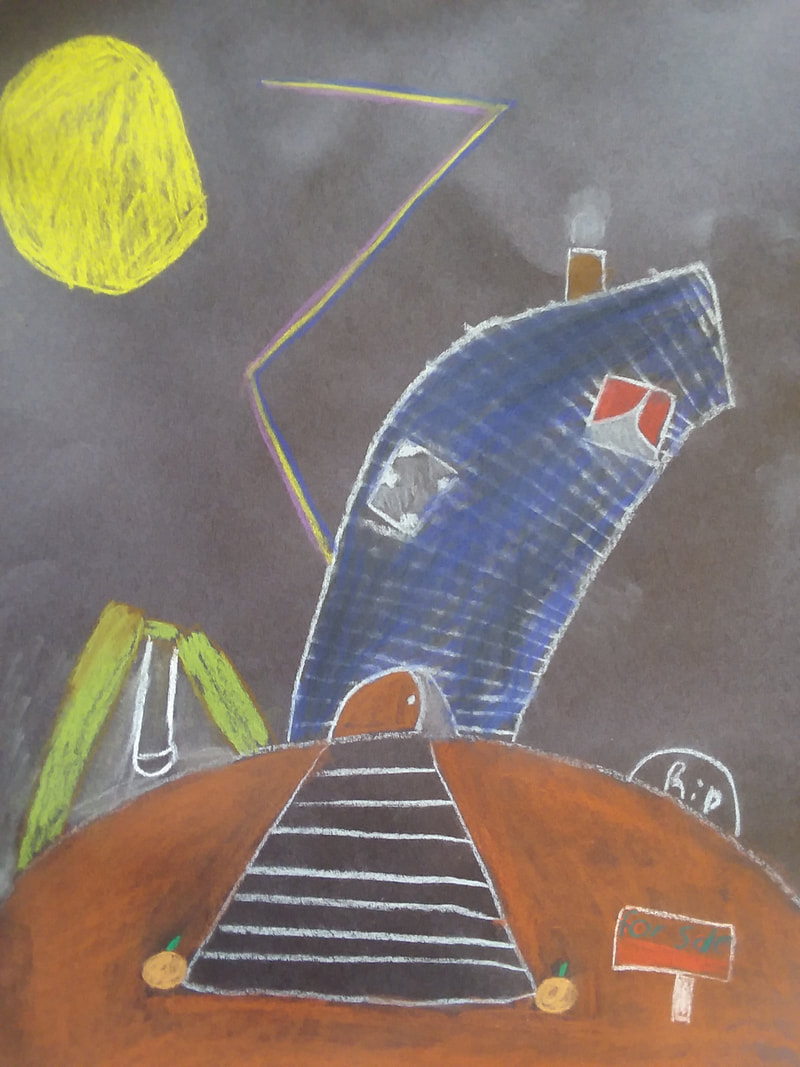
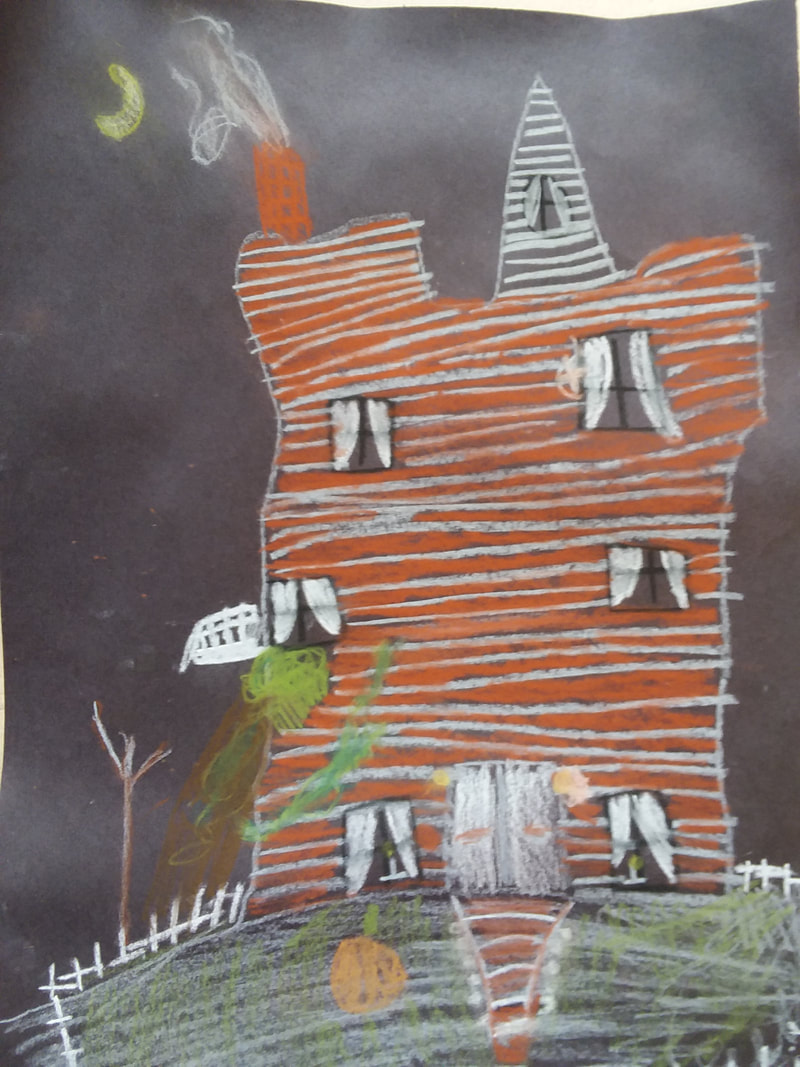
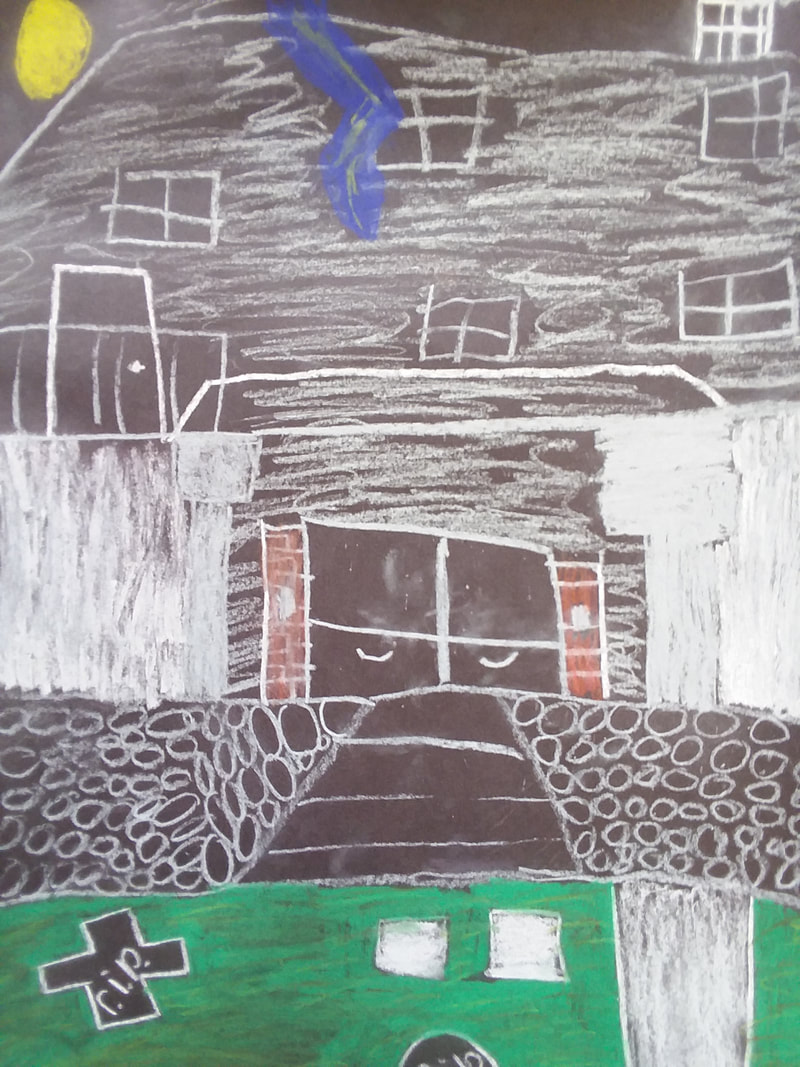
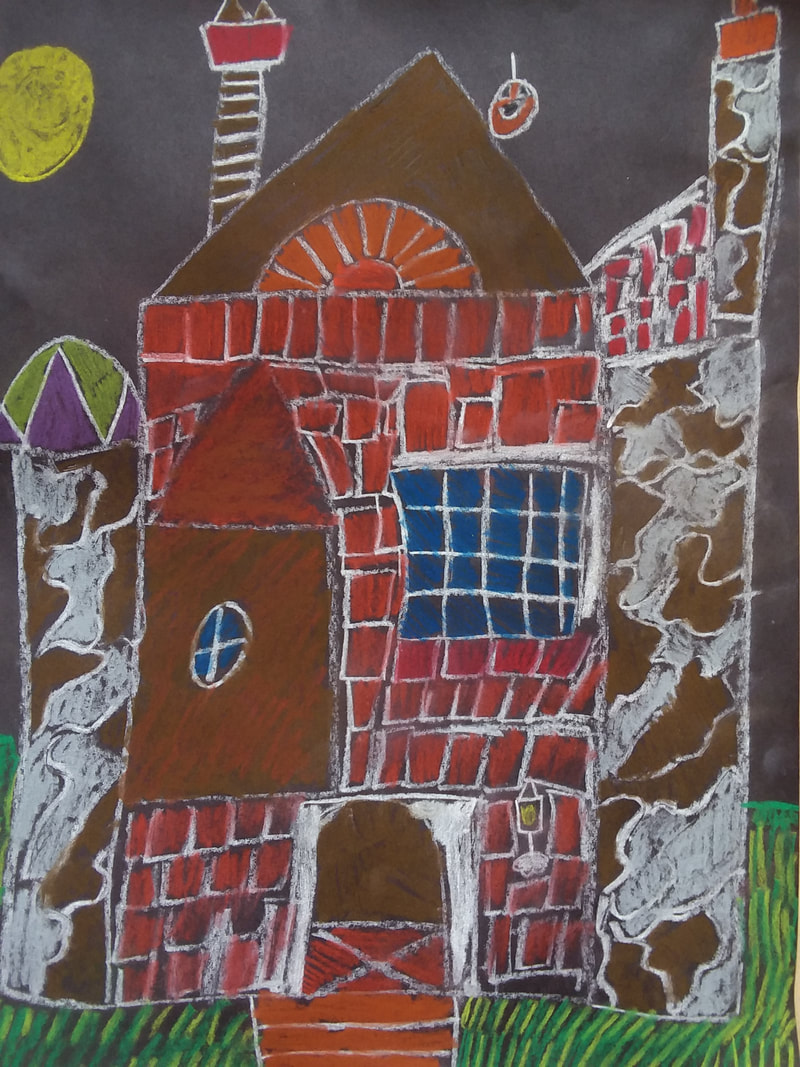
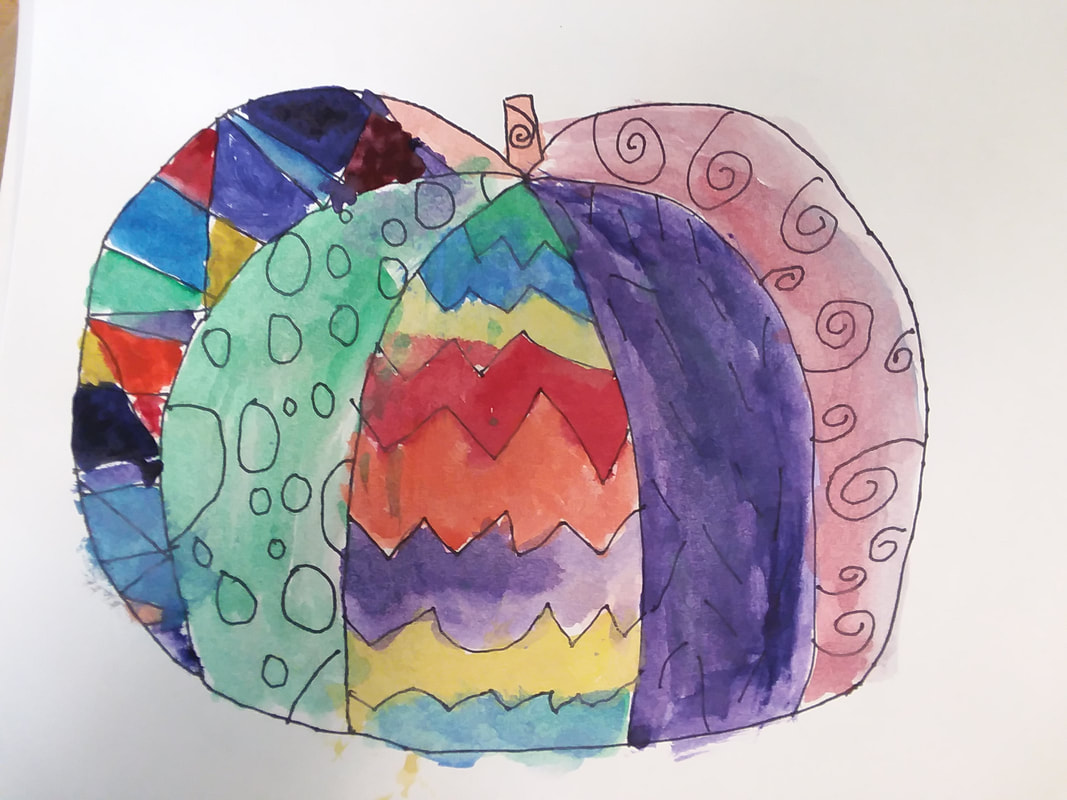
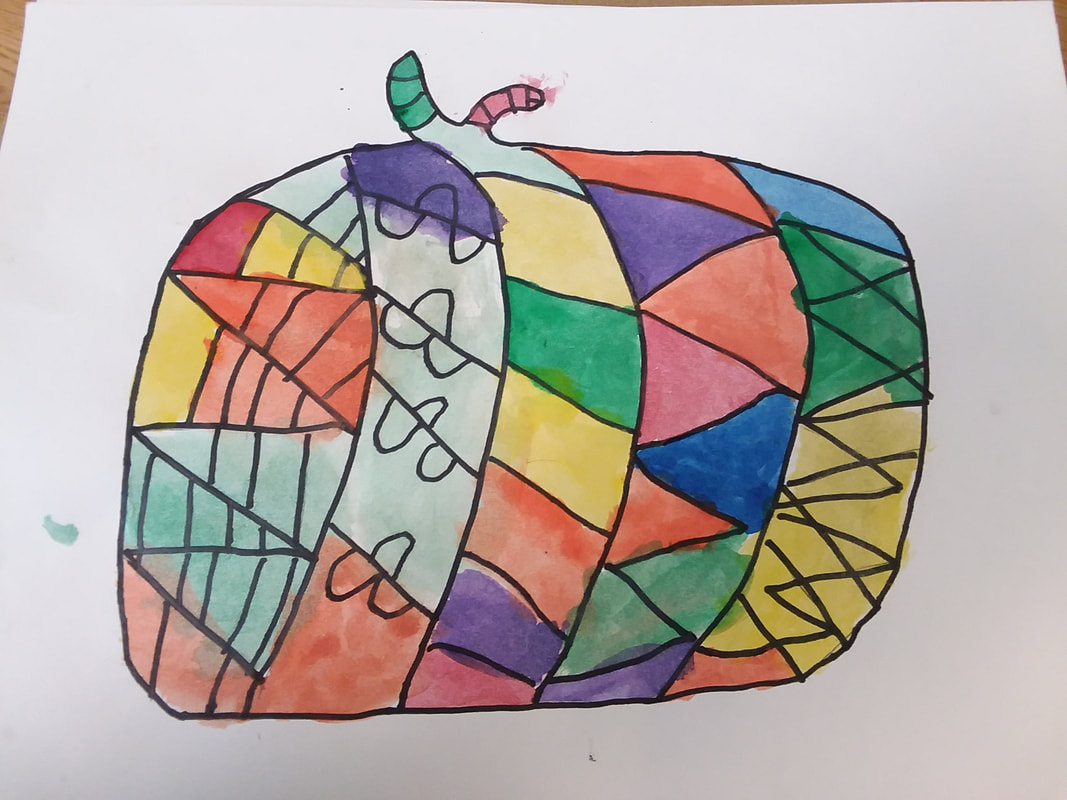
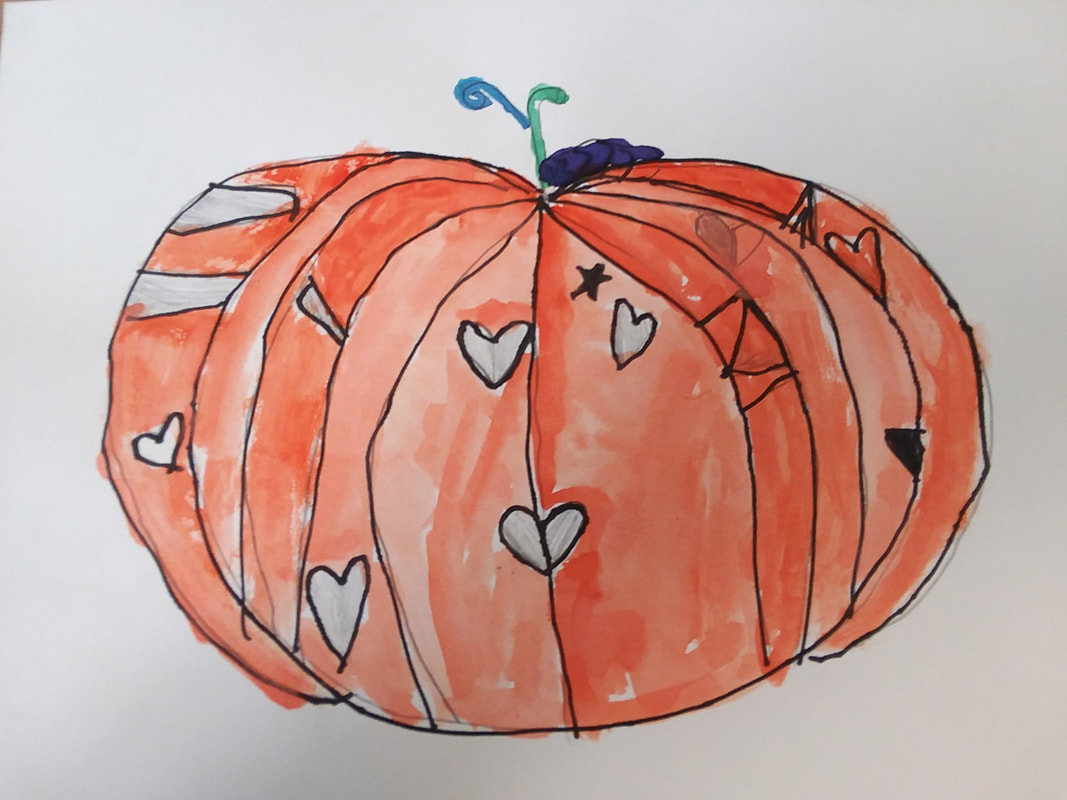
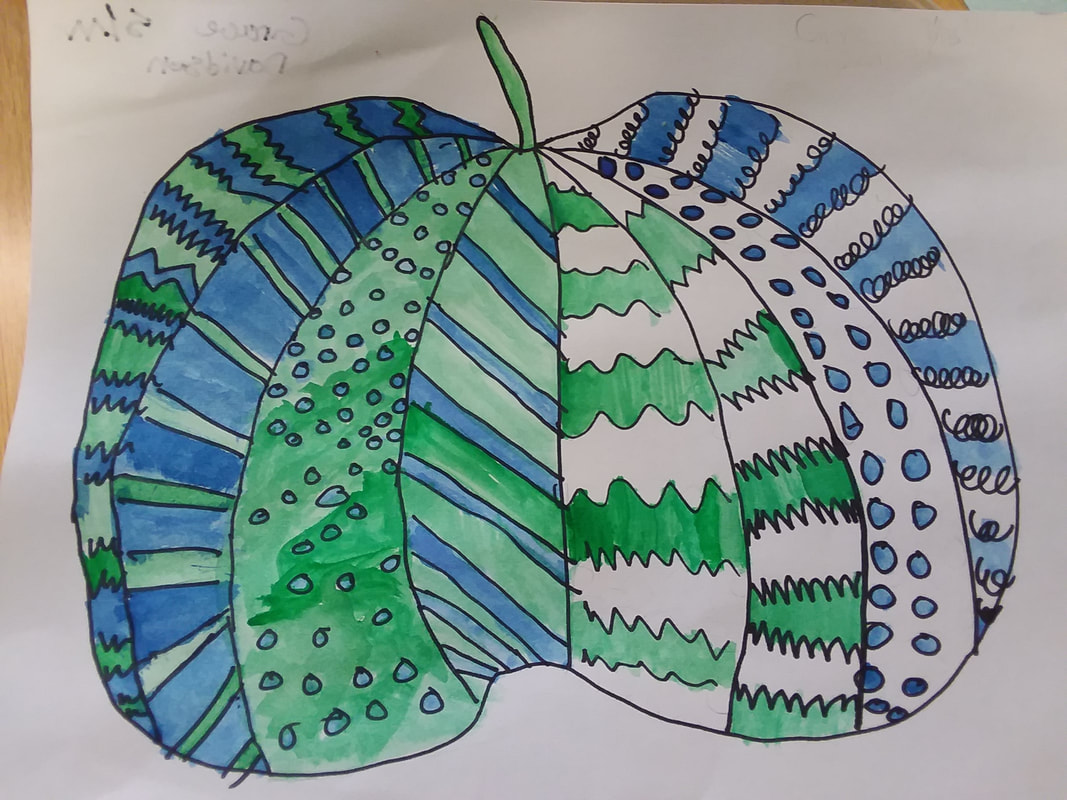
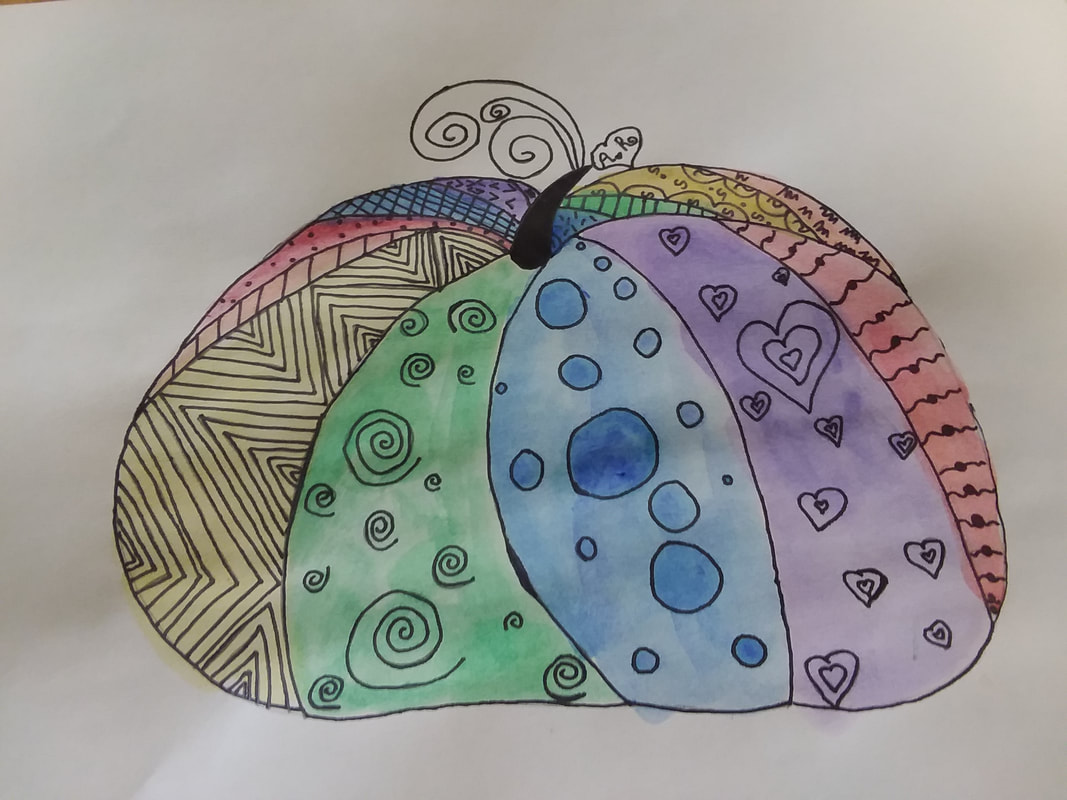
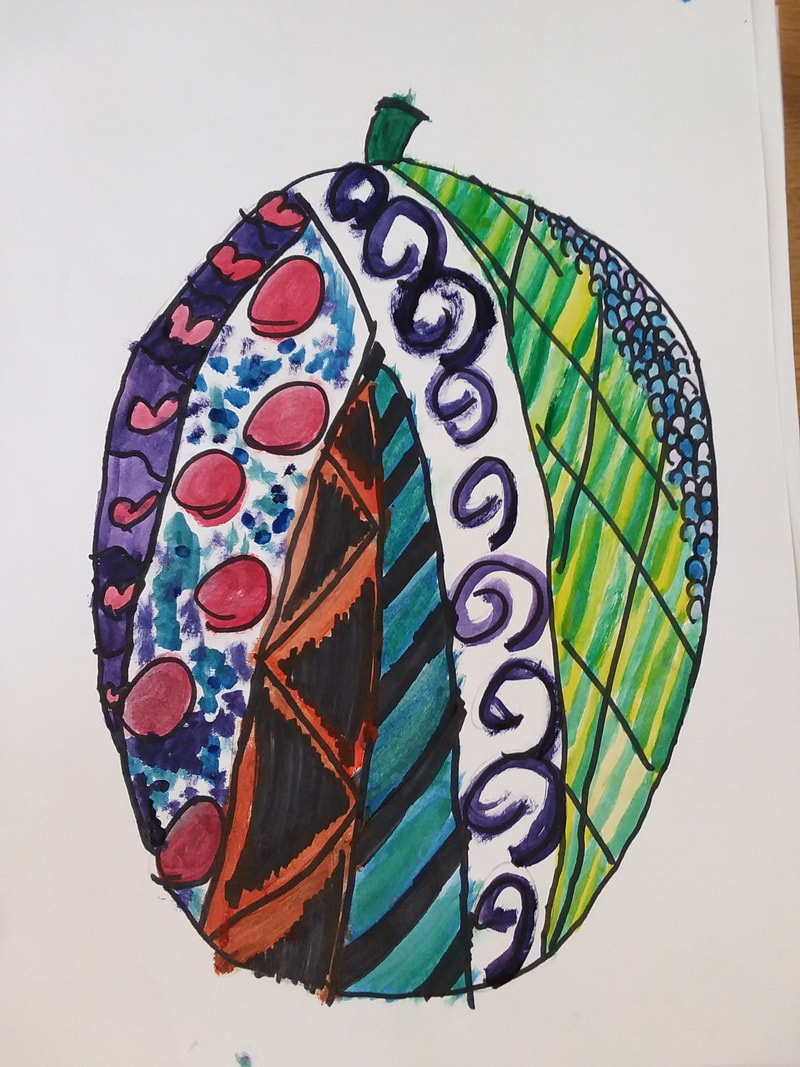
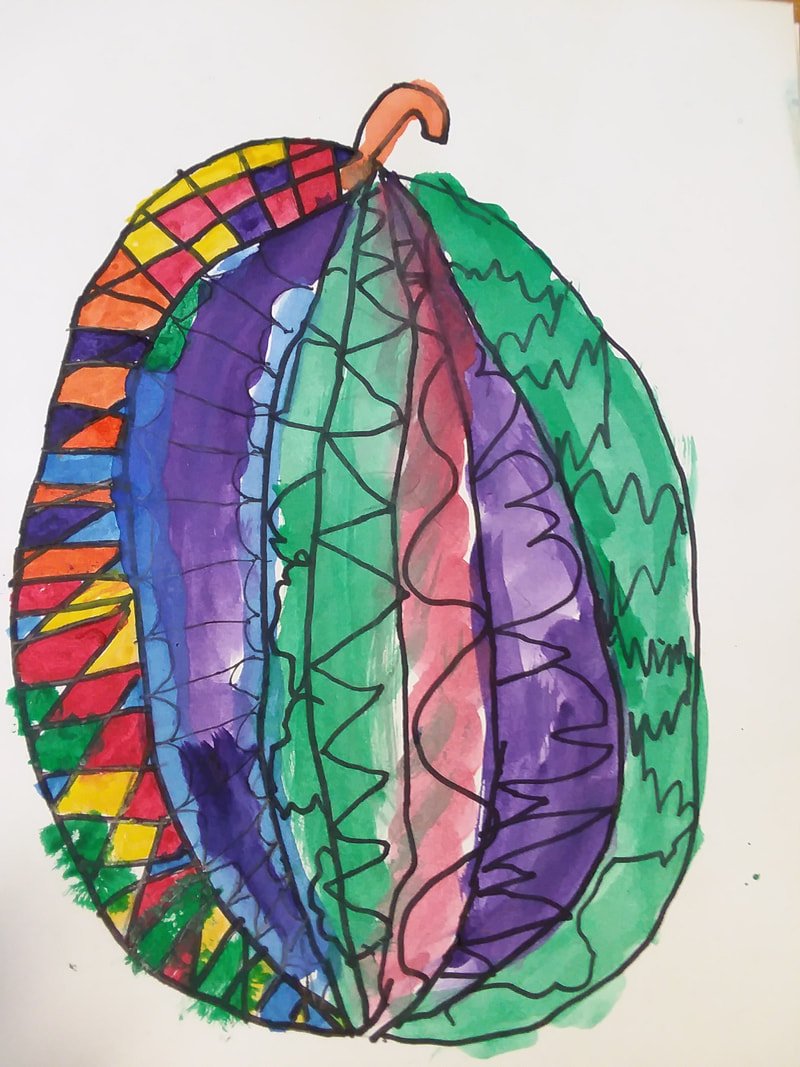
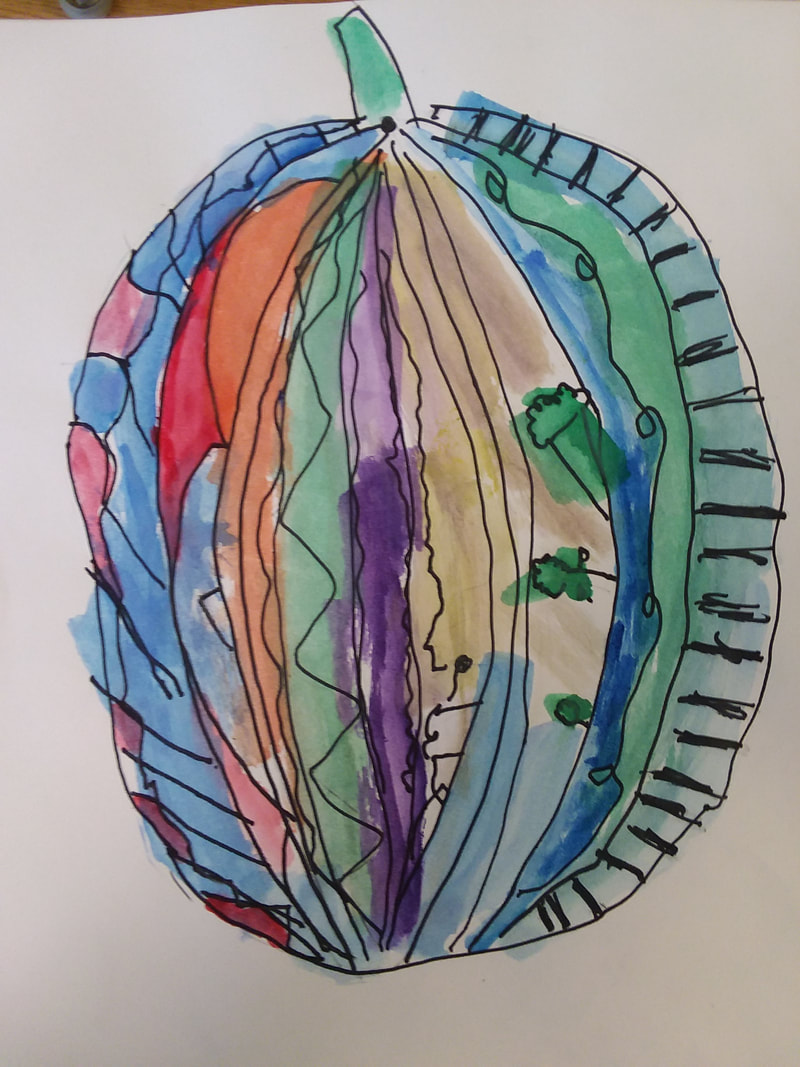
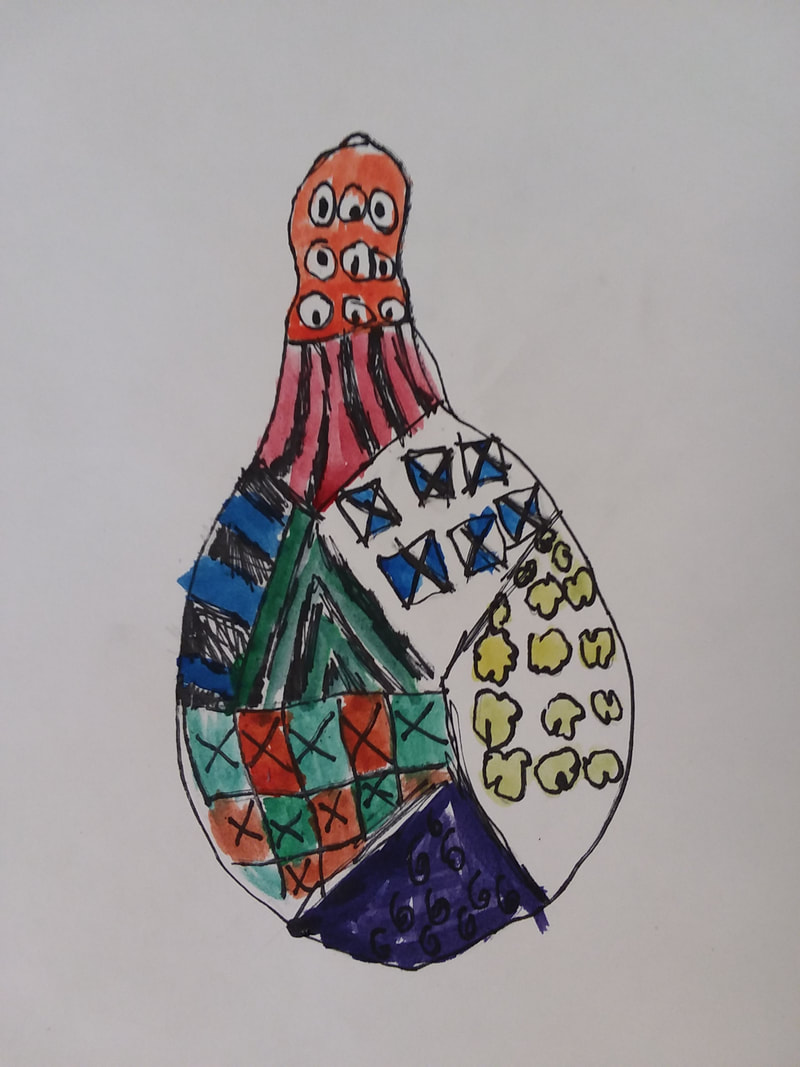
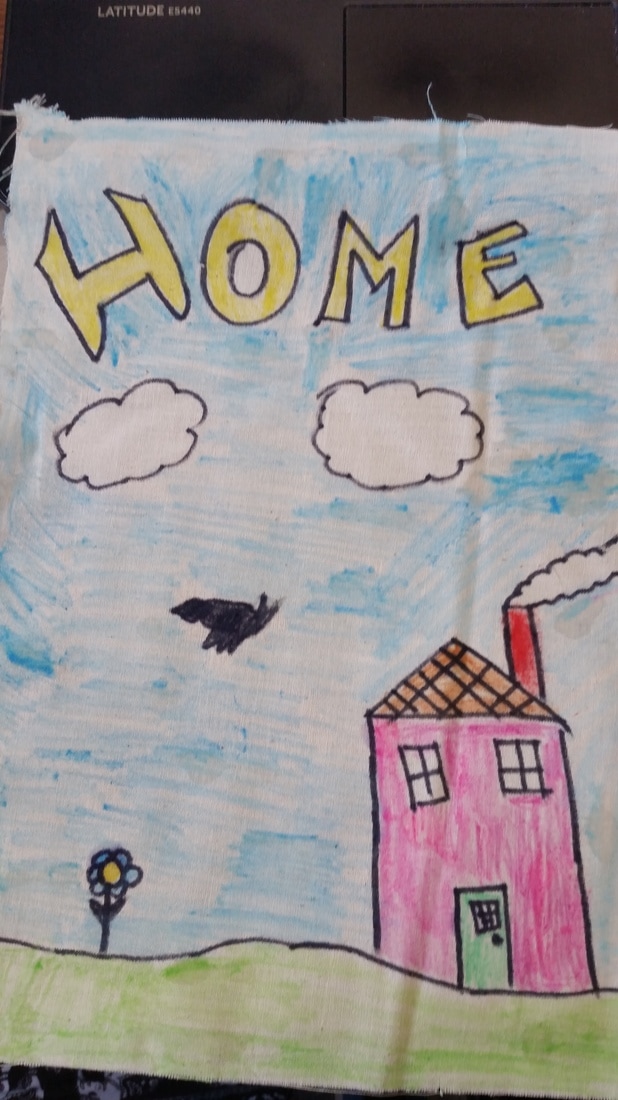
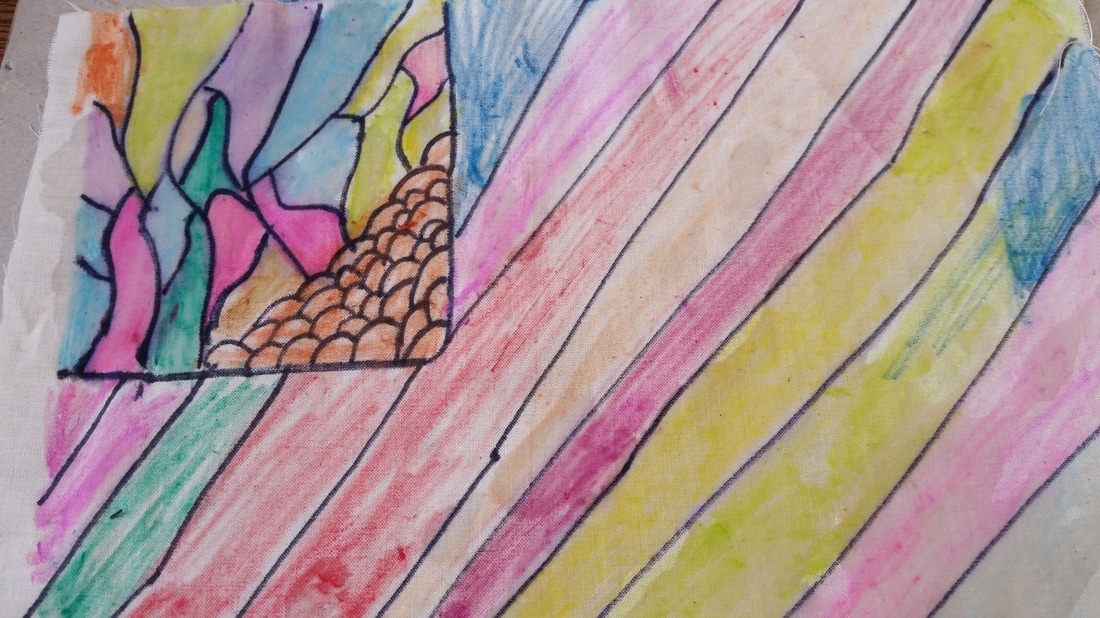
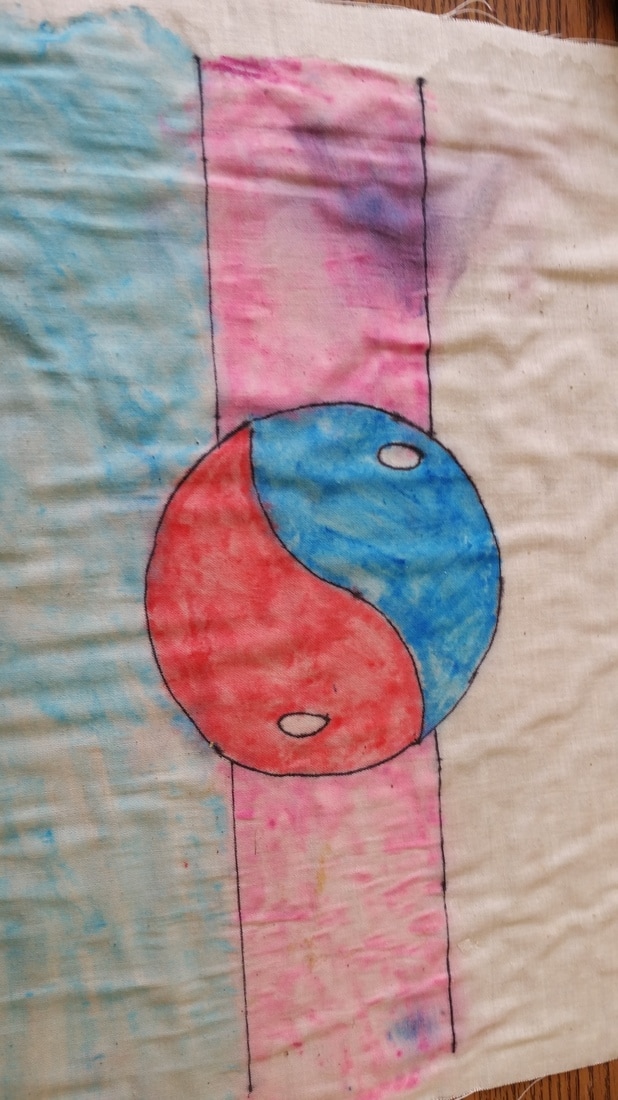
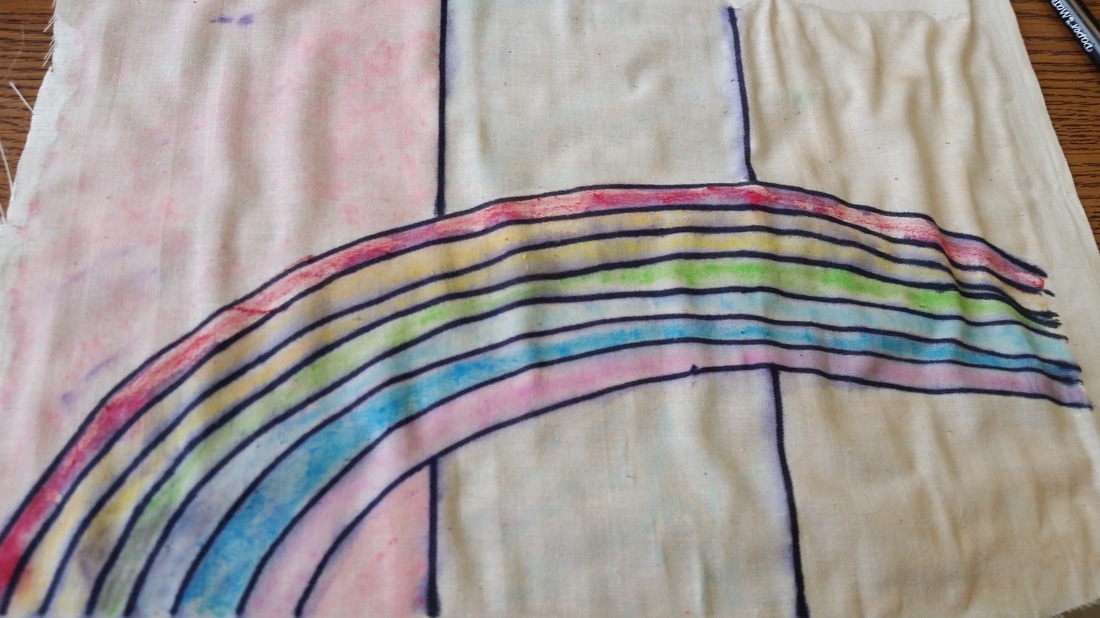
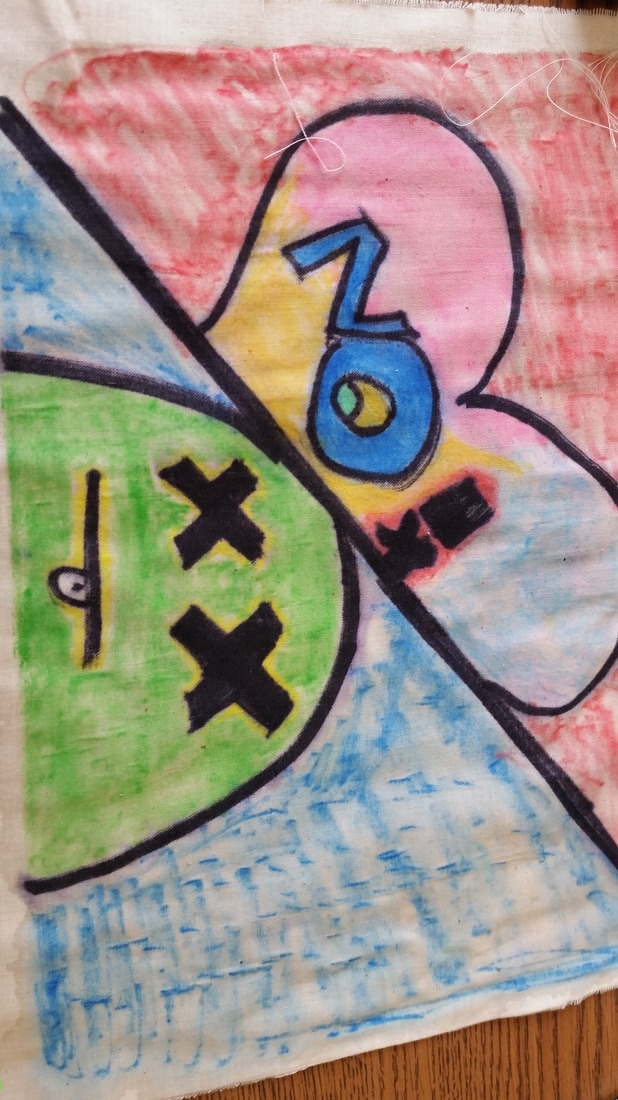
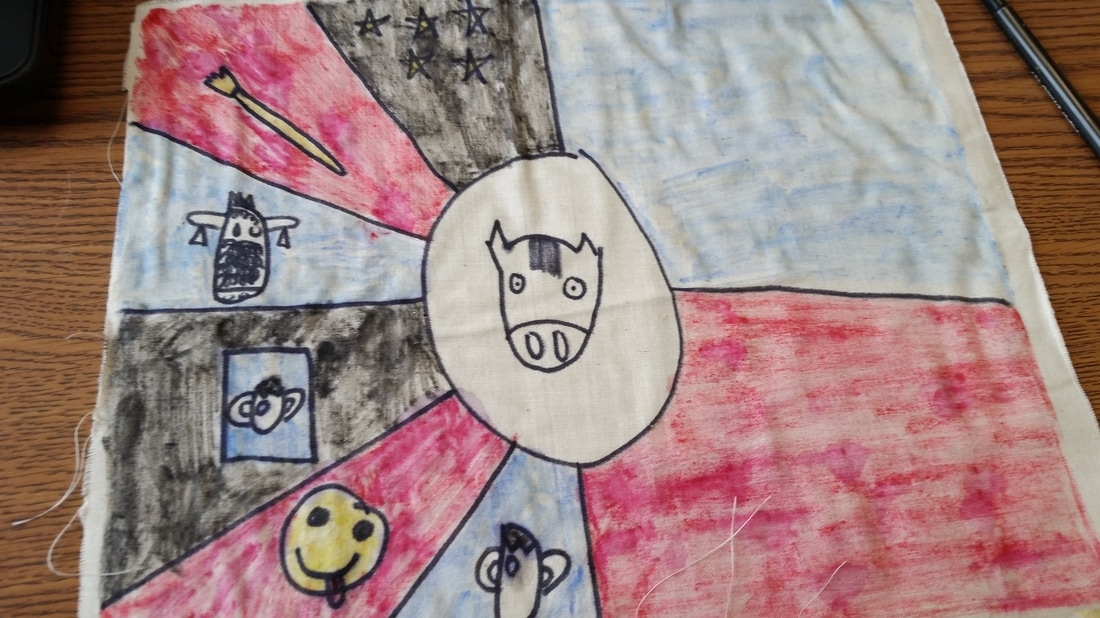
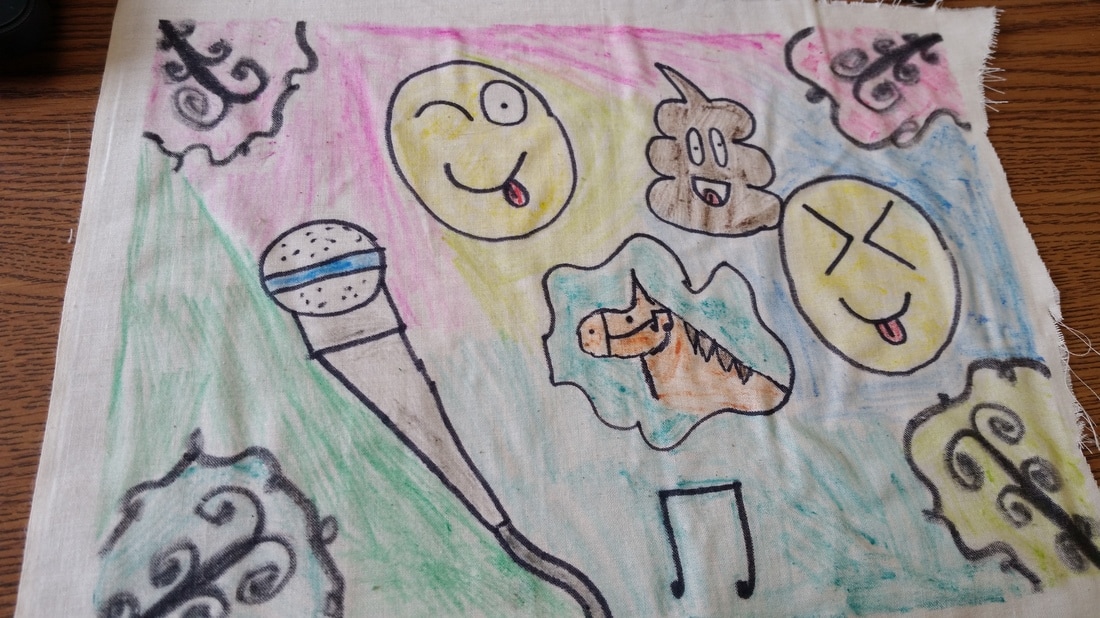
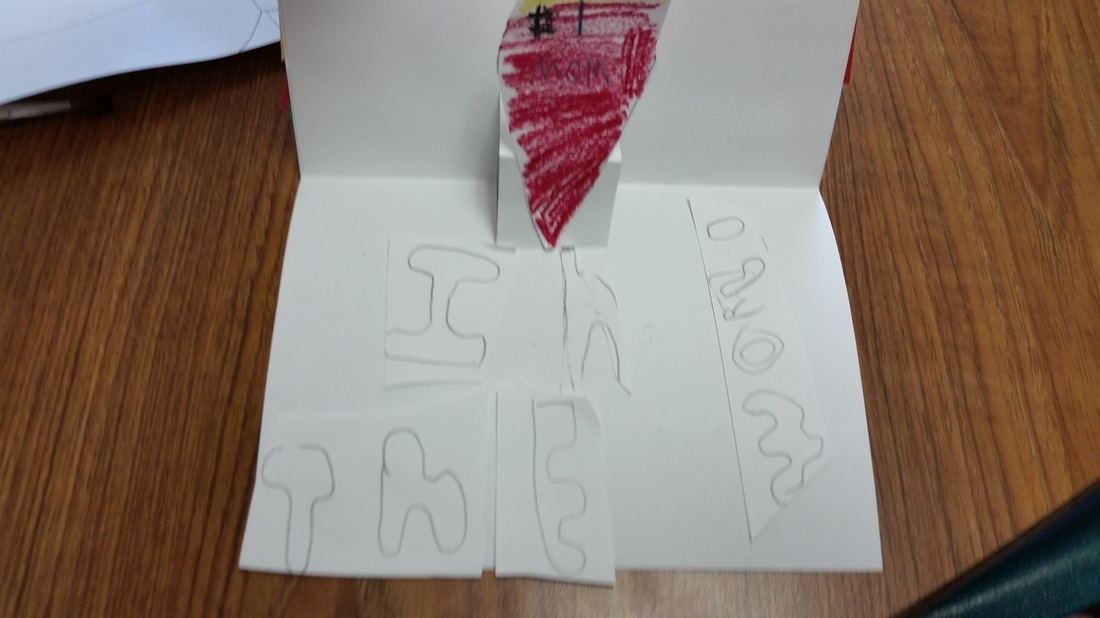
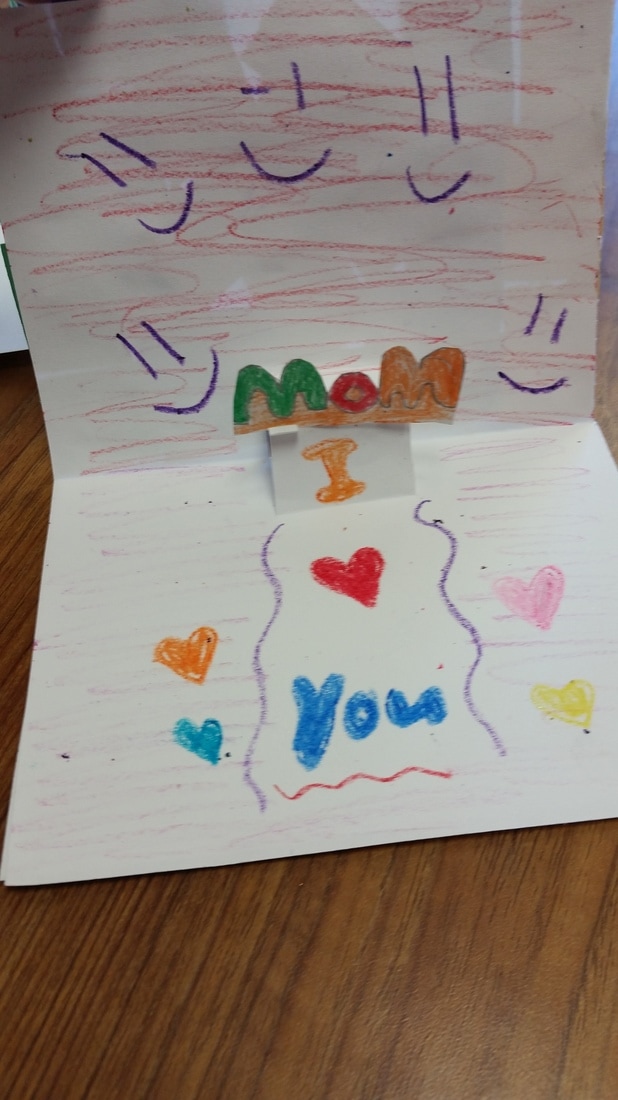
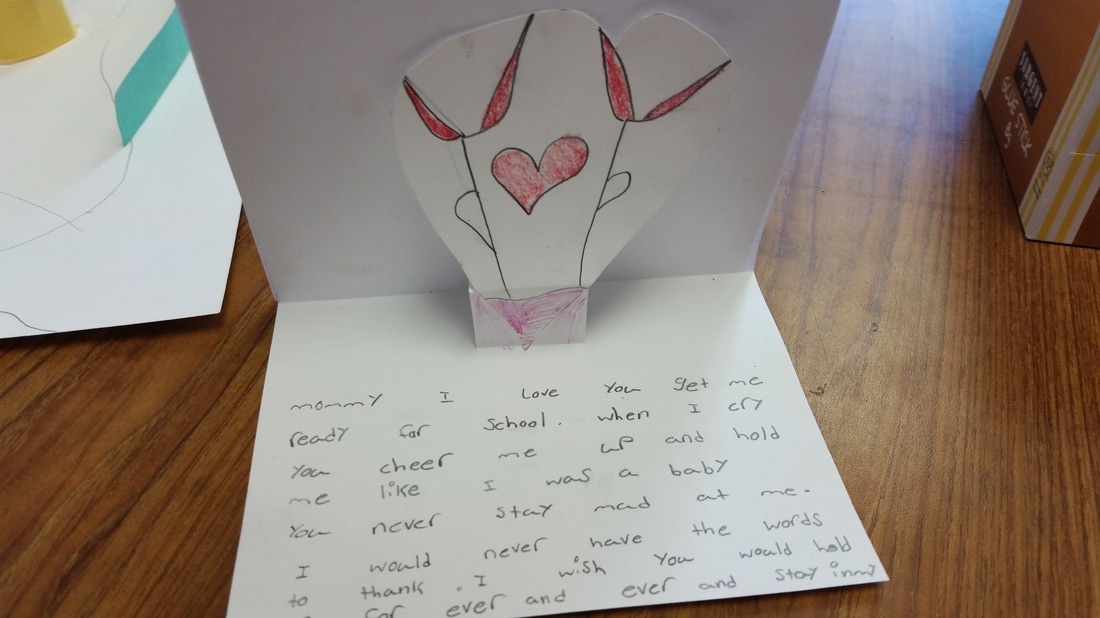
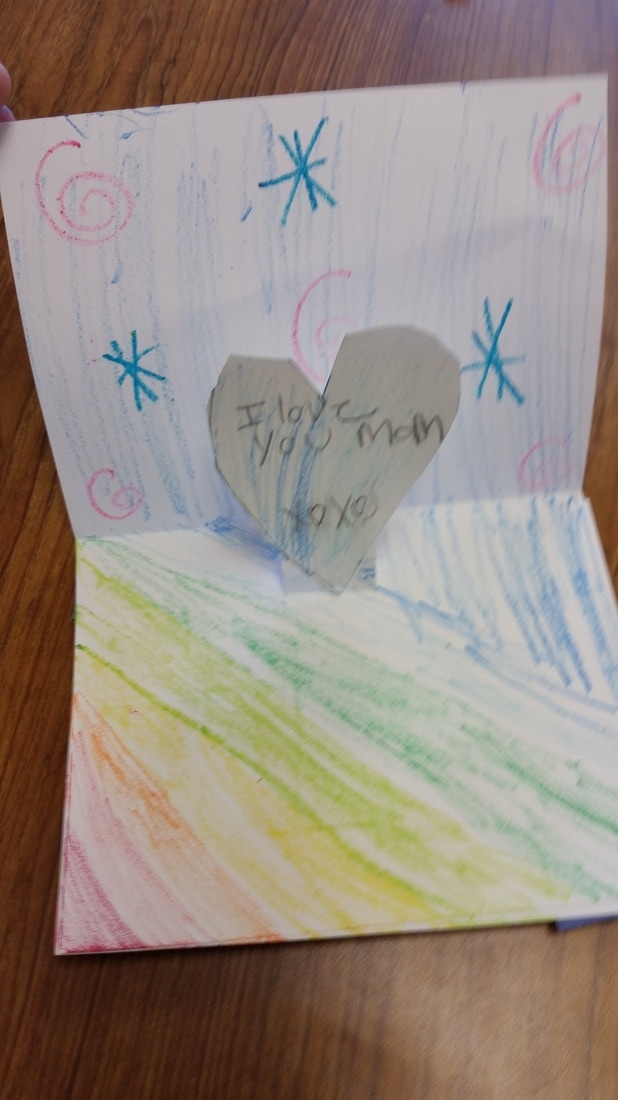
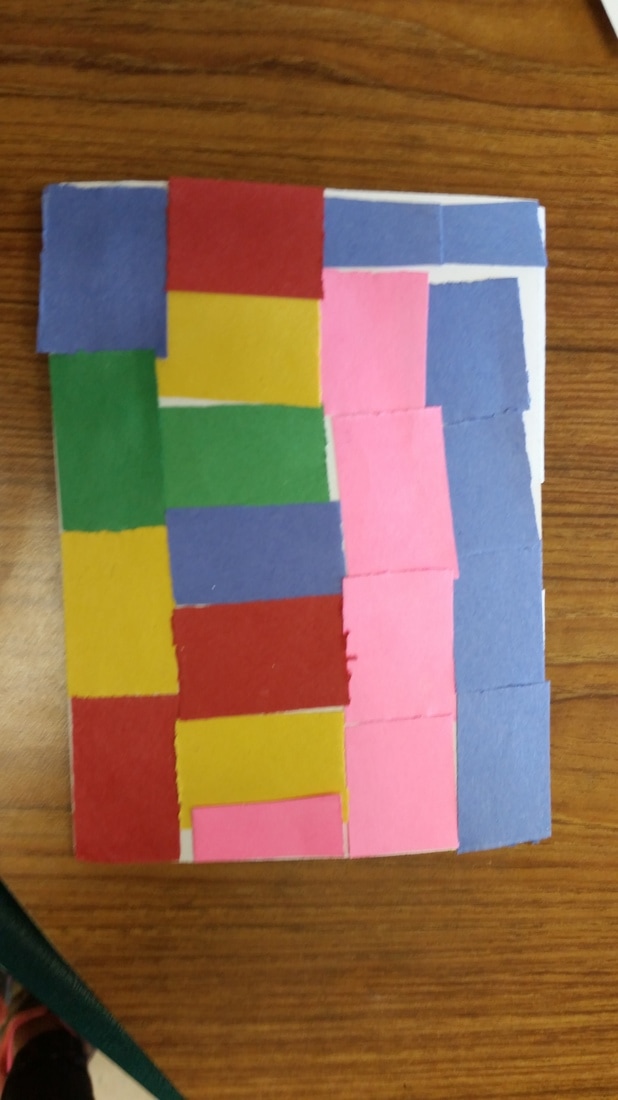
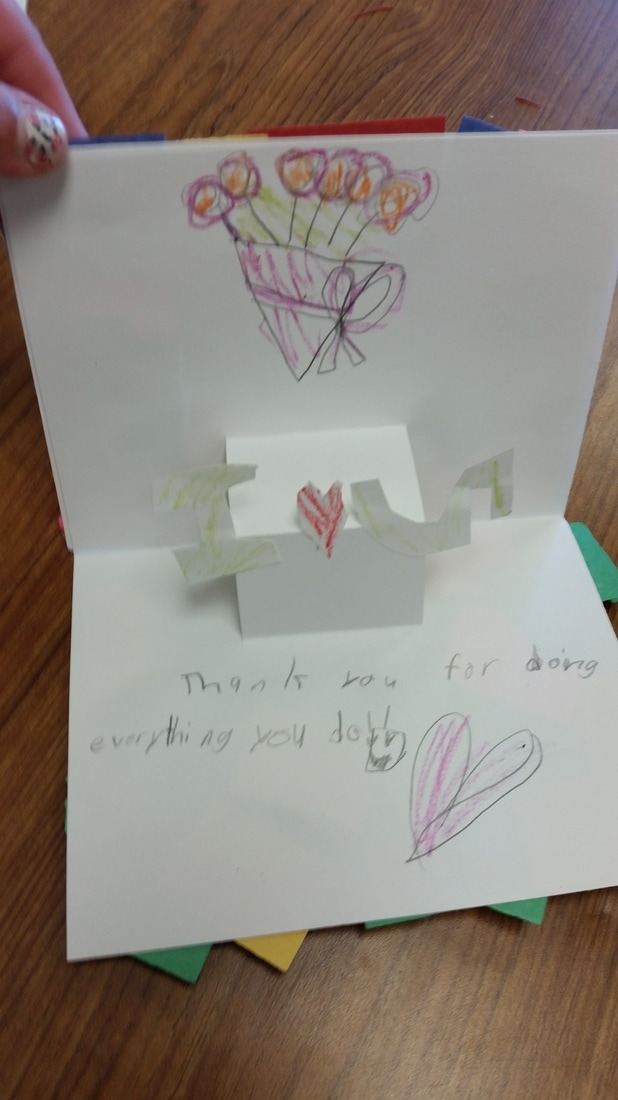
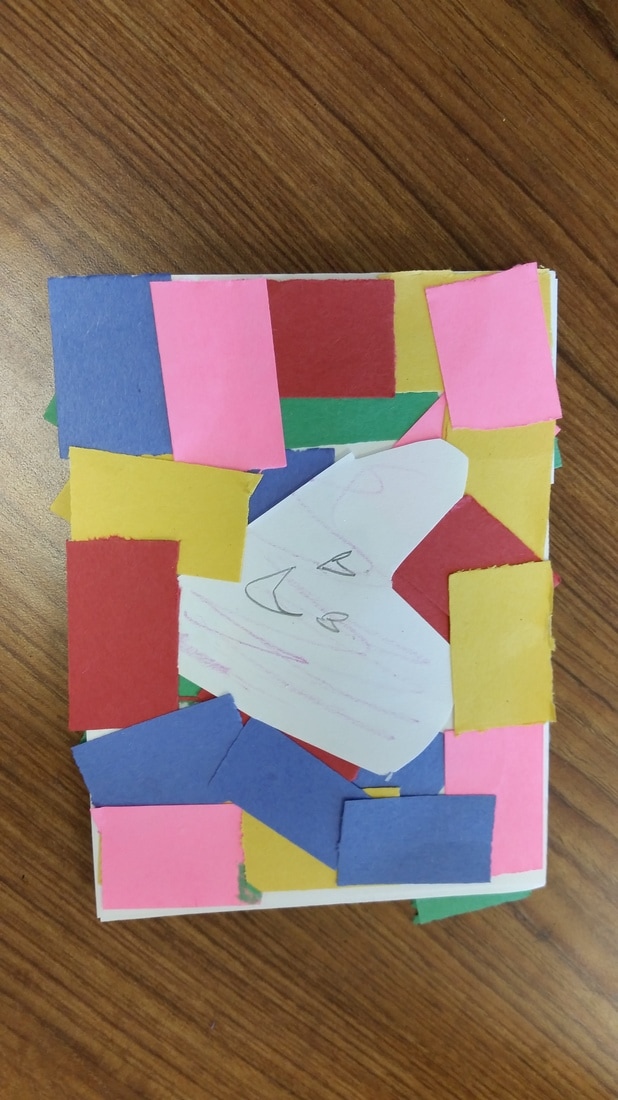
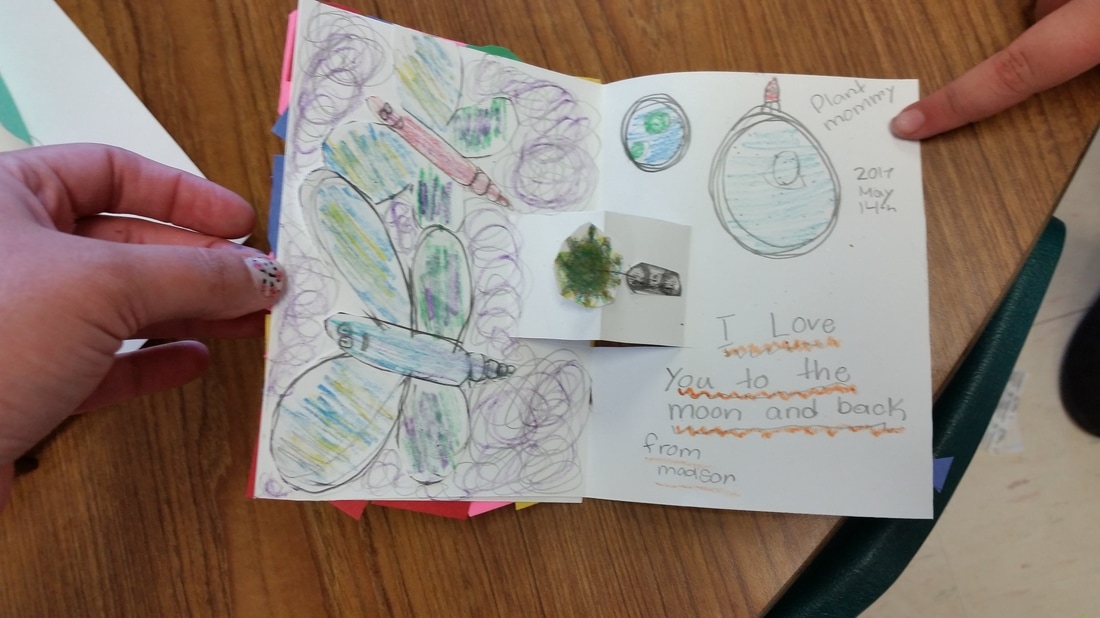
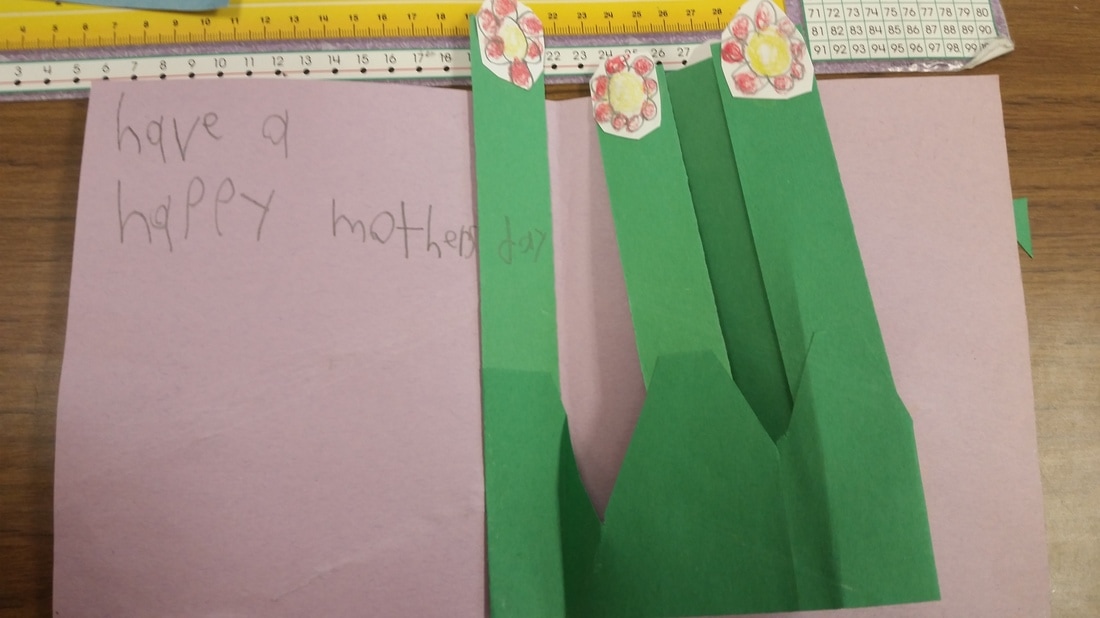
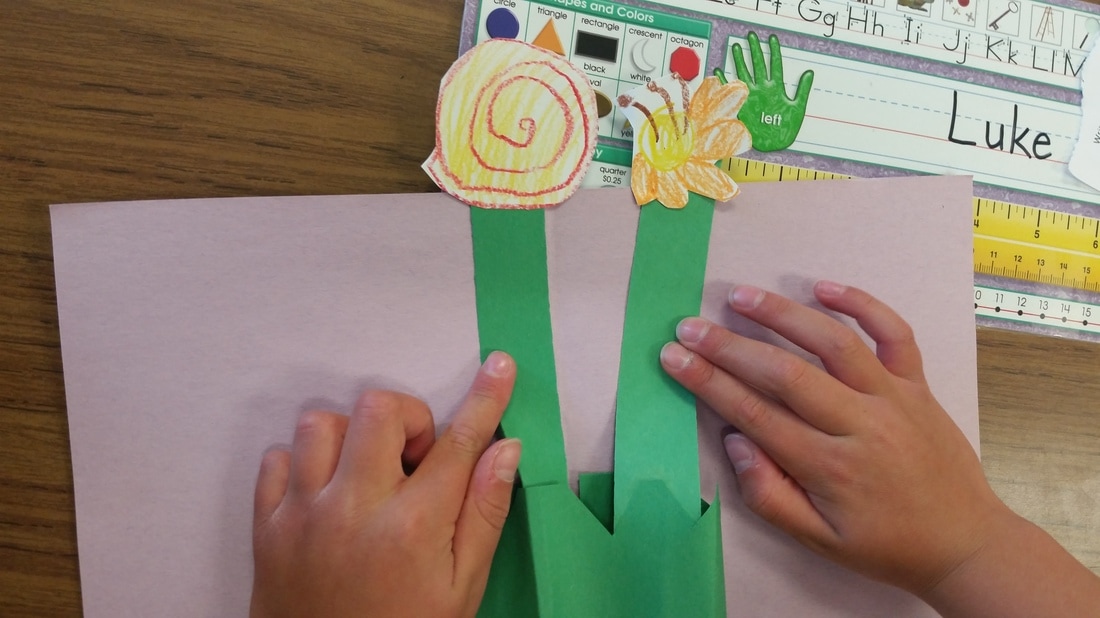
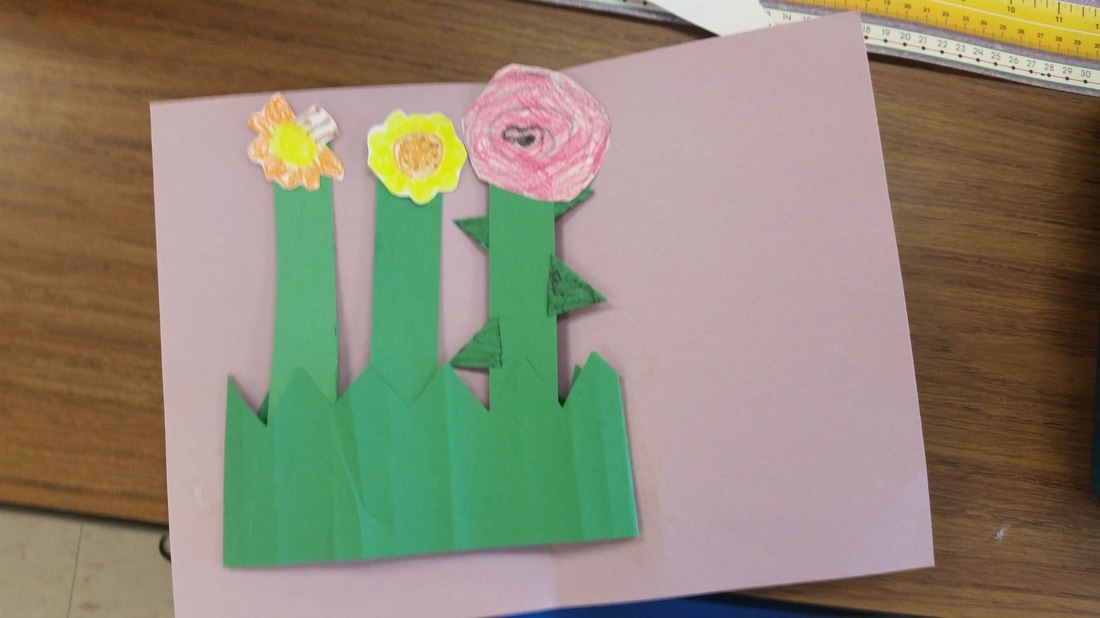
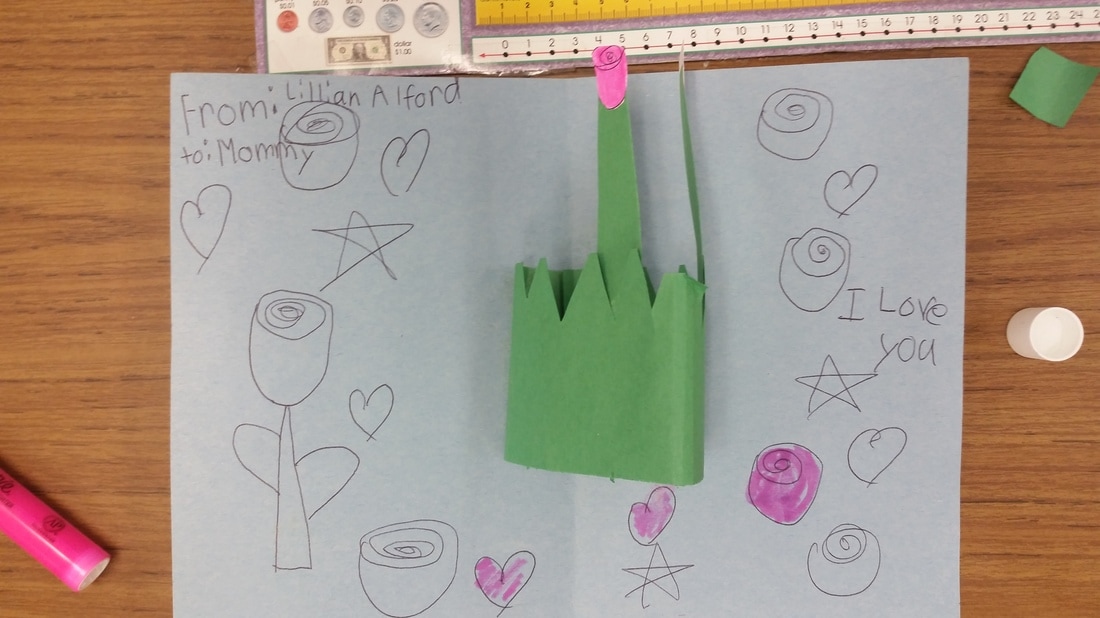
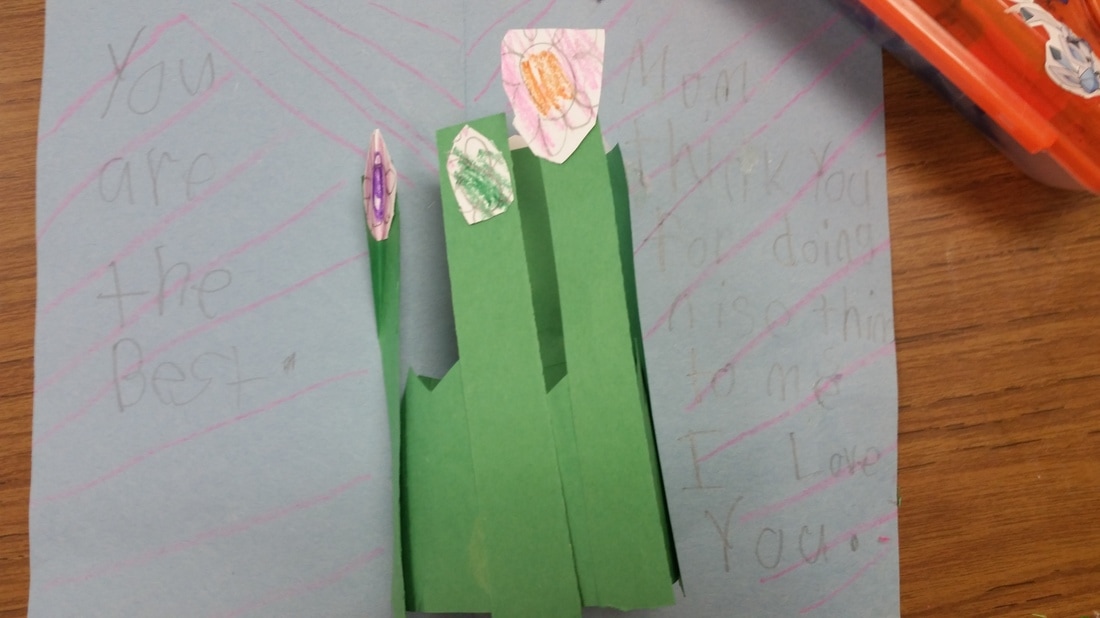
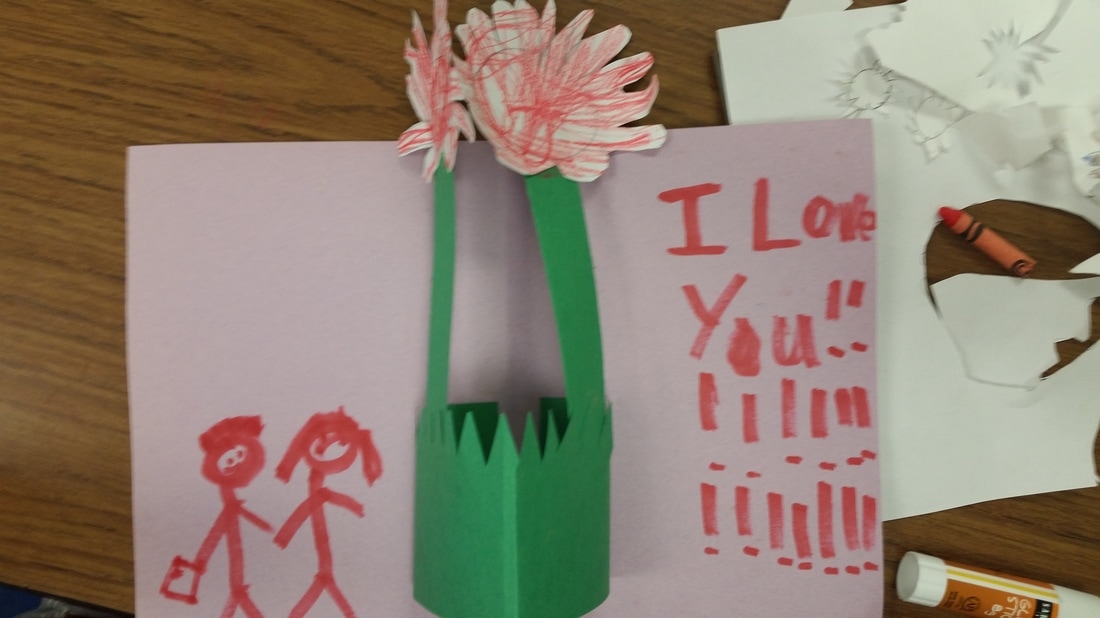
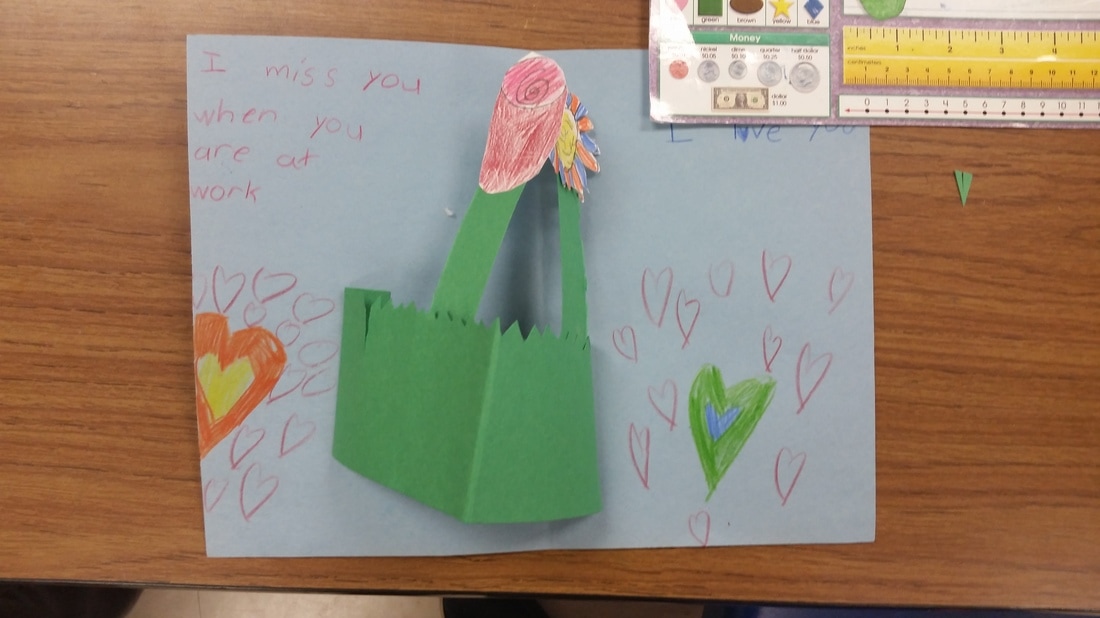
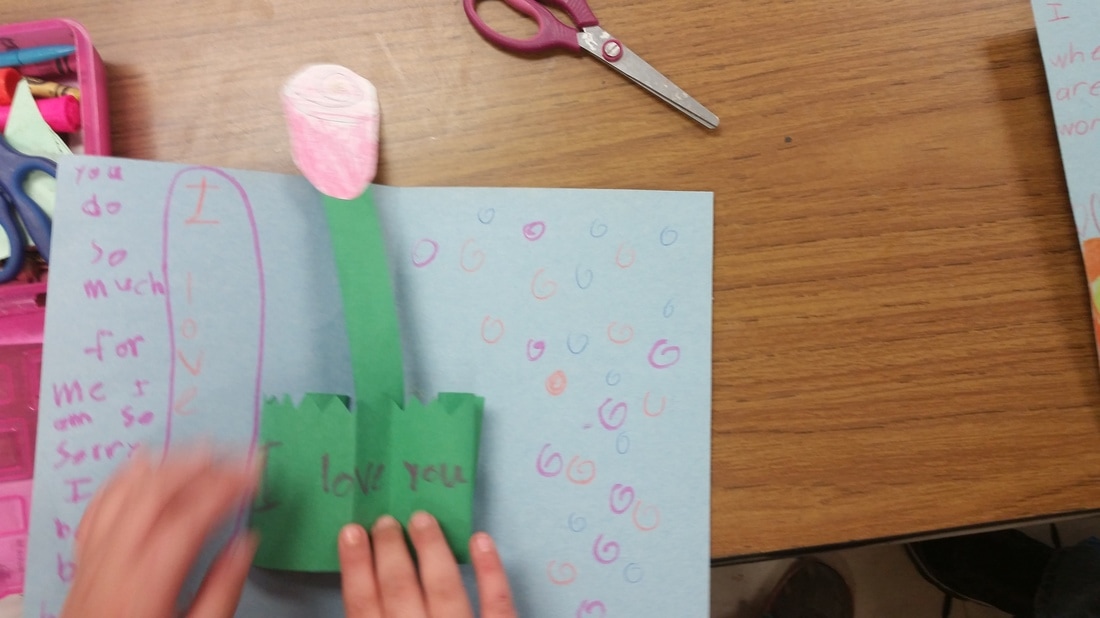
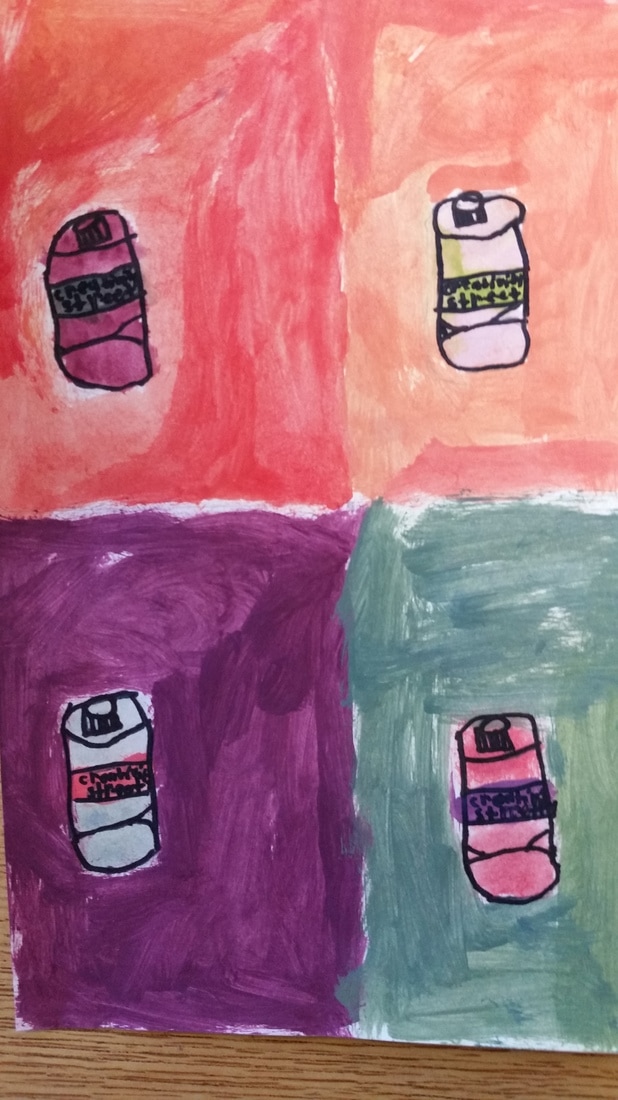
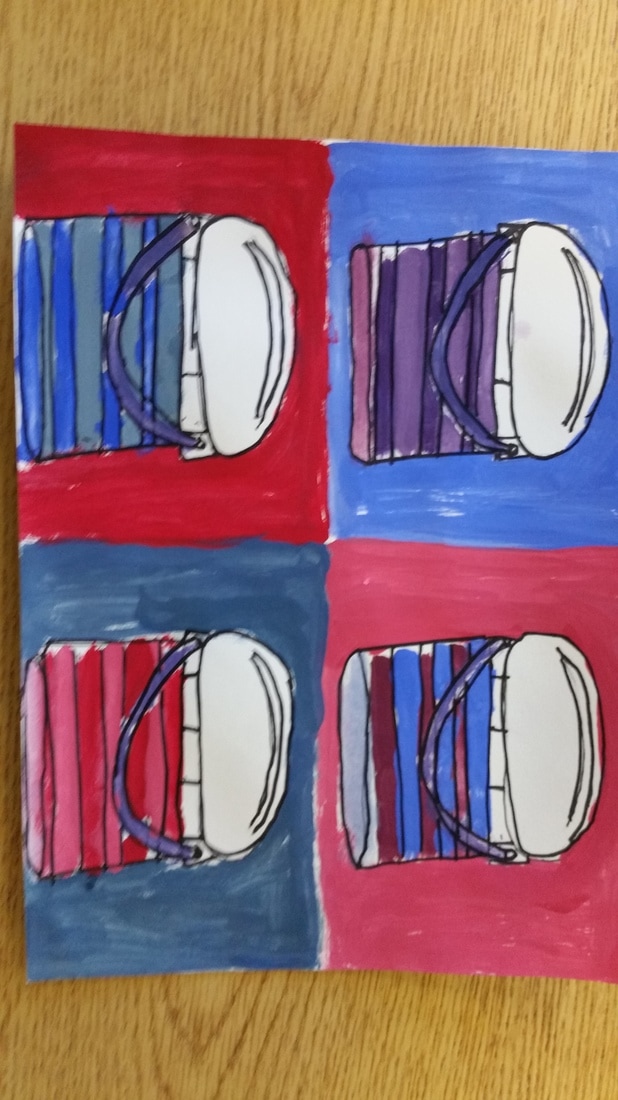
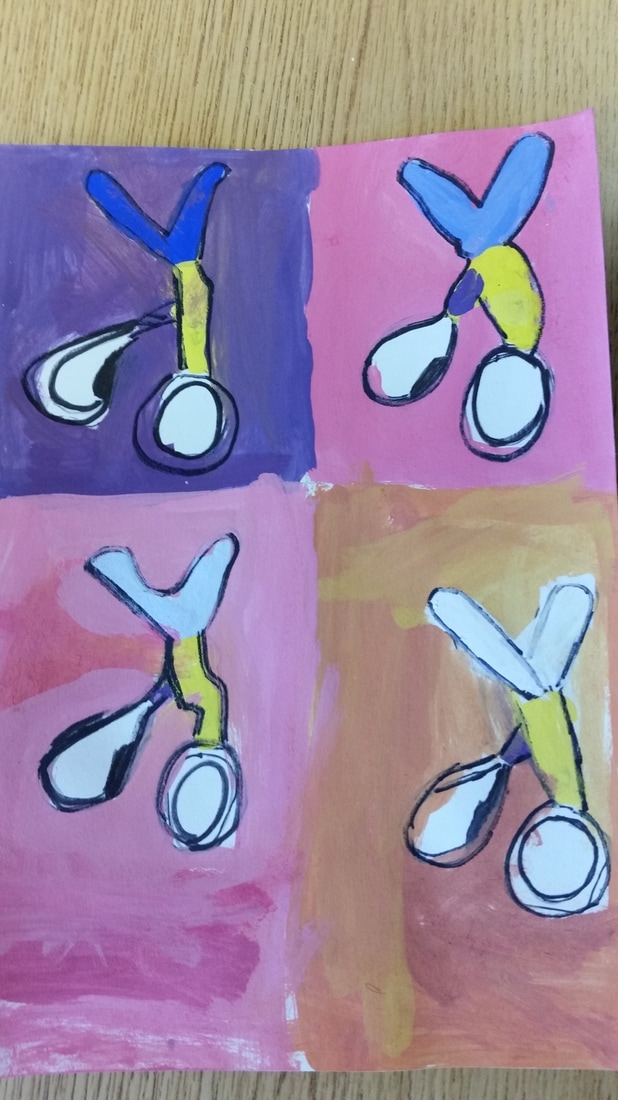
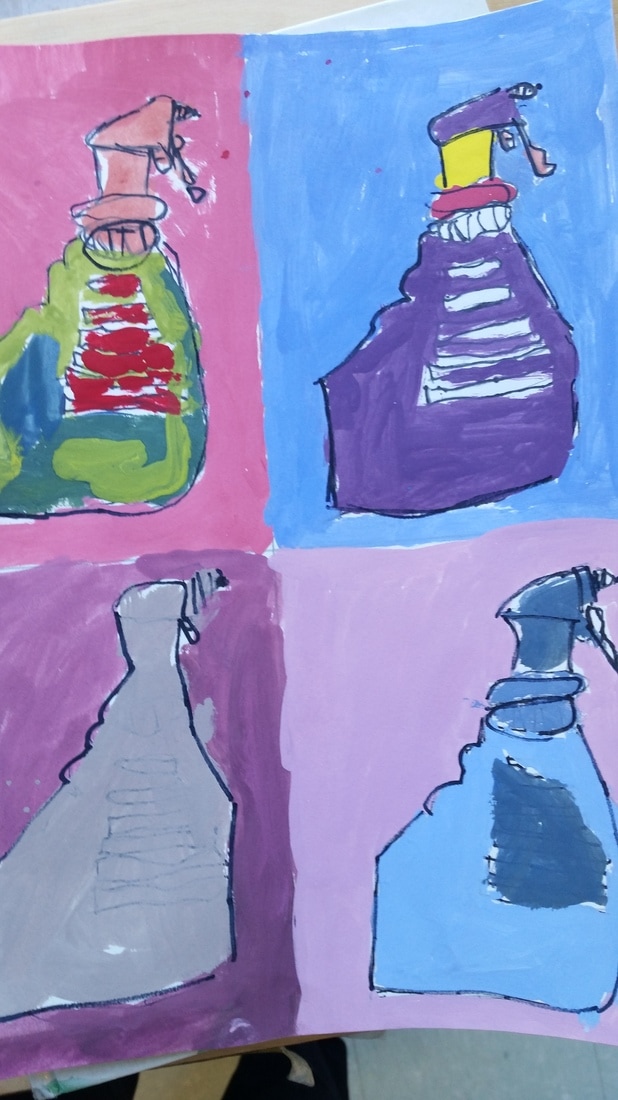
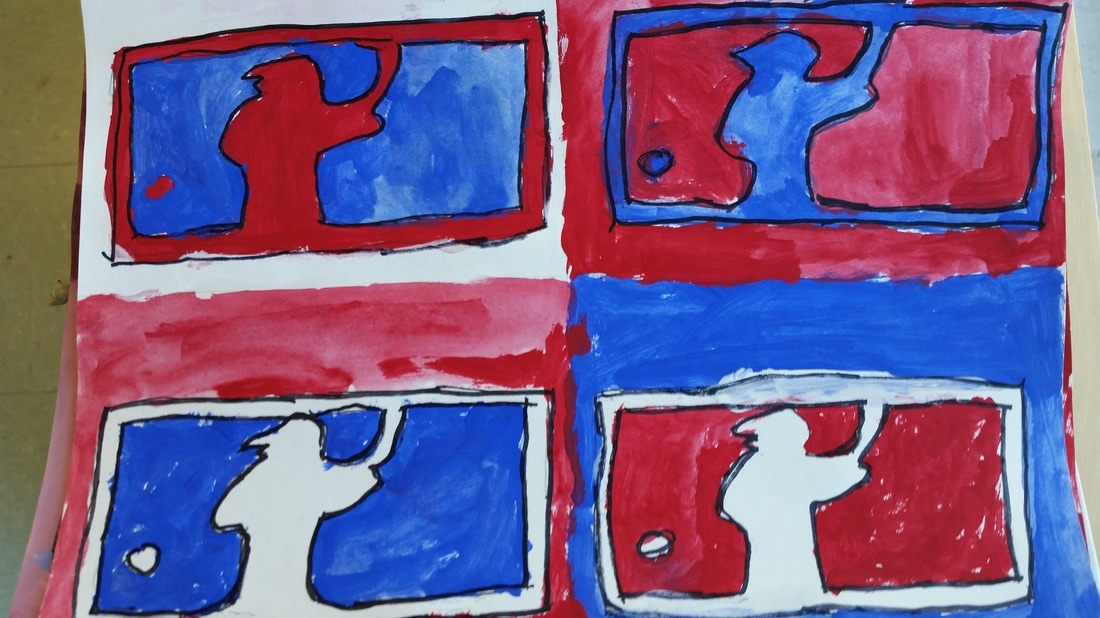
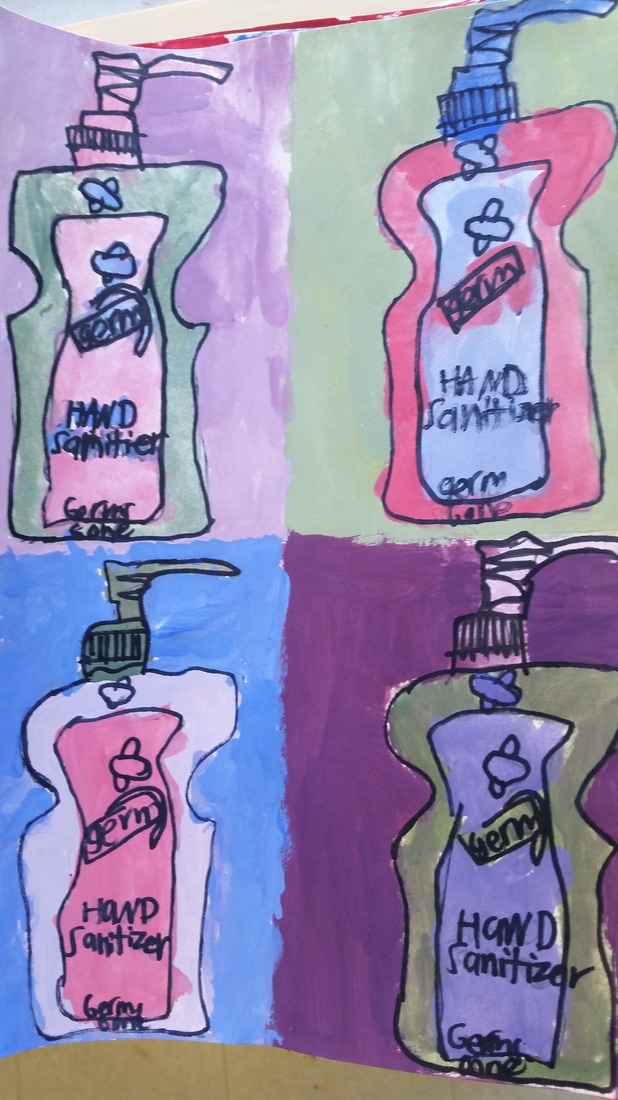
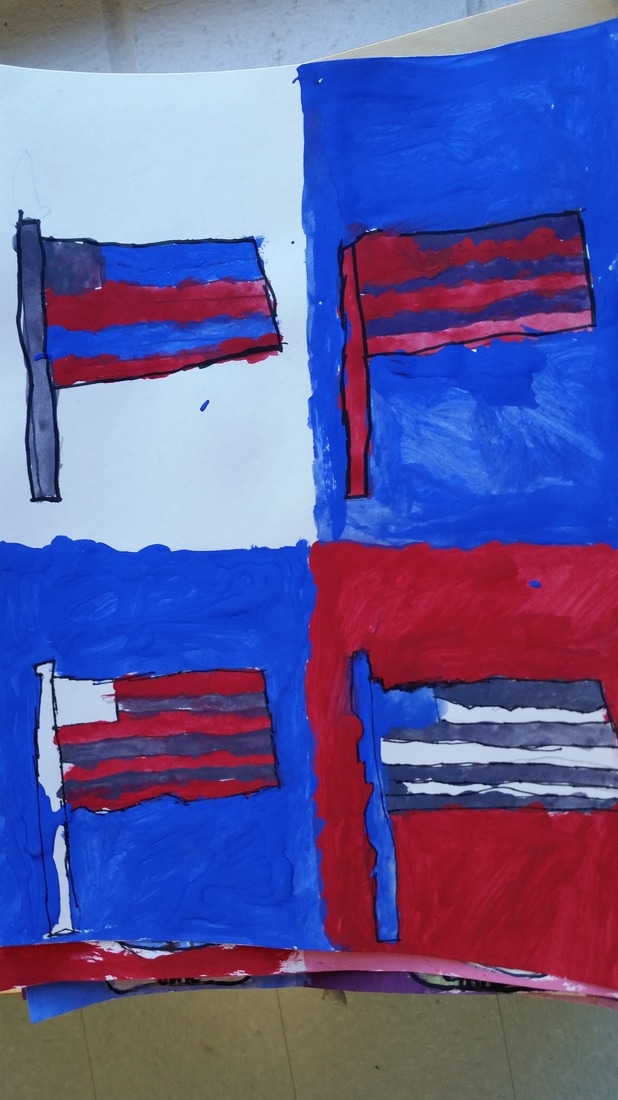
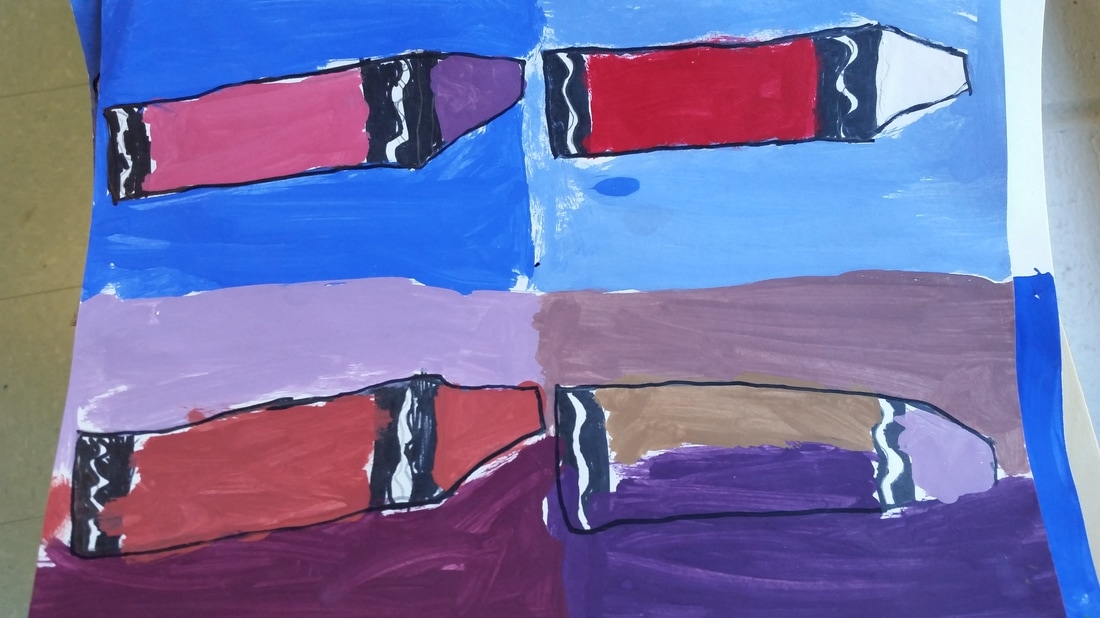
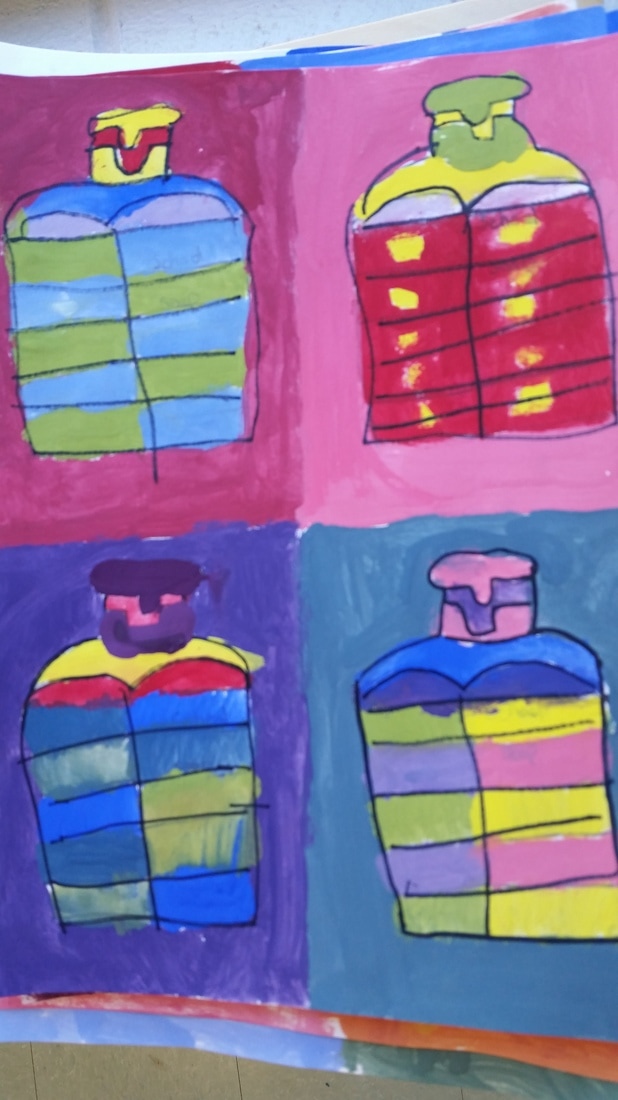
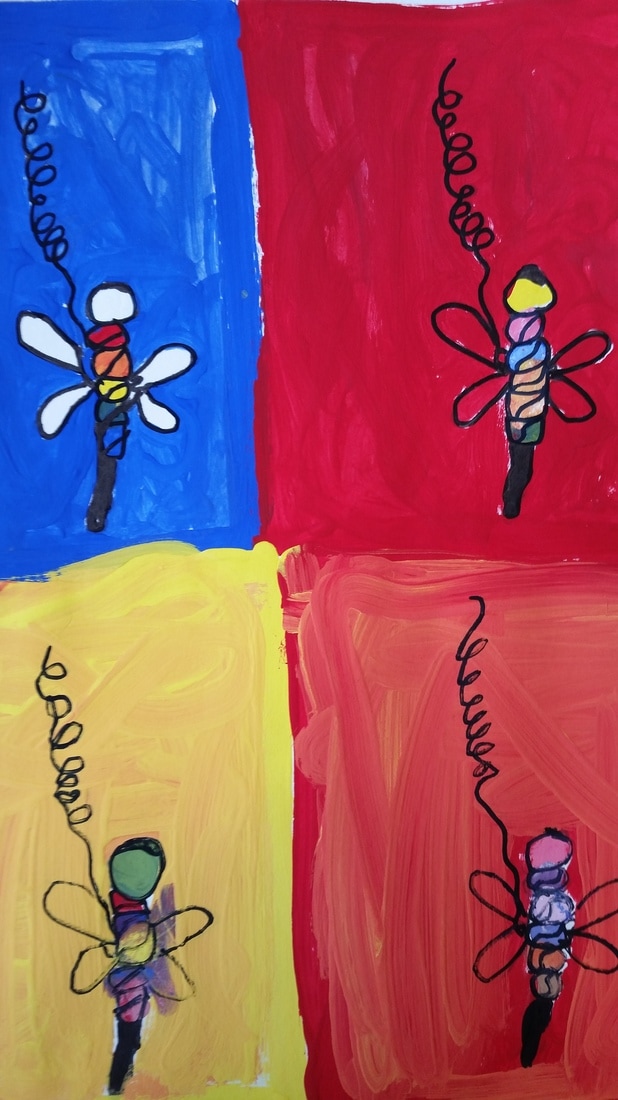
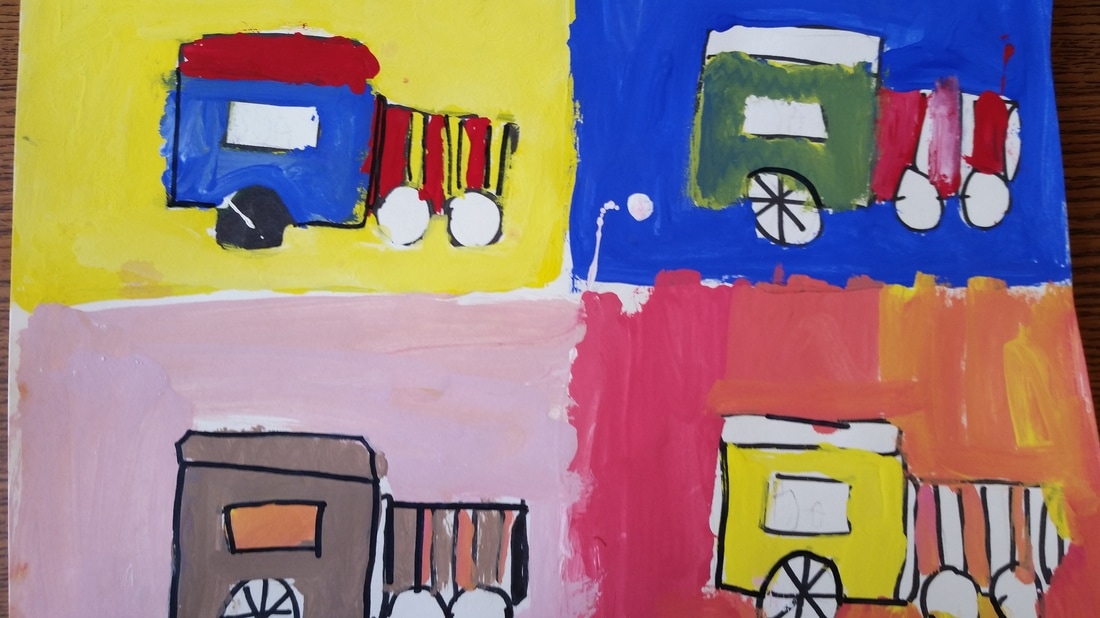
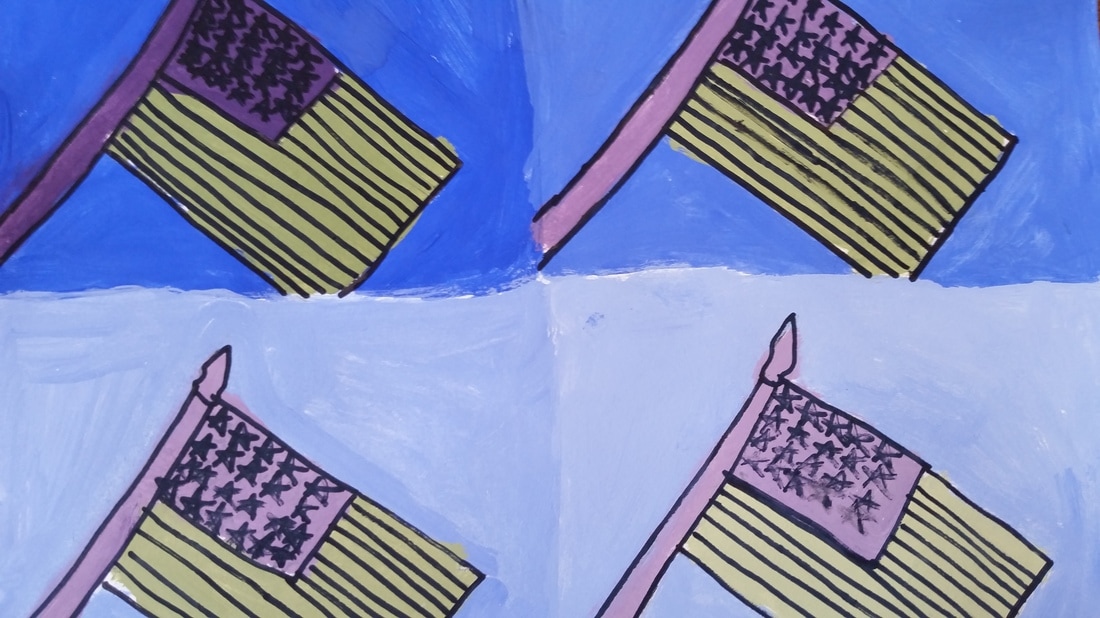
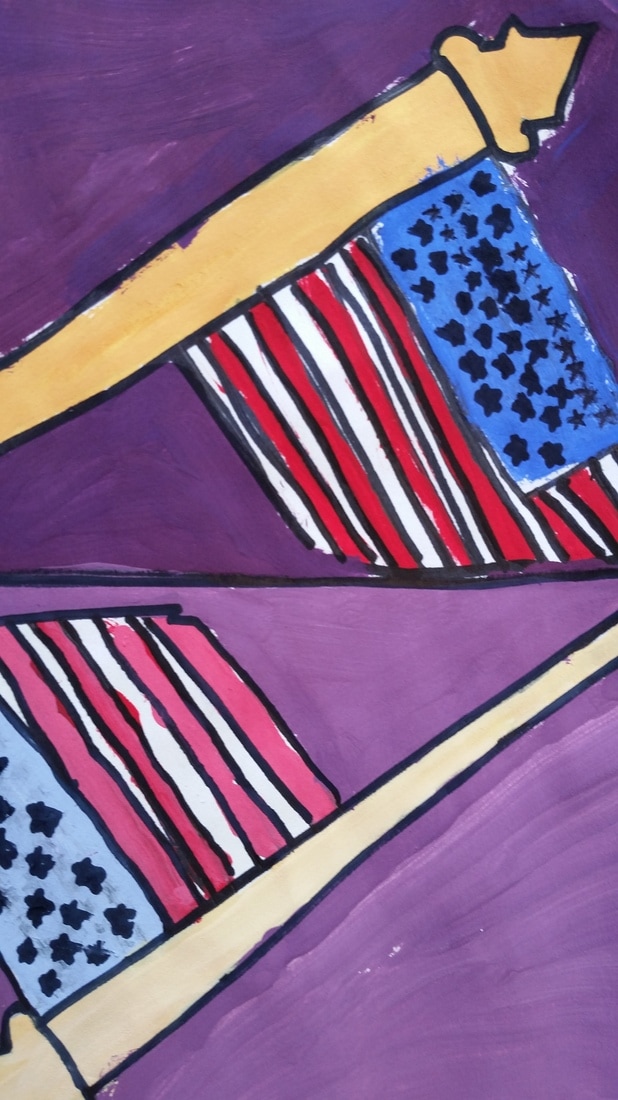
Unit Overview: Students created haunted houses using chalk pastels to create an artwork that set a spooky mood/tone. Students experimented with chalk pastel as a medium in order to expand artistic knowledge and understanding of materials. Our art room is fortunate enough to have Conte Chalk Pastels in our room. They are super nice and the colors are just amazingly vivid. In the past, working with chalk pastels ends up being an experiment in frustration. But, with the right tools, even fourth graders can make magical and beautiful works of art. 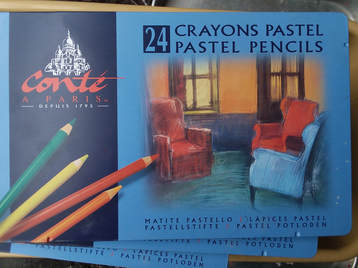 Let's talk haunted houses. As a policy, our school doesn't permit students to draw pictures of violence, blood, guts, gore, weaponry, etc. So, how can students make successful haunted houses with the scary stuff? Good question. The answer is: by focusing on the spooky stuff. For example, a clown with a knife in the kitchen is only scary for a second. But, imagine being home alone. A storm causes the power to go out. There are no candles or light. The sound of a squeaky door comes from the kitchen. Then, tap ... tap ... tap. You peer through the darkness ... you hear a breath by your ear. Now that's scary stuff. And totally school appropriate. (Win!) So how do we apply those kind of scary elements to an artwork? What about drawing a swing on a tree? A random shovel in the middle of the yard? Smoke coming from an abandoned house? A gate left open. Footprints along a dirt path, but no one in sight. That creates the illusion that something is happening ... that someone is there. To me, that's scarier that a clown with a knife. Because maybe the clown with the knife in the kitchen is making a salad. How boring. Then, we used a spooky medium. Chalk pastels. Students experimented first. We used scrap paper to test what happens when we smear the pastels, when we layer the colors. We talked about how to use them gently, because they are nearly impossible to sharpen. We talked about how chalk pastel doesn't erase, so every mark is important. We talked about using a cover paper so we wouldn't smudge our beautiful artwork. We talked about affixing the chalk with hairspray, to keep the picture from getting smudged. Then, we dove in headfirst and drew our entire haunted house using chalk pastel. The results are remarkable. 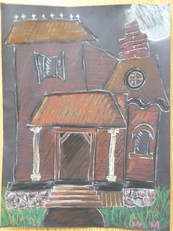 My teacher example Unit Overview: Students created pumpkin zentangles using watercolor paint and sharpie in order to review line, shape, form and pattern. In order to help students review good craftsmanship, detail, and artistic creativity, I had students start off the year with a simple project. We drew pumpkins from observation and talked about how the lines of a pumpkin go from its stem to its bottom. This makes the lines look curved when drawn. Students then added pattern to create a zentangle. For painting, students were given the colors on a color wheel. No black, no brown. I have noticed that students who aren't confident in their work tend to smear black or brown paint over their patterns to cover it up. Therefore, those colors were not available to them. Unit Overview: Students looked at flags around the world and studied how colors and symbols conveyed meaning (symbology). Students then designed a flag that displayed personal meaning and narrative. Students made their final flag on fabric and colored the fabric using a heat set medium and watercolor pencils. Unit Overview: Students created cards for mother's day using various technique, method, and personal ideas. Students were shown different types of cards and made personal decisions based on their perspective. Unit Overview: Students will create a pop-art design based on the work of Andy Warhol. Students discussed tone and hue in order to create their own colors from a color palette. Students began by drawing objects from observation. After creating a template and tracing it onto a larger paper four times, students learned about the use of hue and tone in pop-art. Students blended all their own colors using the primary colors and white. Students made a tonal color wheel using the worksheet below. 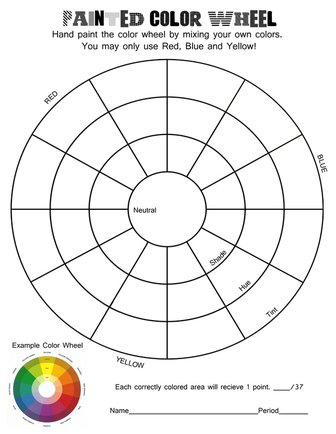 Using the information gathered by blending their own colors (secondary and tertiary), students painted their final pop-art design. This project was used during the week before spring break. It was a great filler lessons for the upper half of elementary. I also did it with the younger age groups, but it took them more time to understand and grasp the concepts needed to create a 3-D paper sculpture. |