|
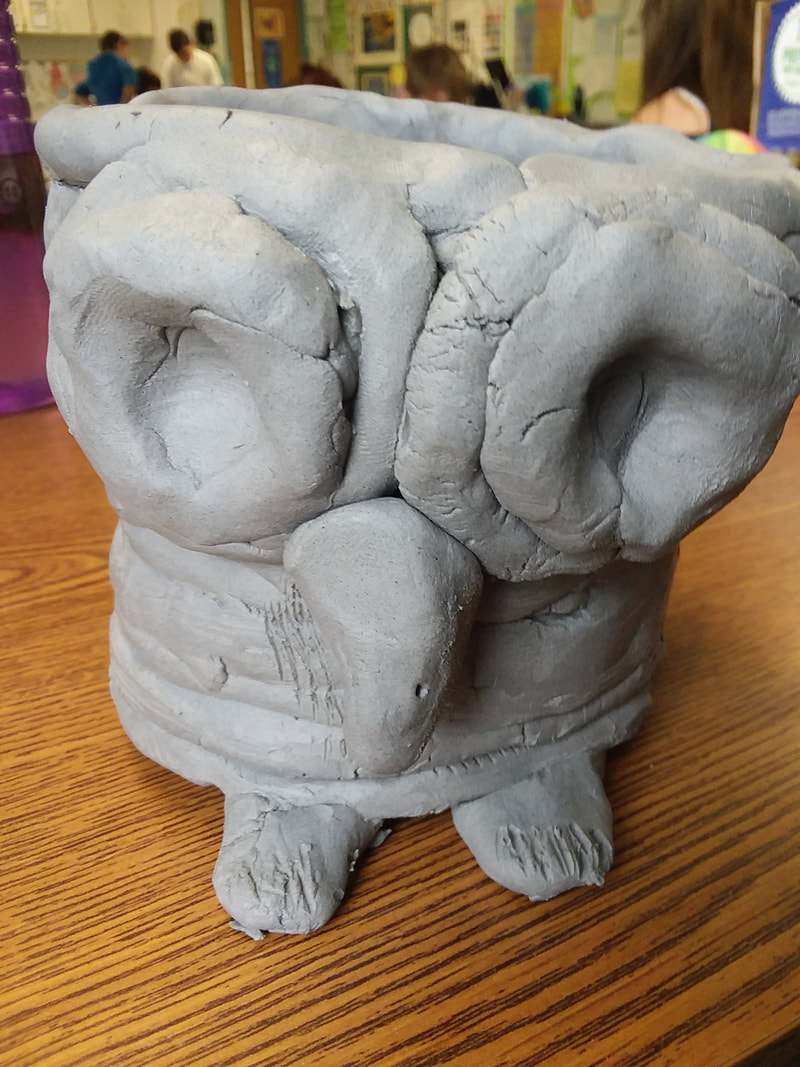
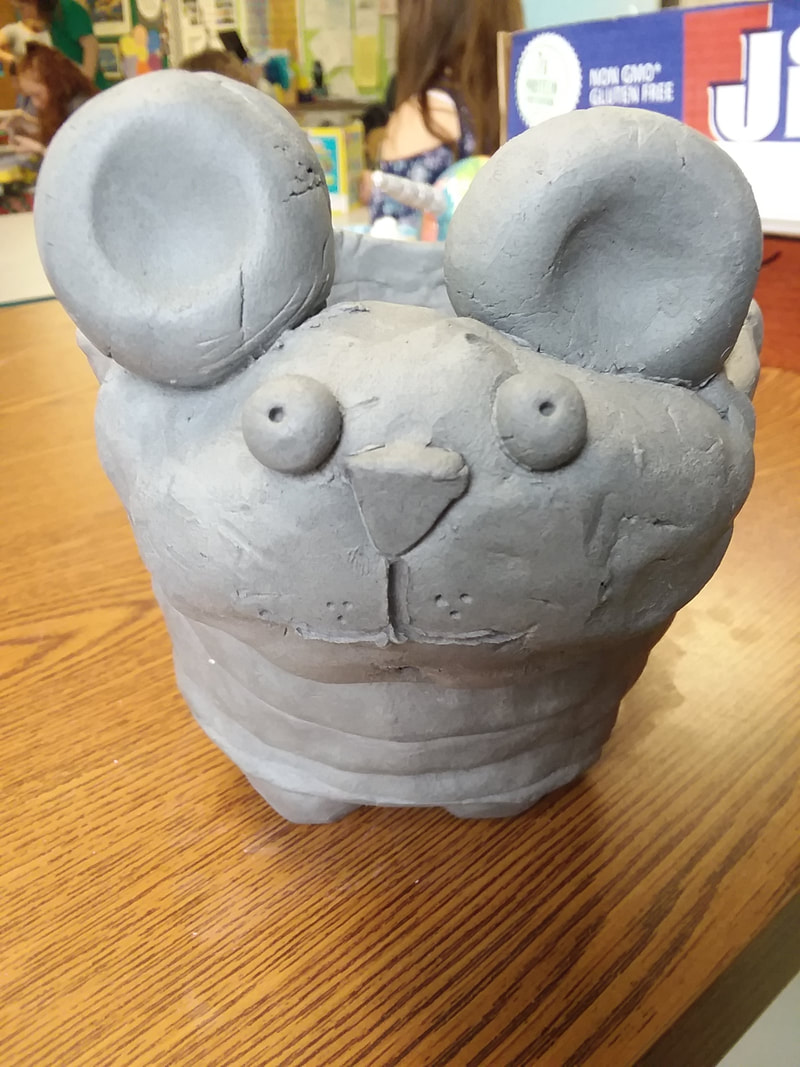
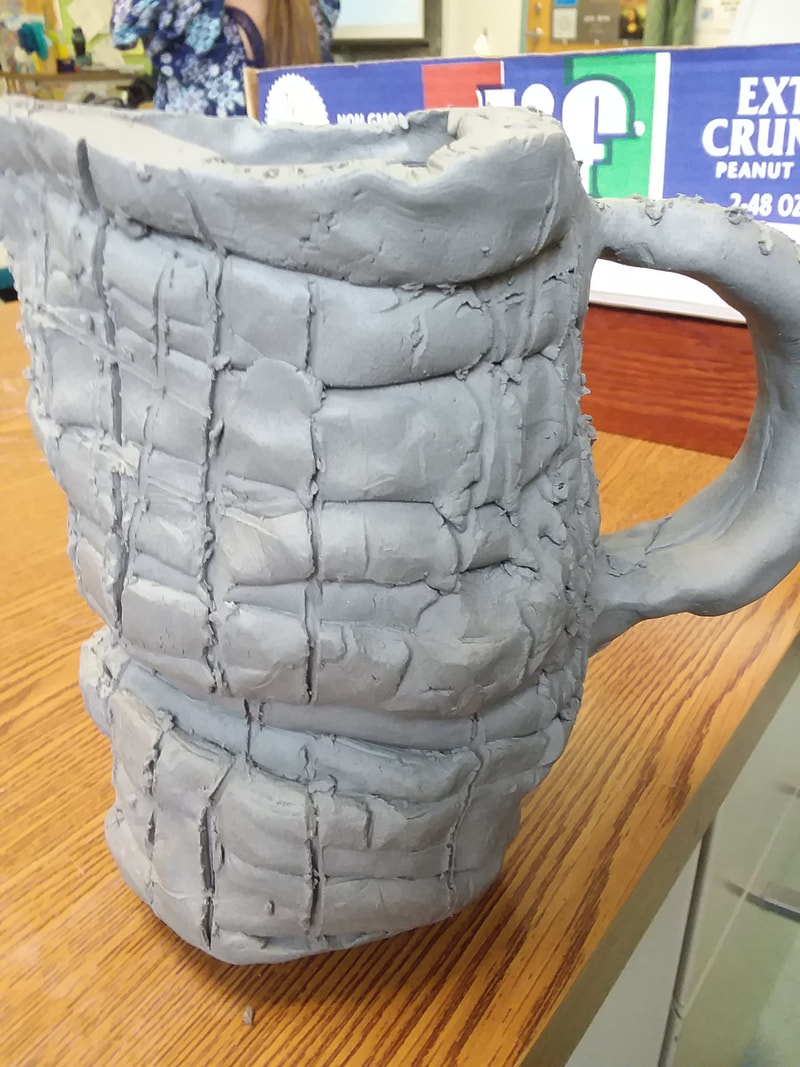
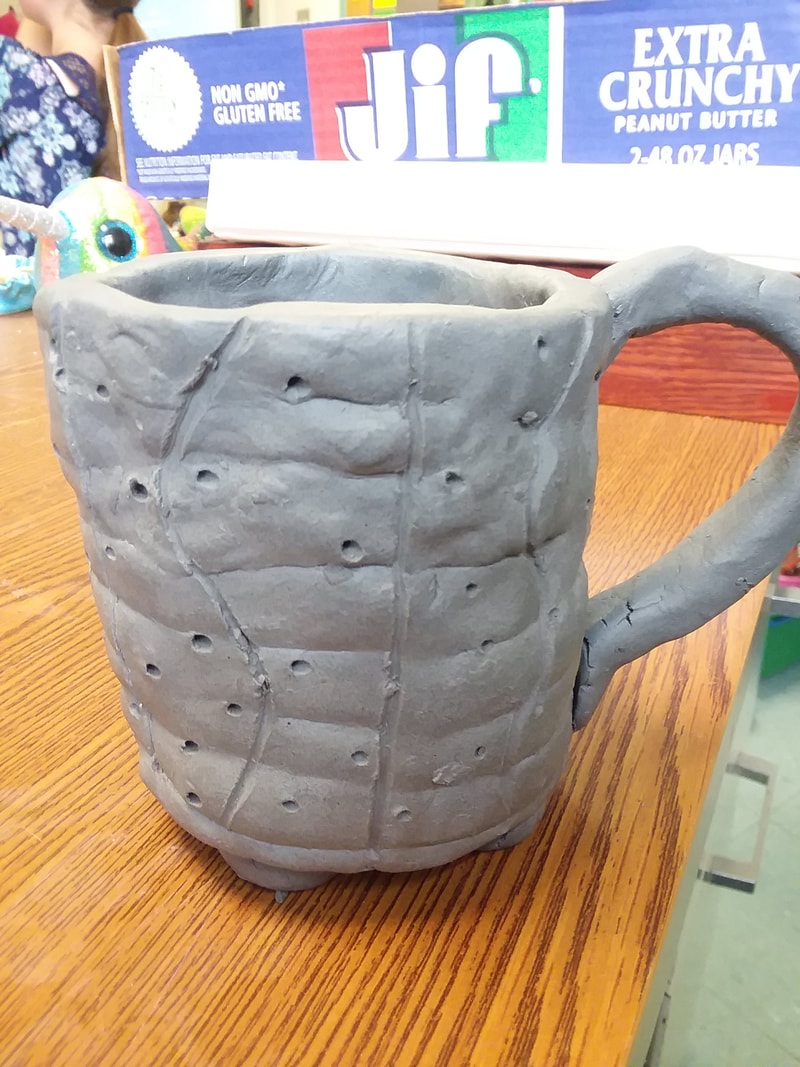
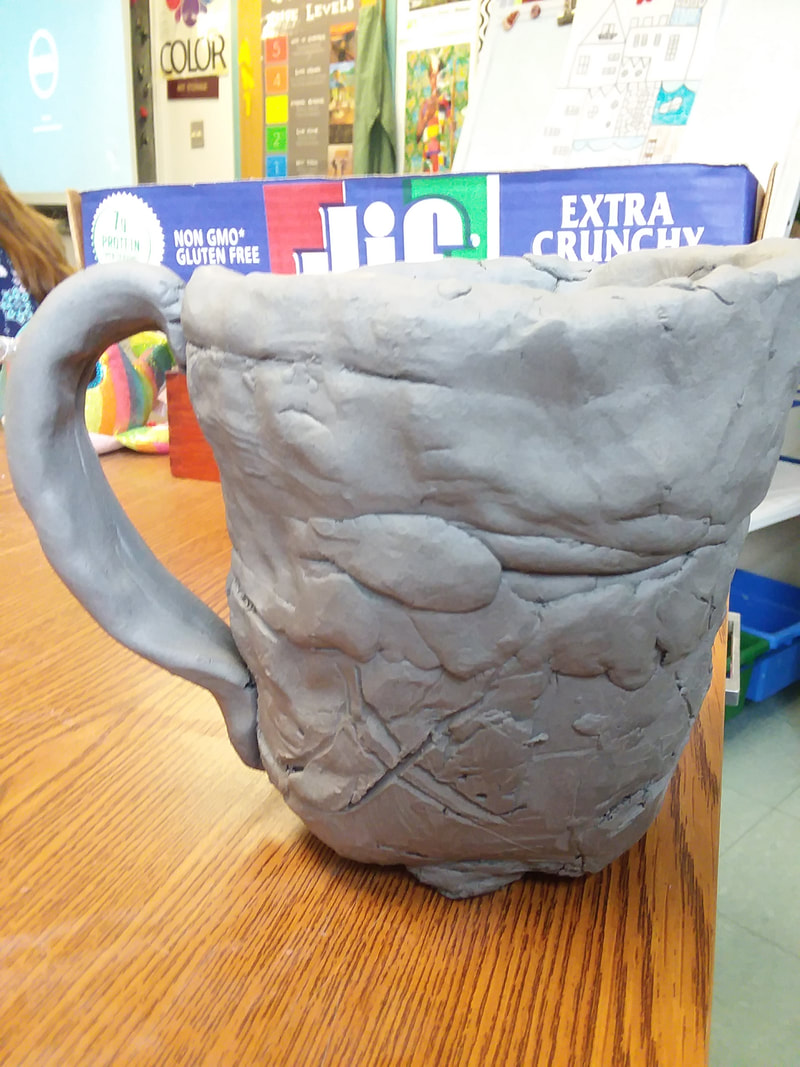
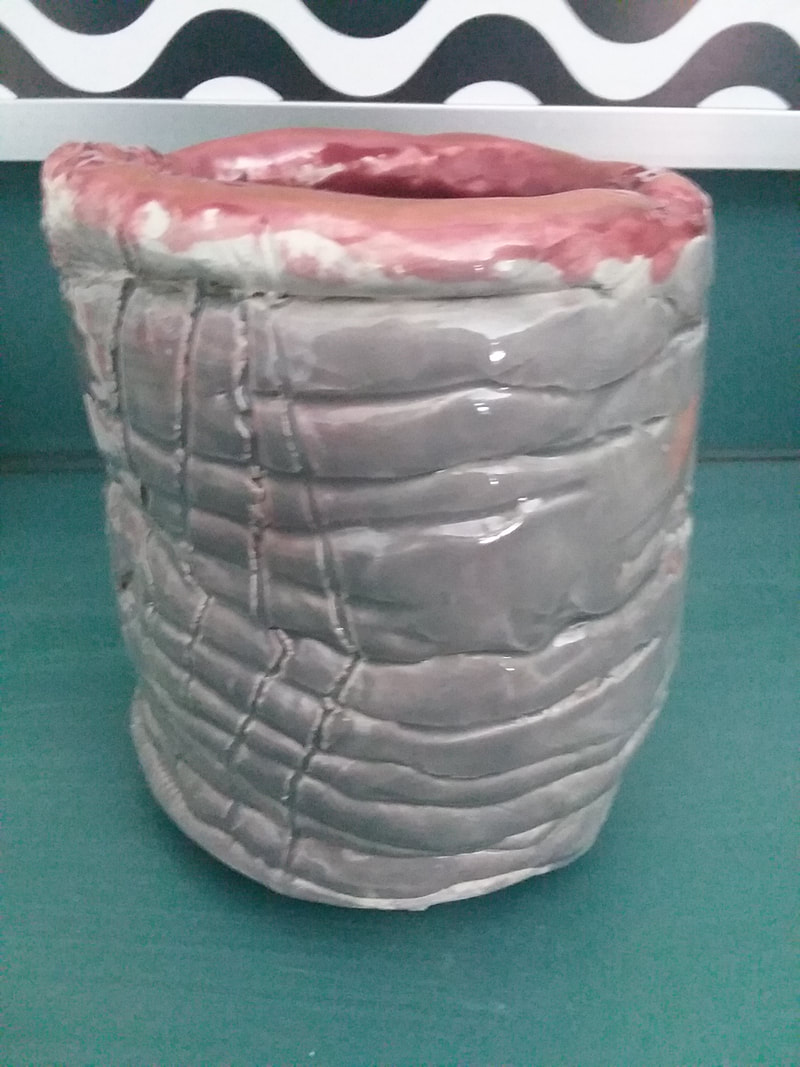
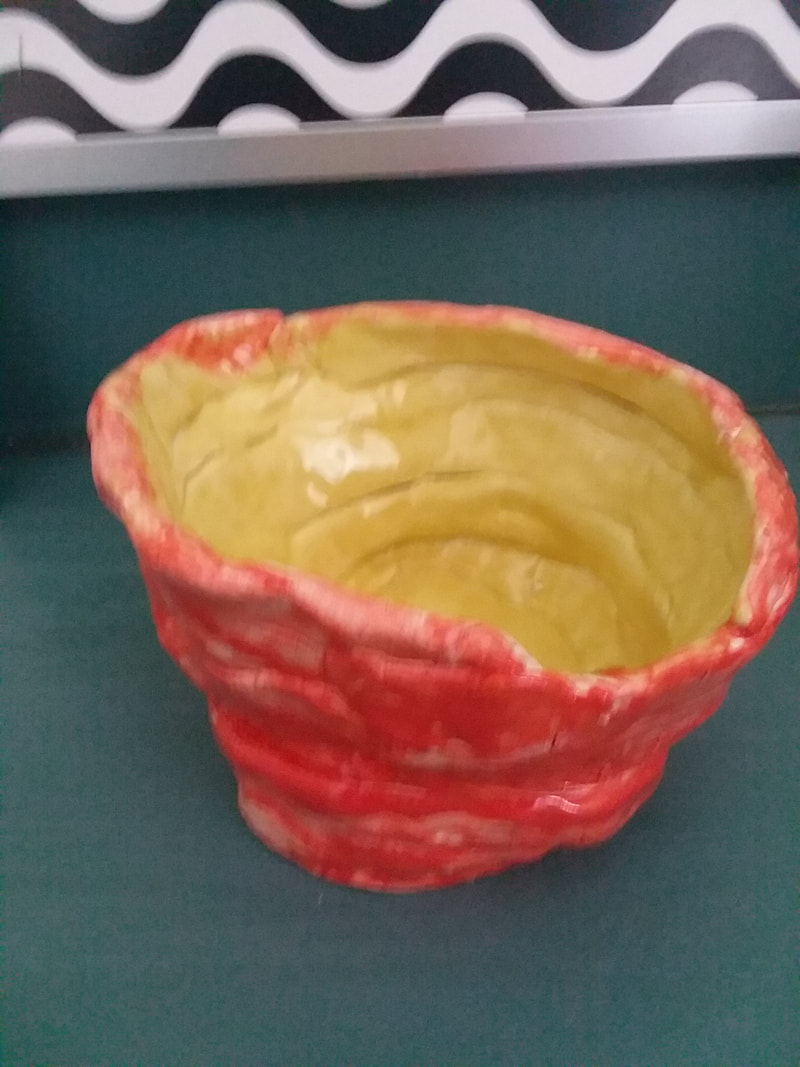
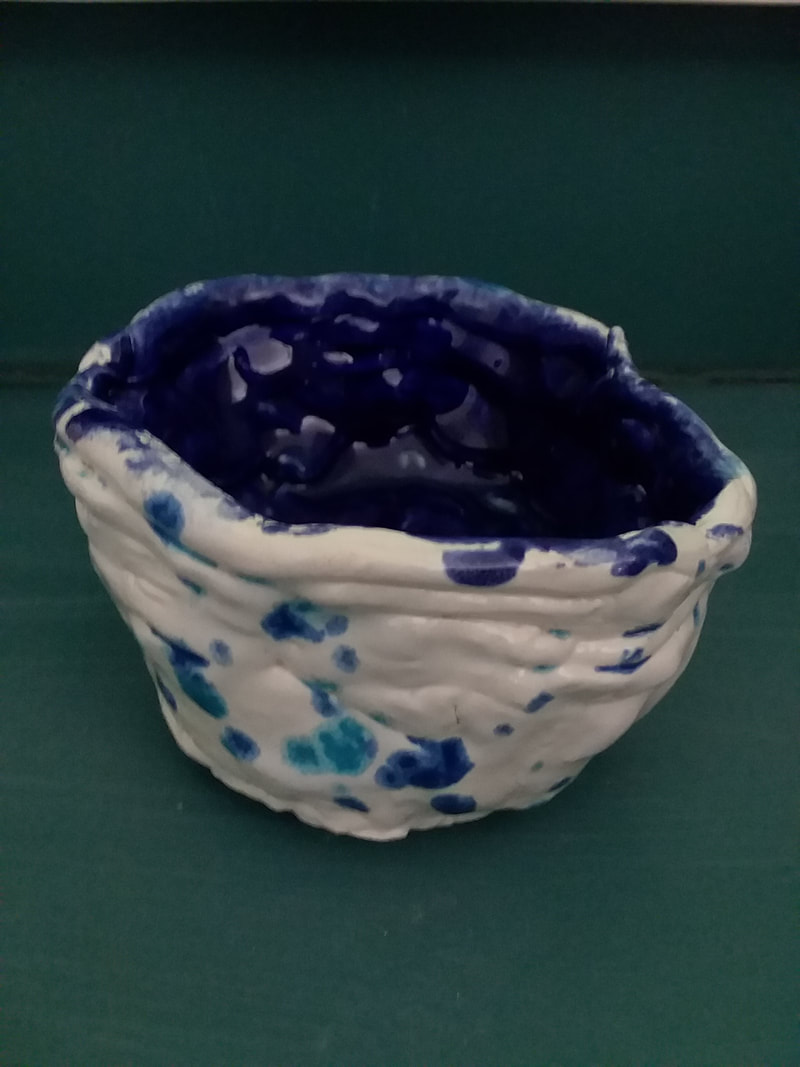
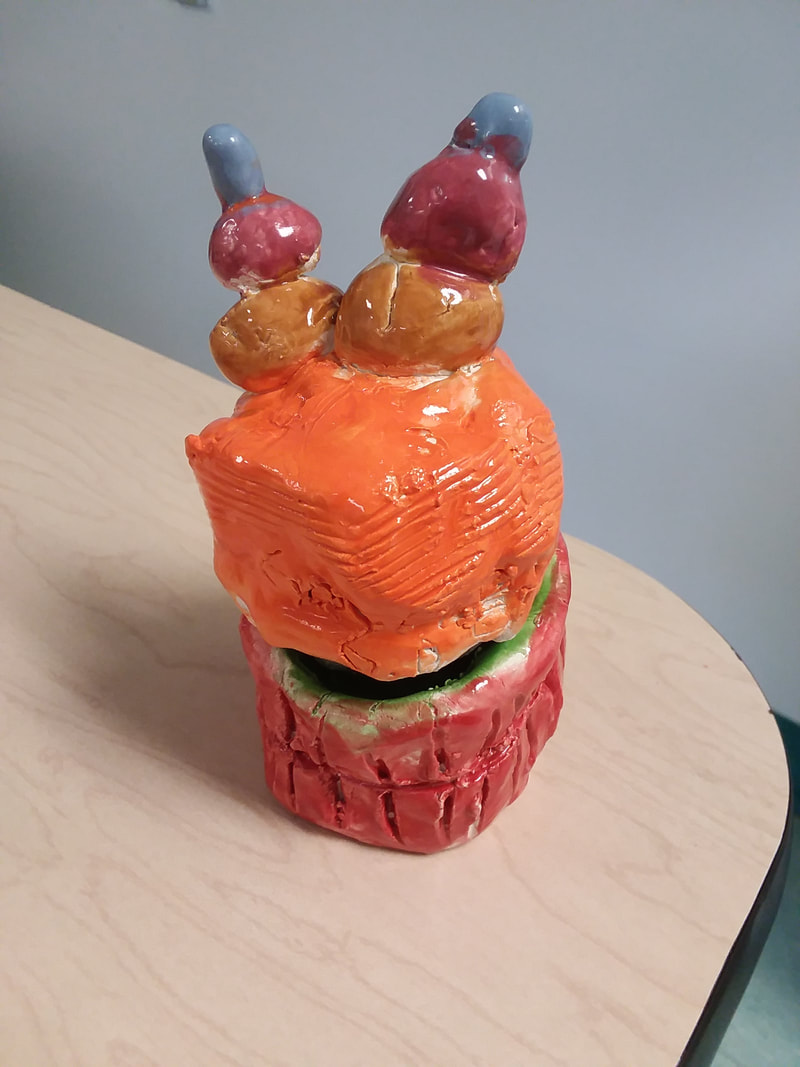
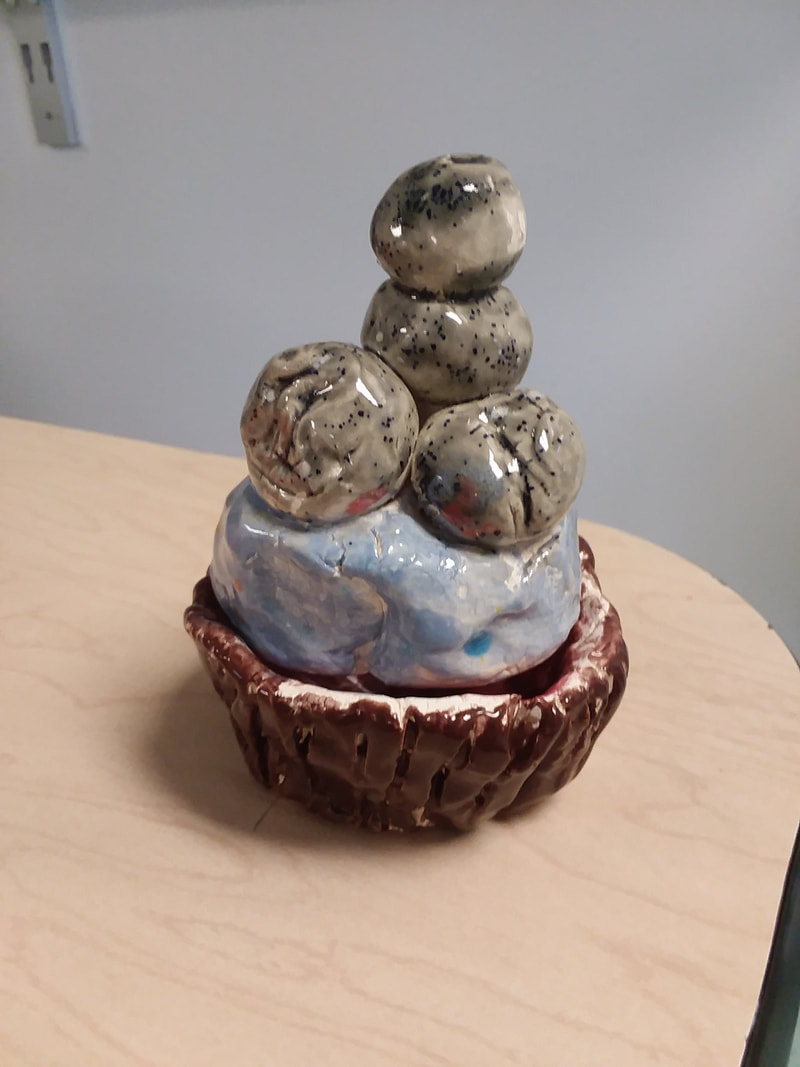
Unit Overview: Students learned how to create a ceramic vessel using clay, clay tools, and coil pot technique in order to create a balanced, clean, well designed container. In this project, I wanted students to focus on the technical aspects of ceramic building. We used the coil pot method and review basic concepts like score and slip, pinch pot, and sgraffito. In addition, we also covered more ceramic technique, like allowing the clay to harden in a sealed bag to just softer than leather hard in order to build more firm, effective, and stable pots. (If you build too high too quickly, your pot will fall or fail.) We also talked about the design of the pot. I required each student to ensure that their pot had the following: 1. A foot 2. An attachment 3. Sgraffito (subtractive design) 4. Built between 3-7 inches 5. Must be solid, no cracks or holes Here's how the bone dry pieces look . . . And now for the final, finished project . . .
0 Comments
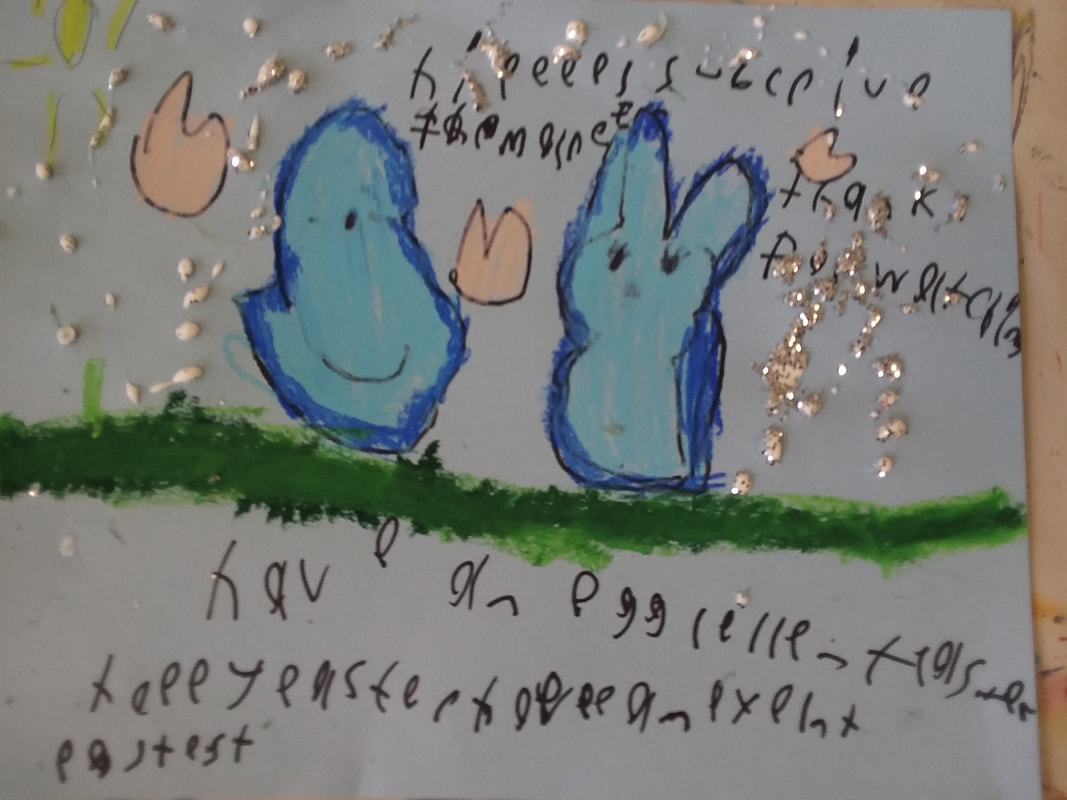
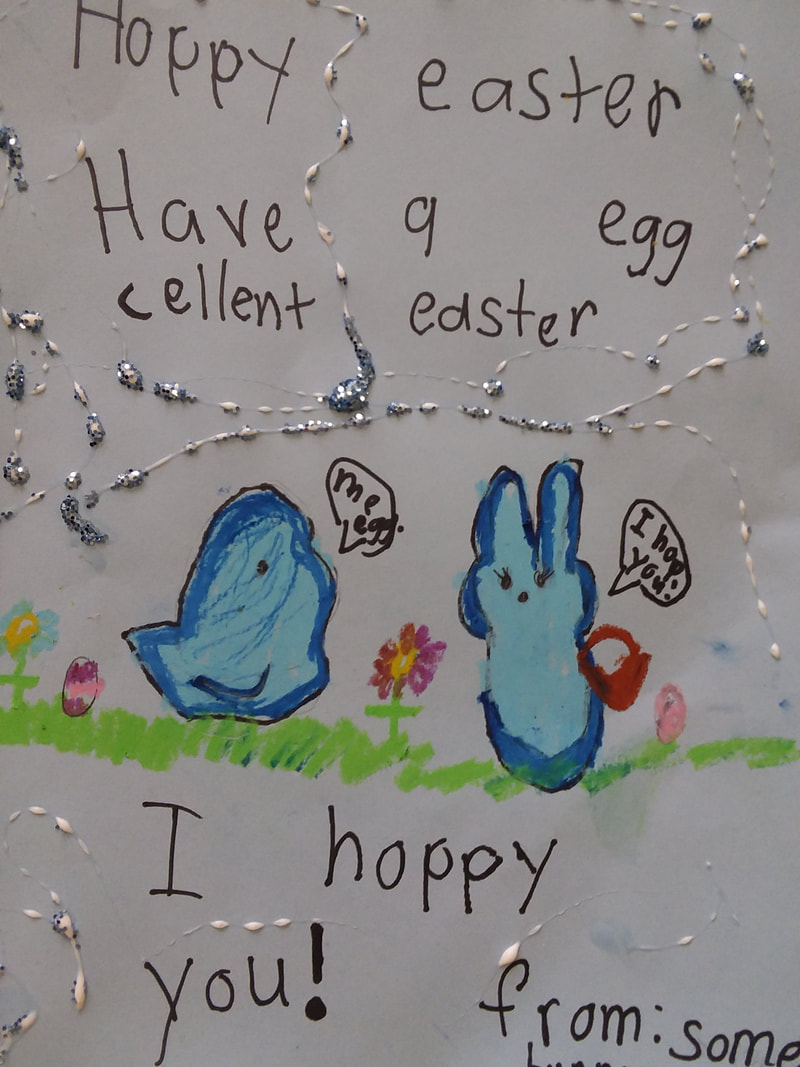
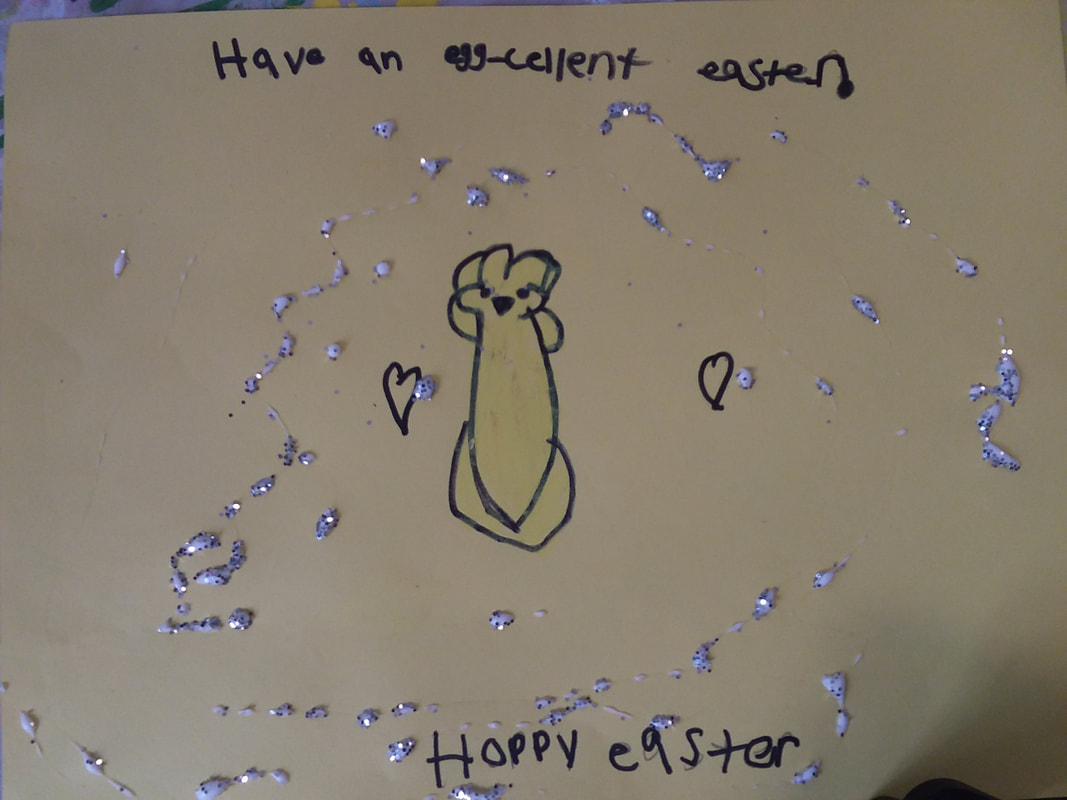
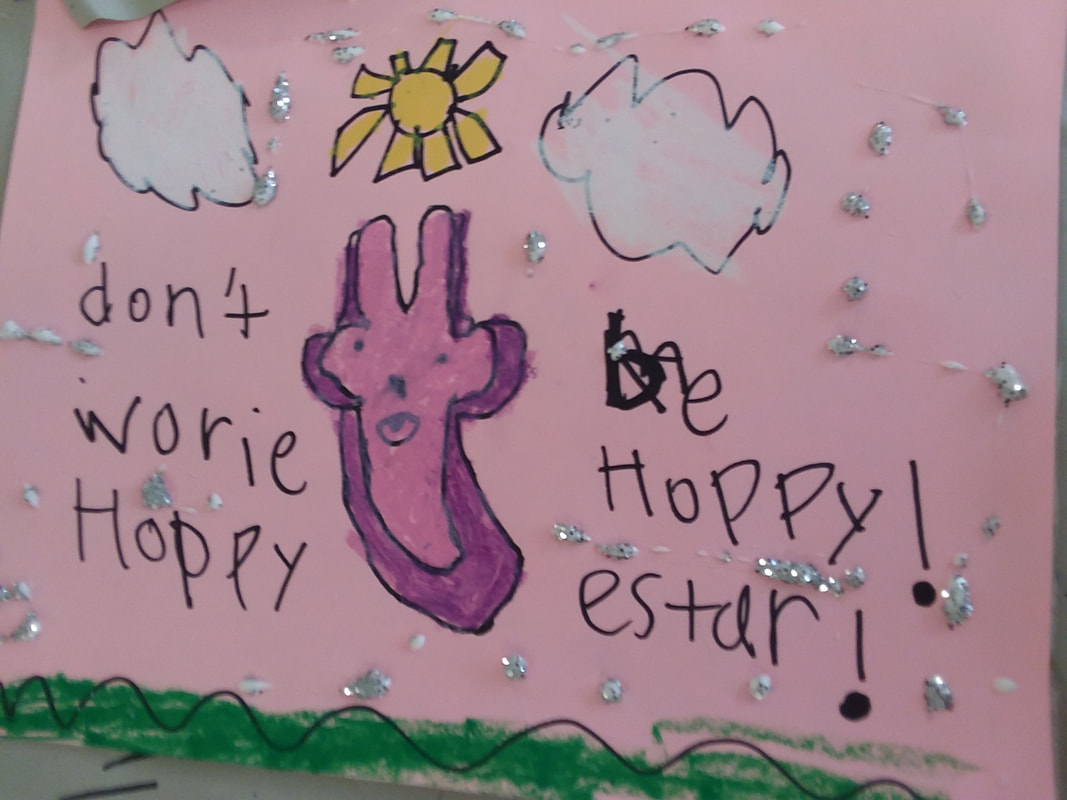
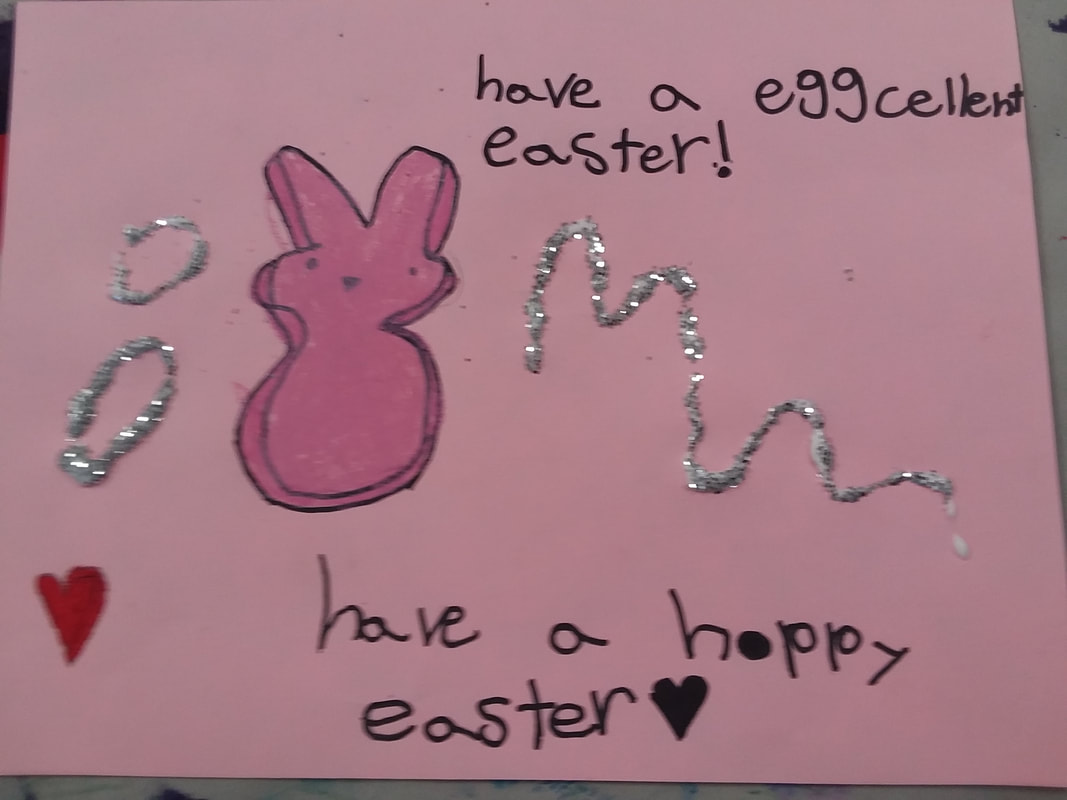
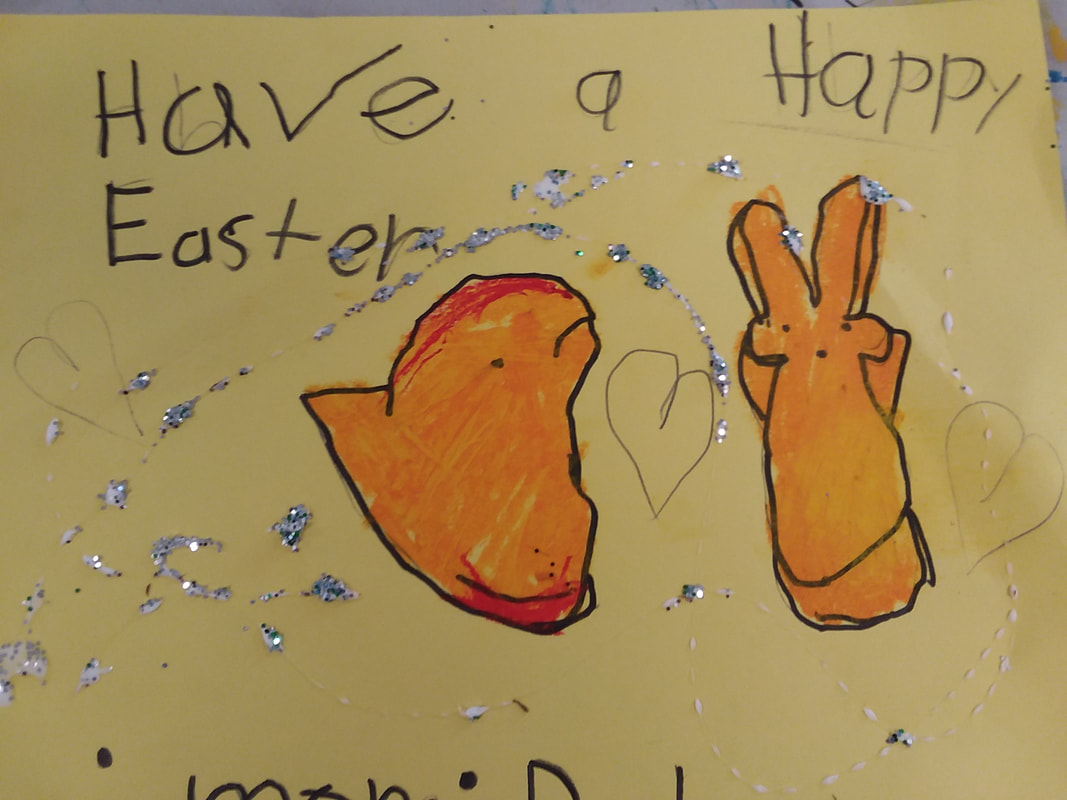
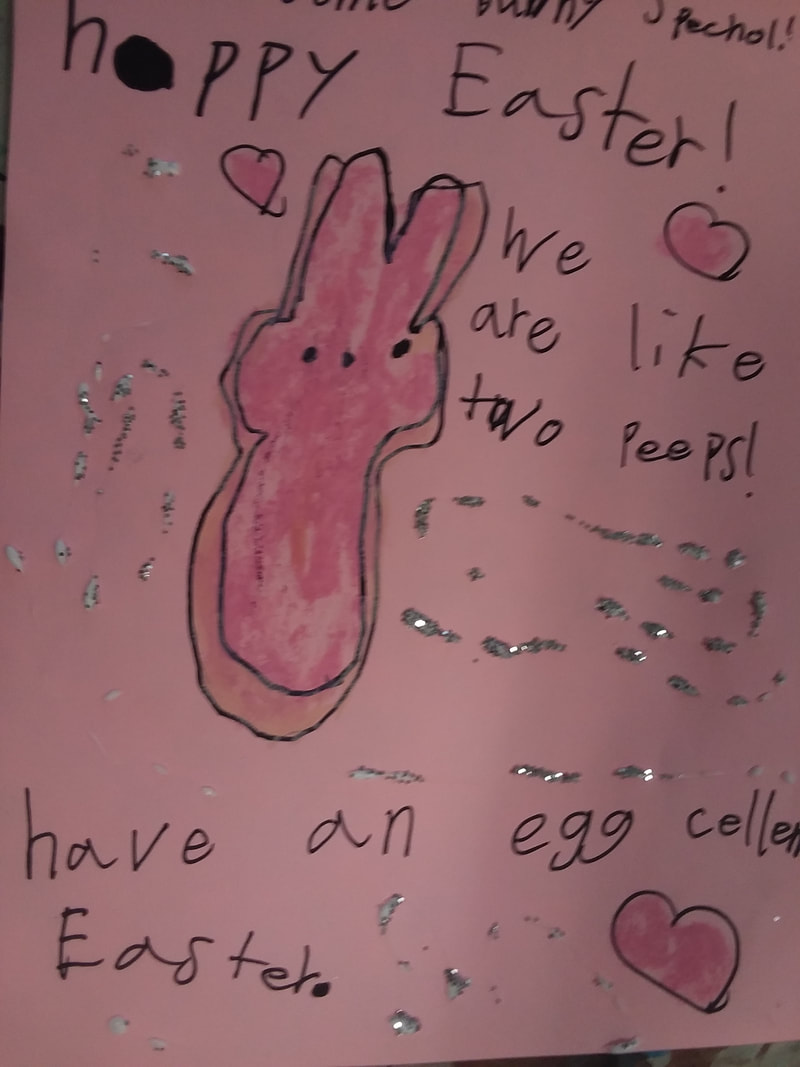
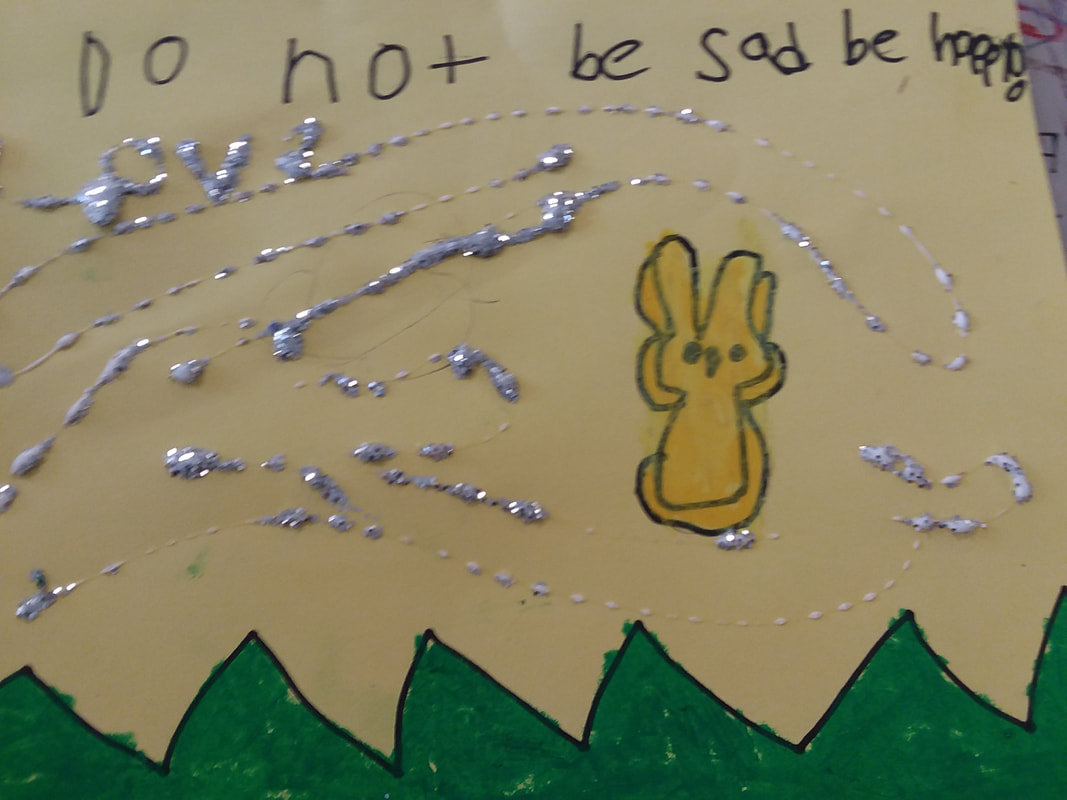
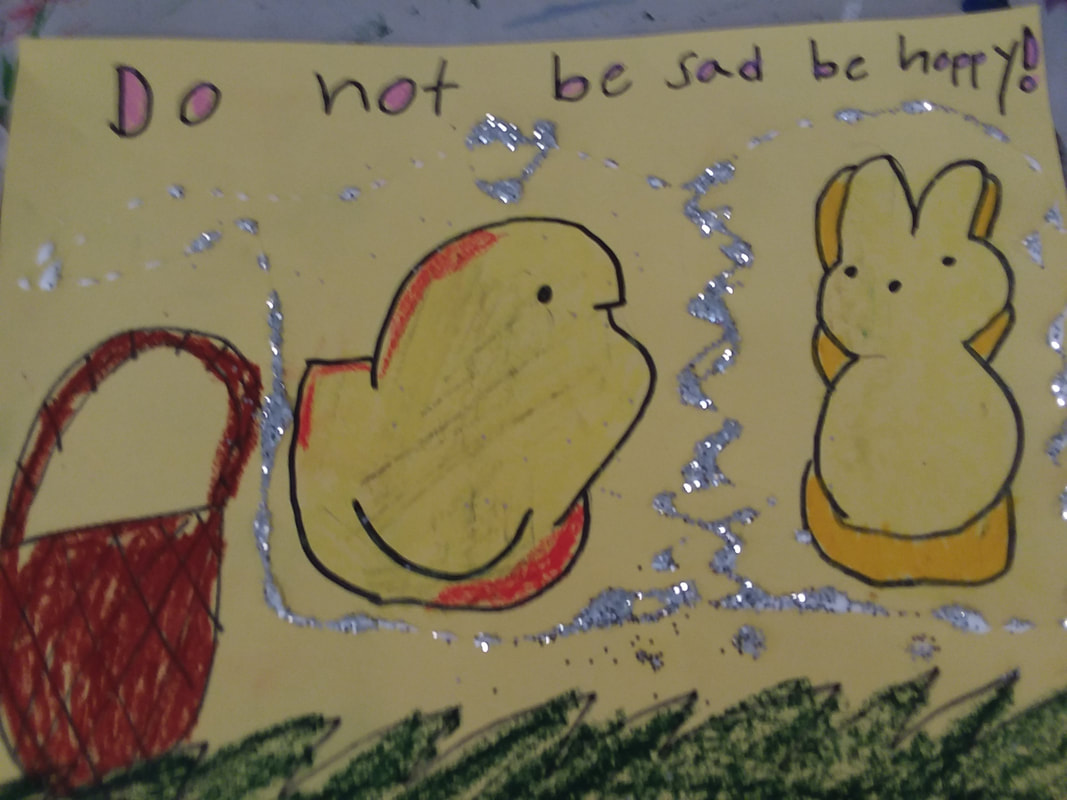
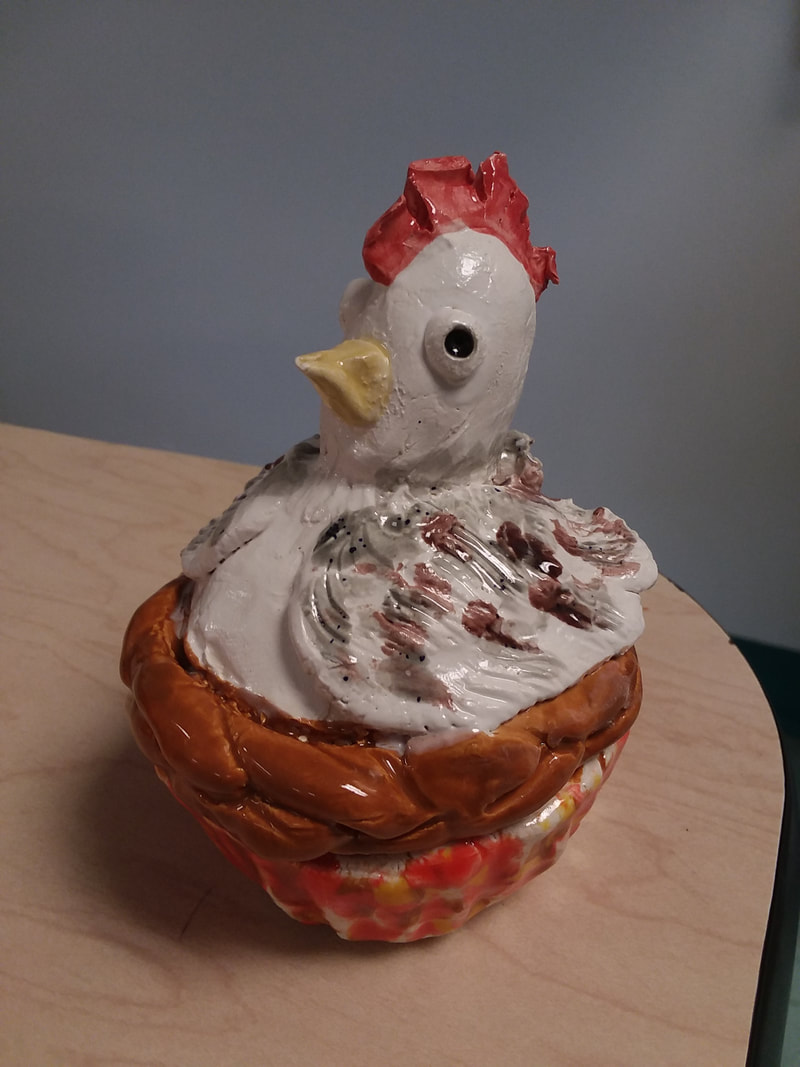
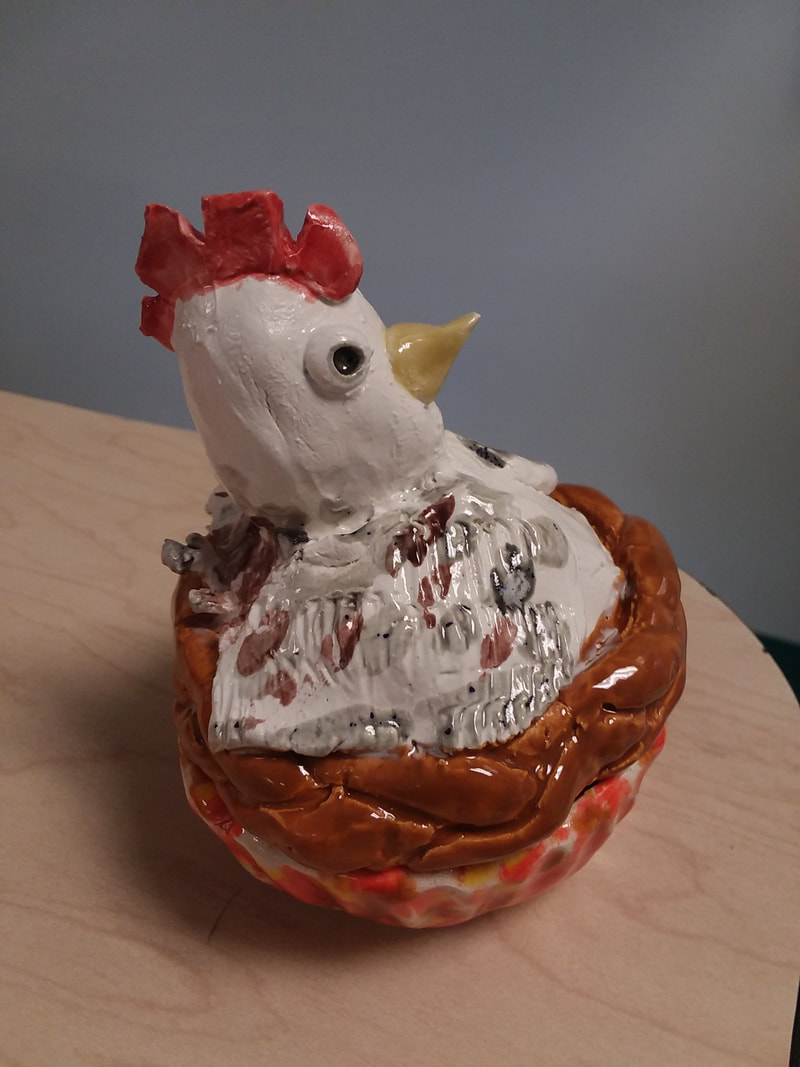
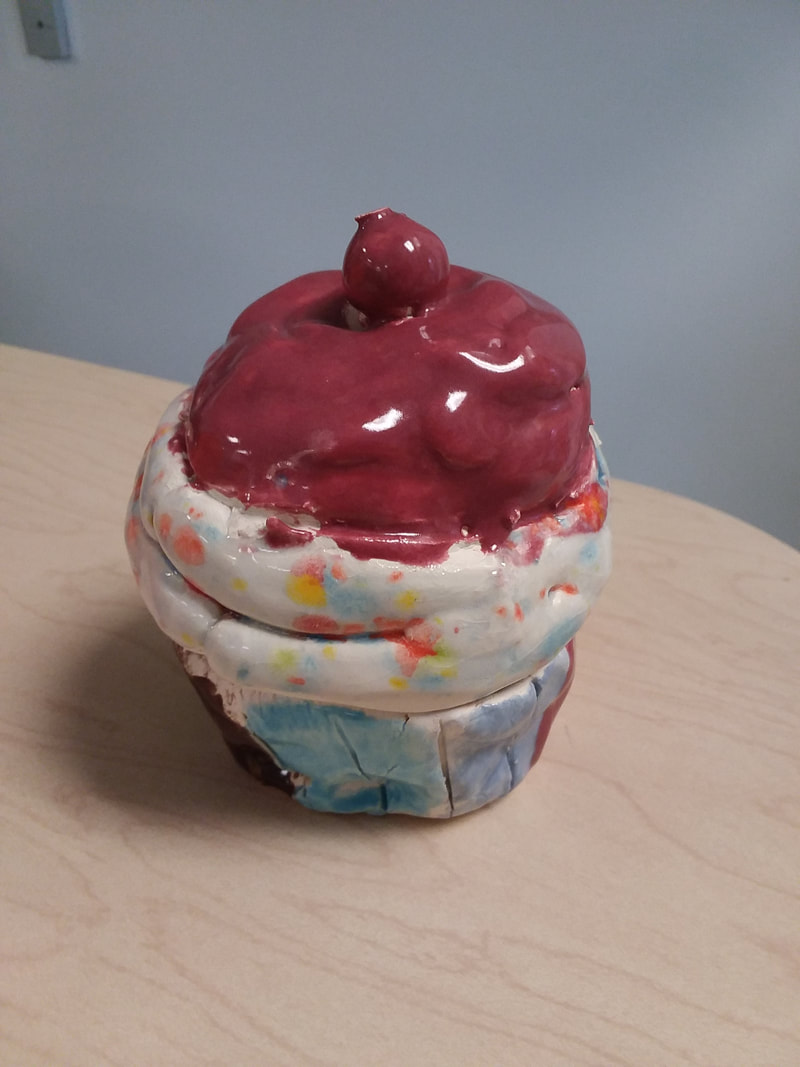
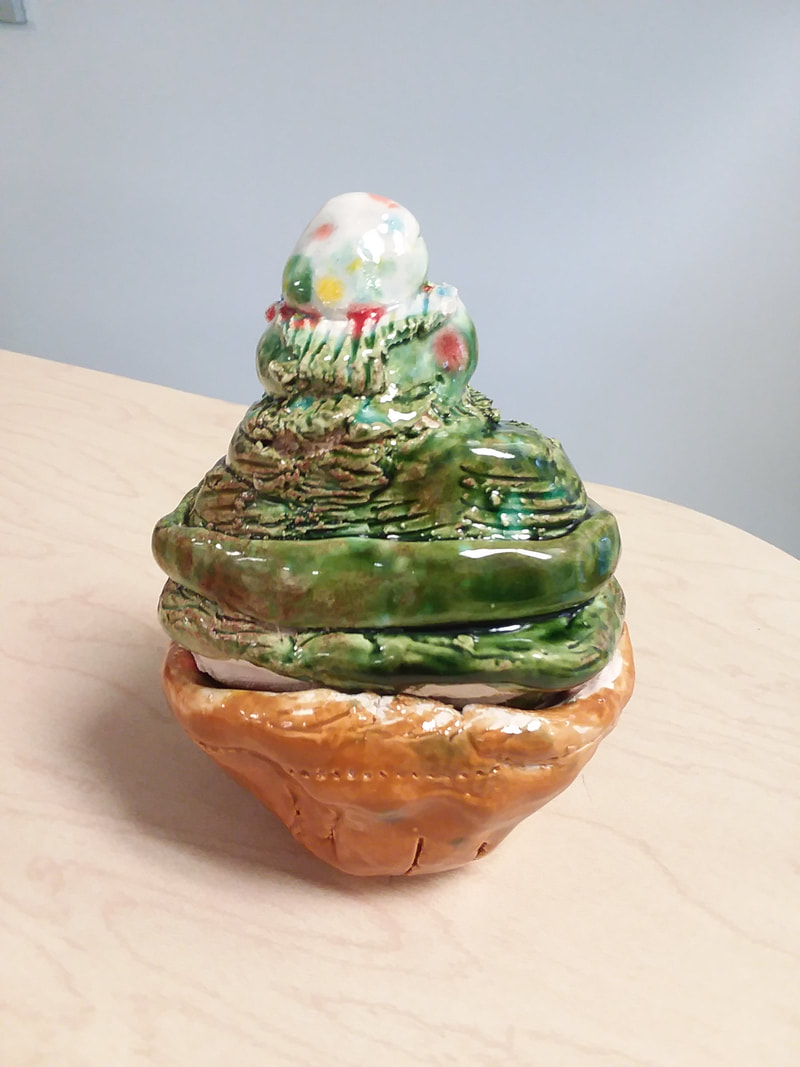
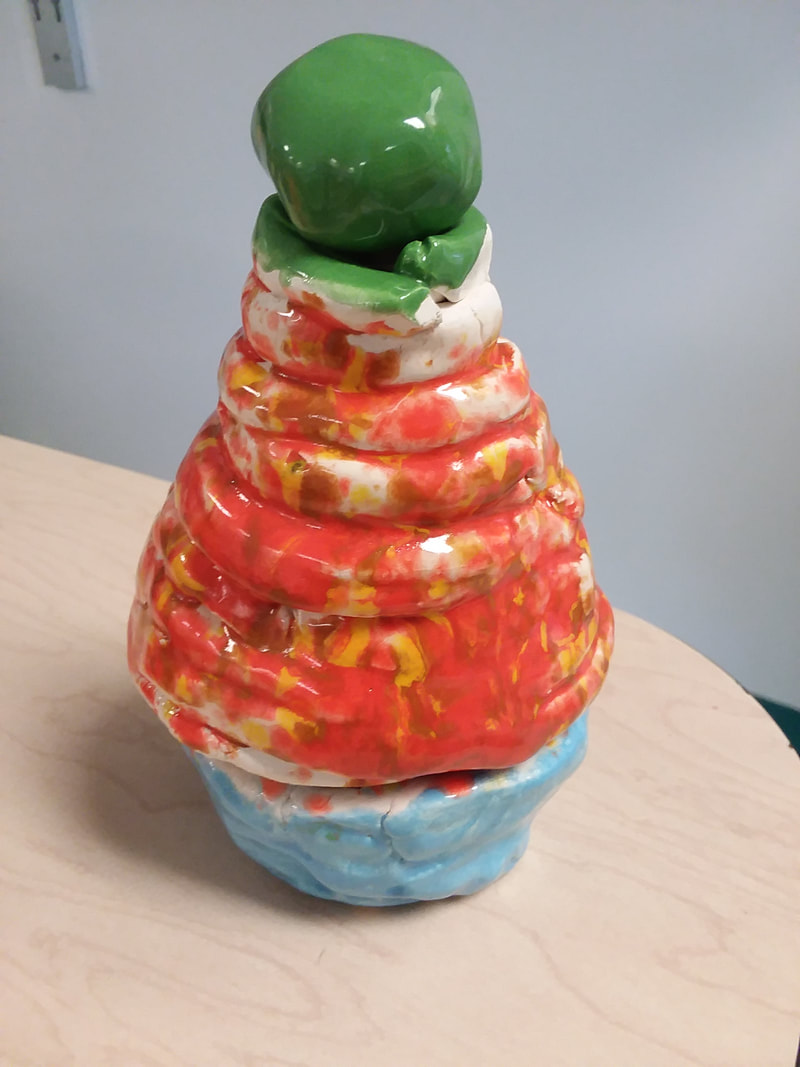
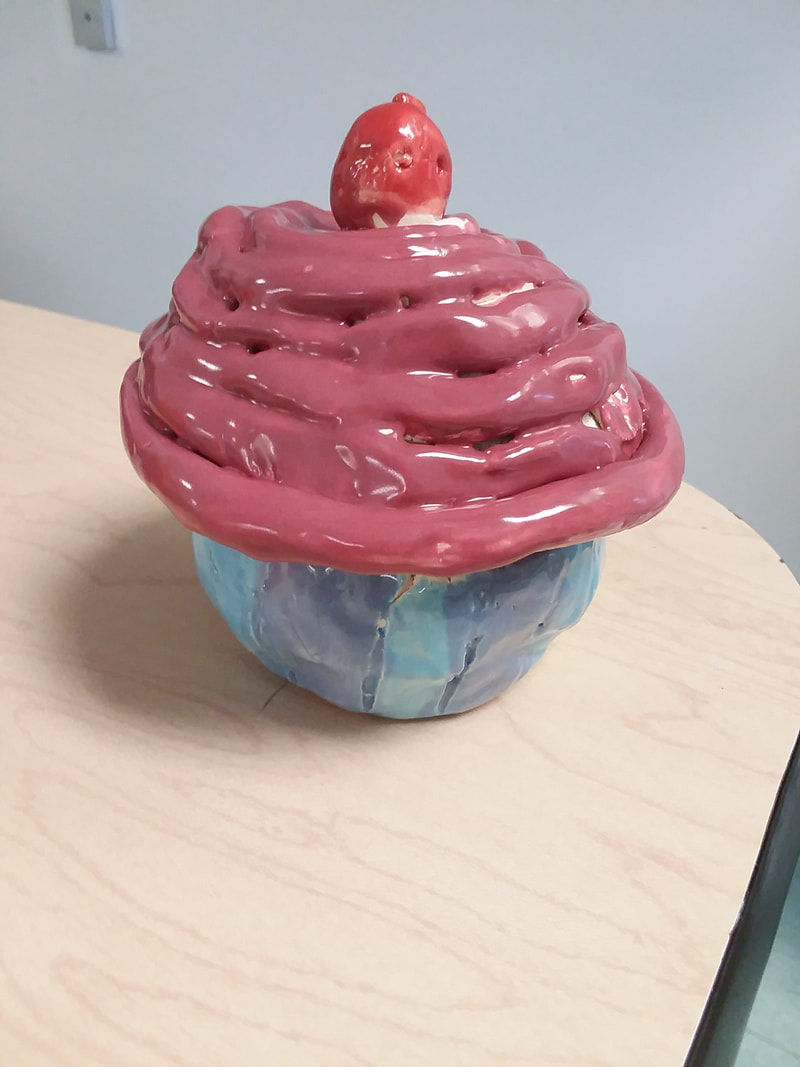
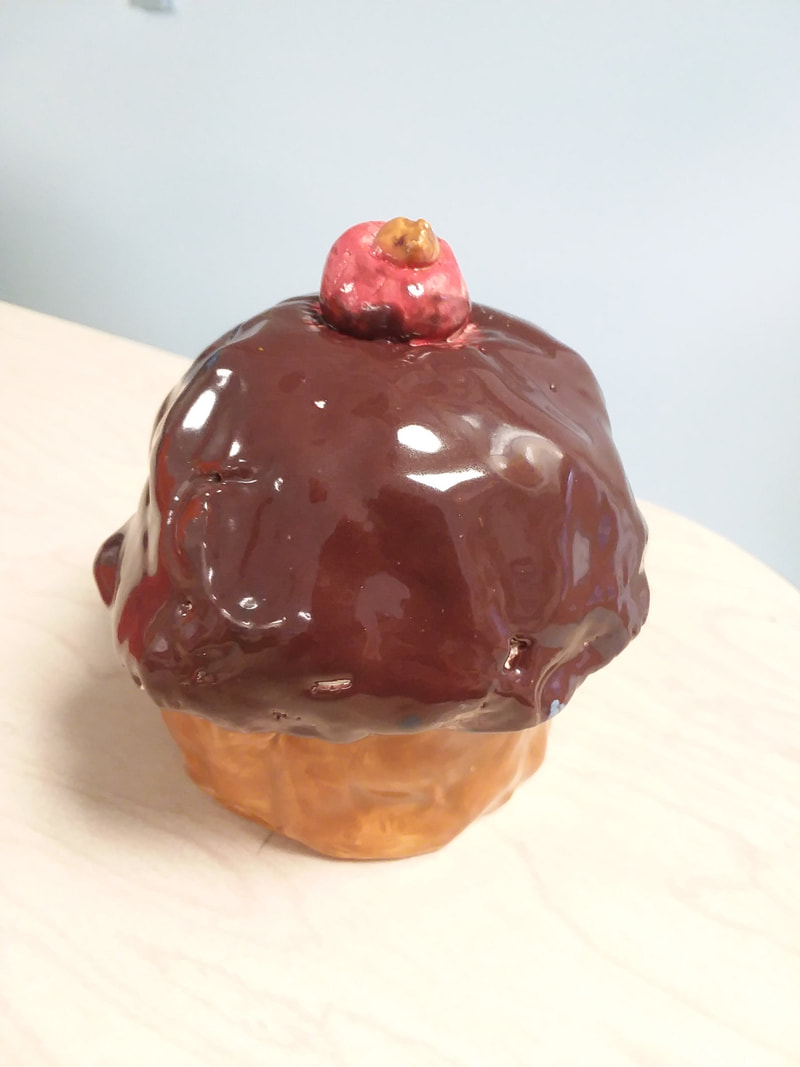
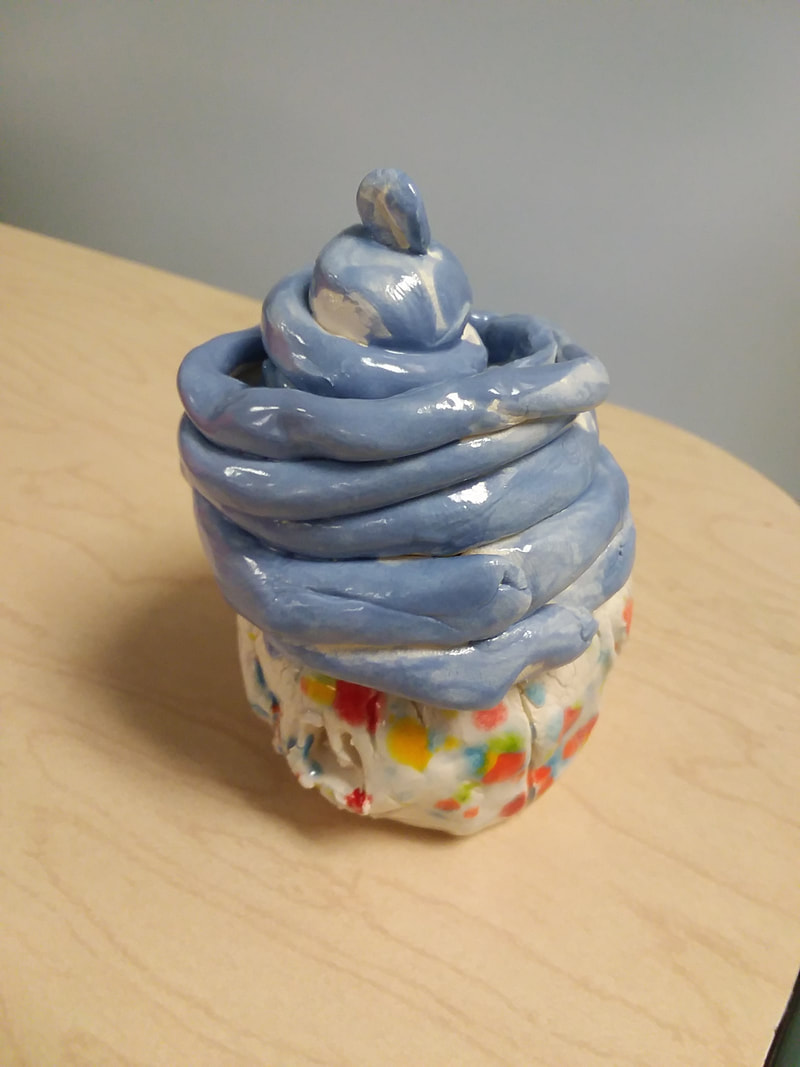
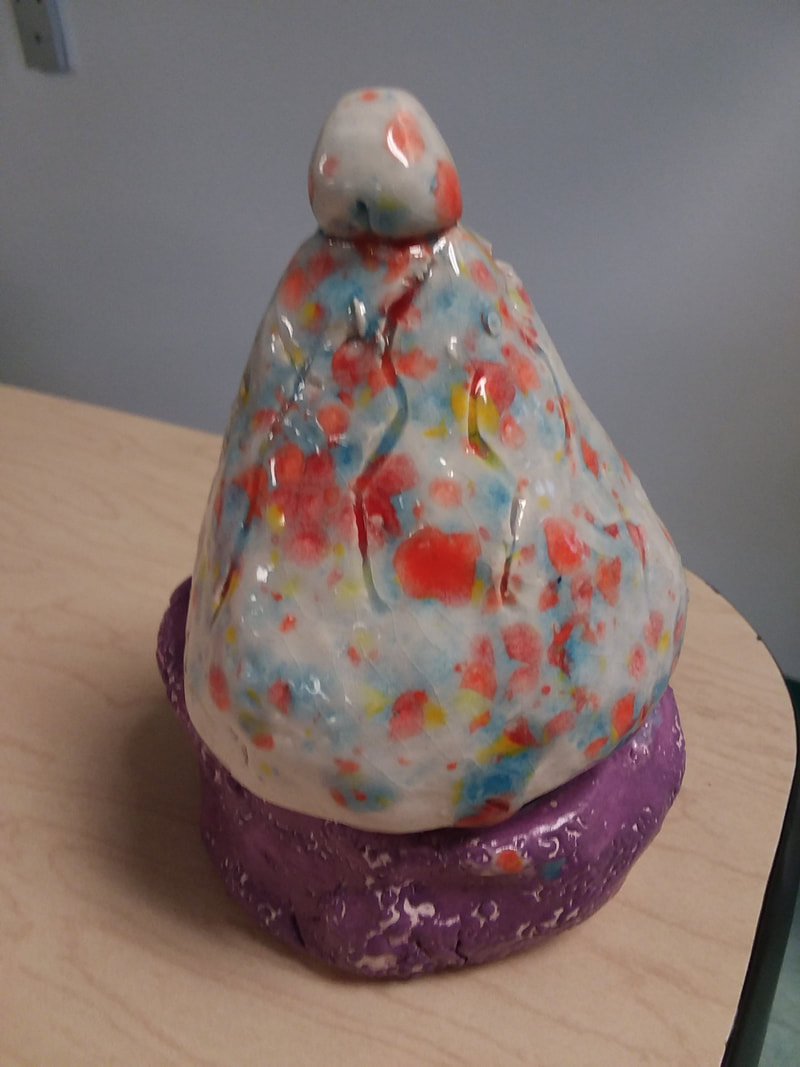
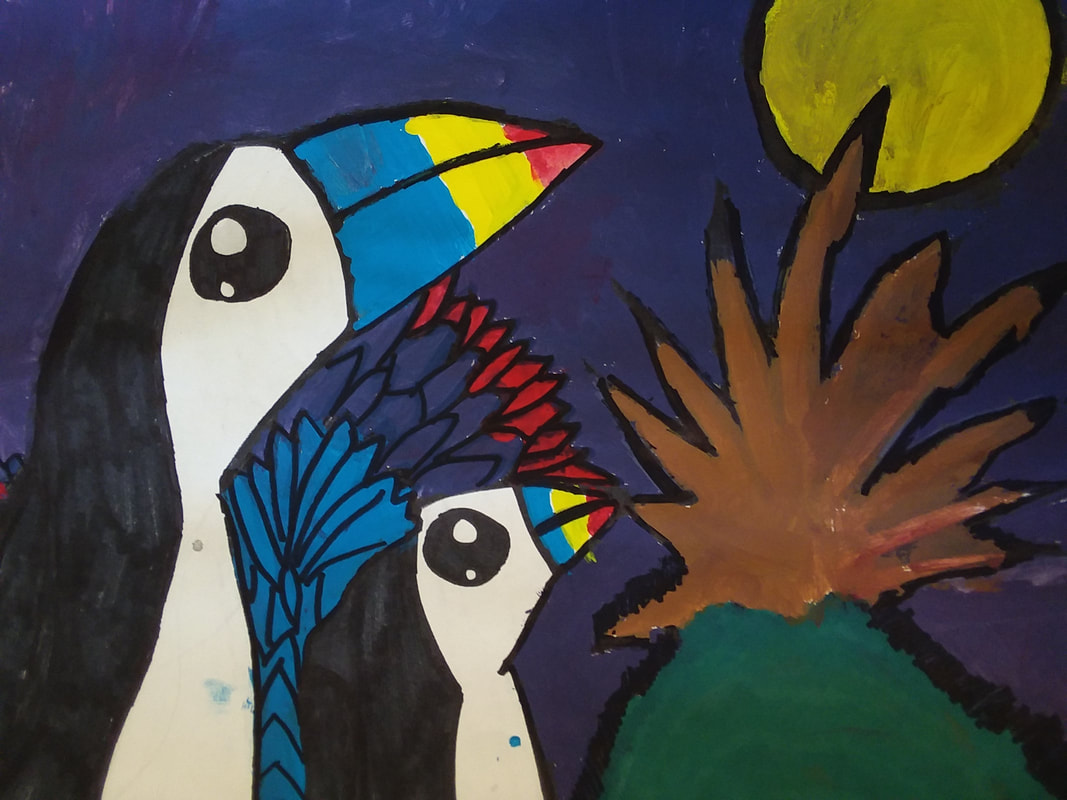
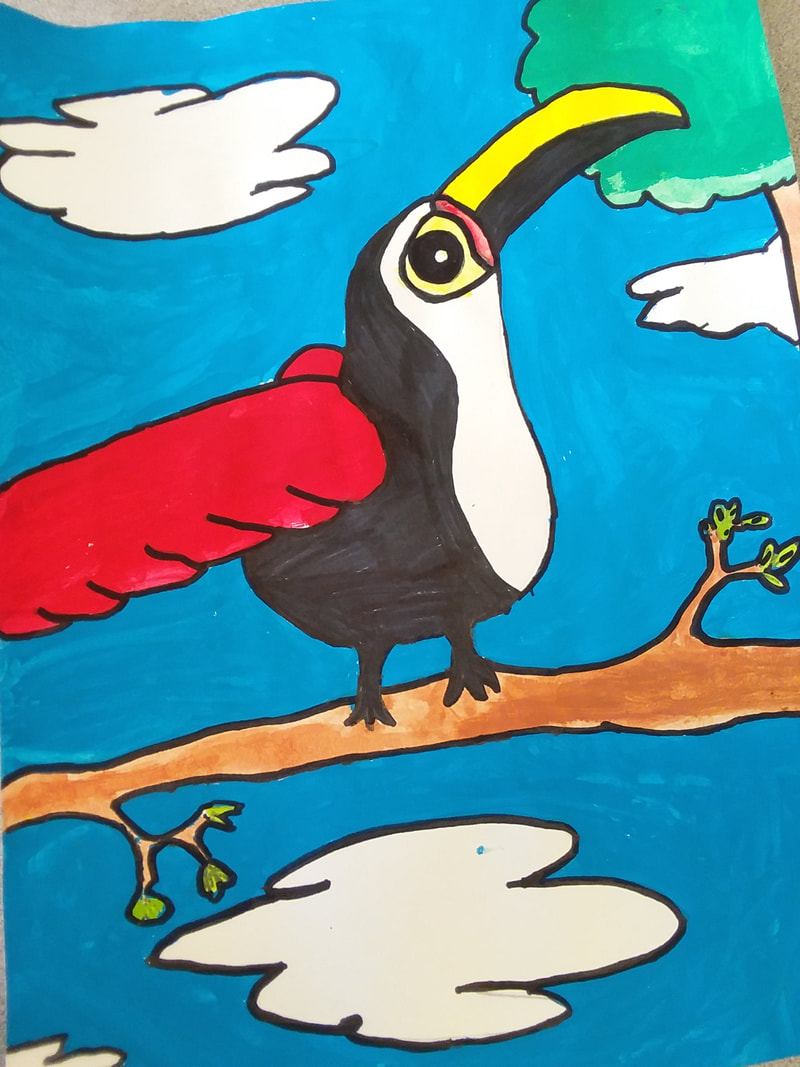
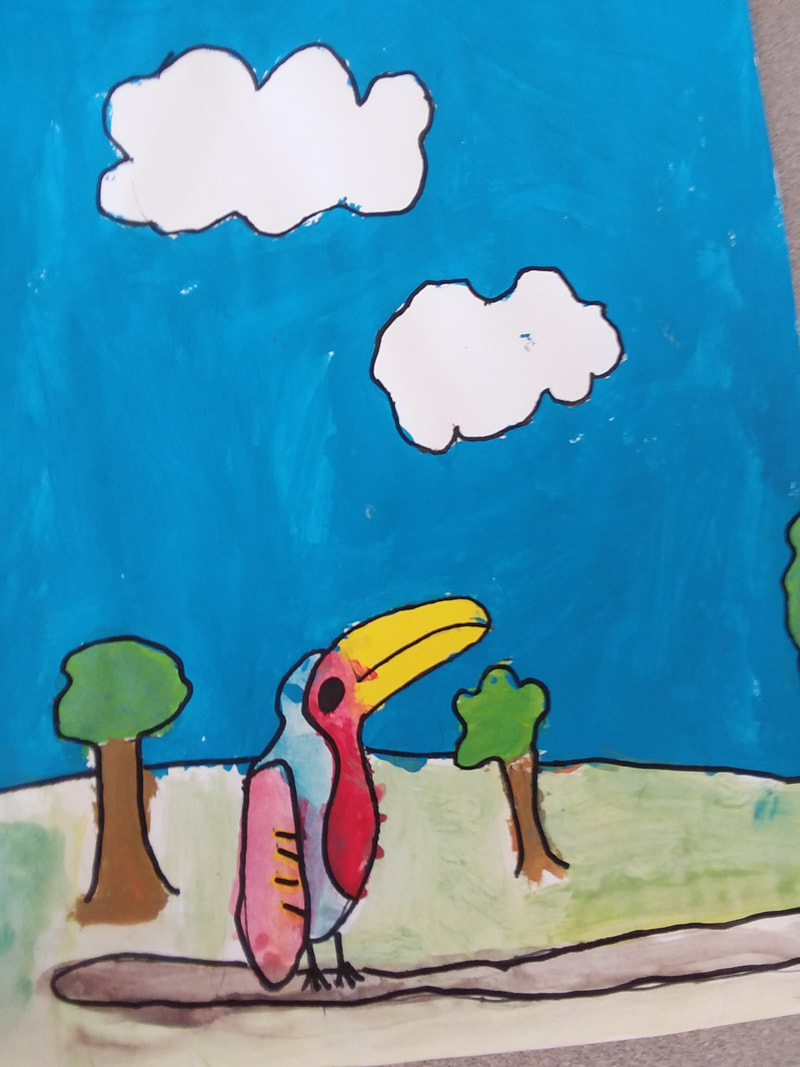
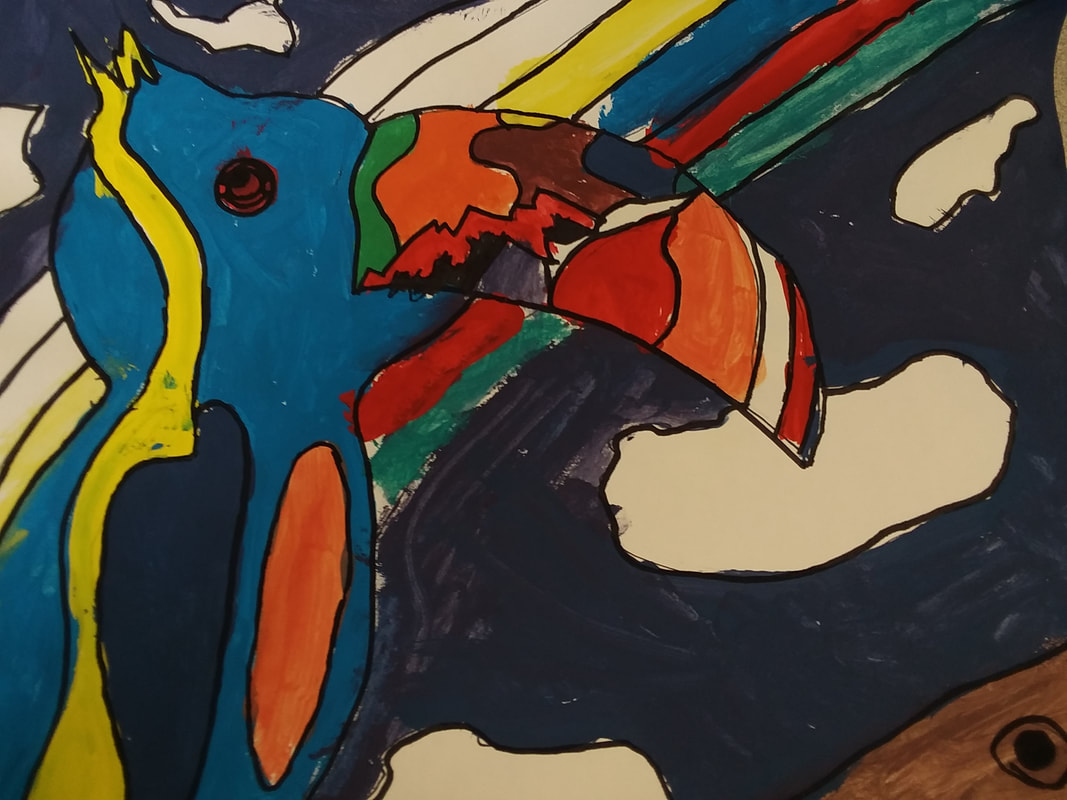
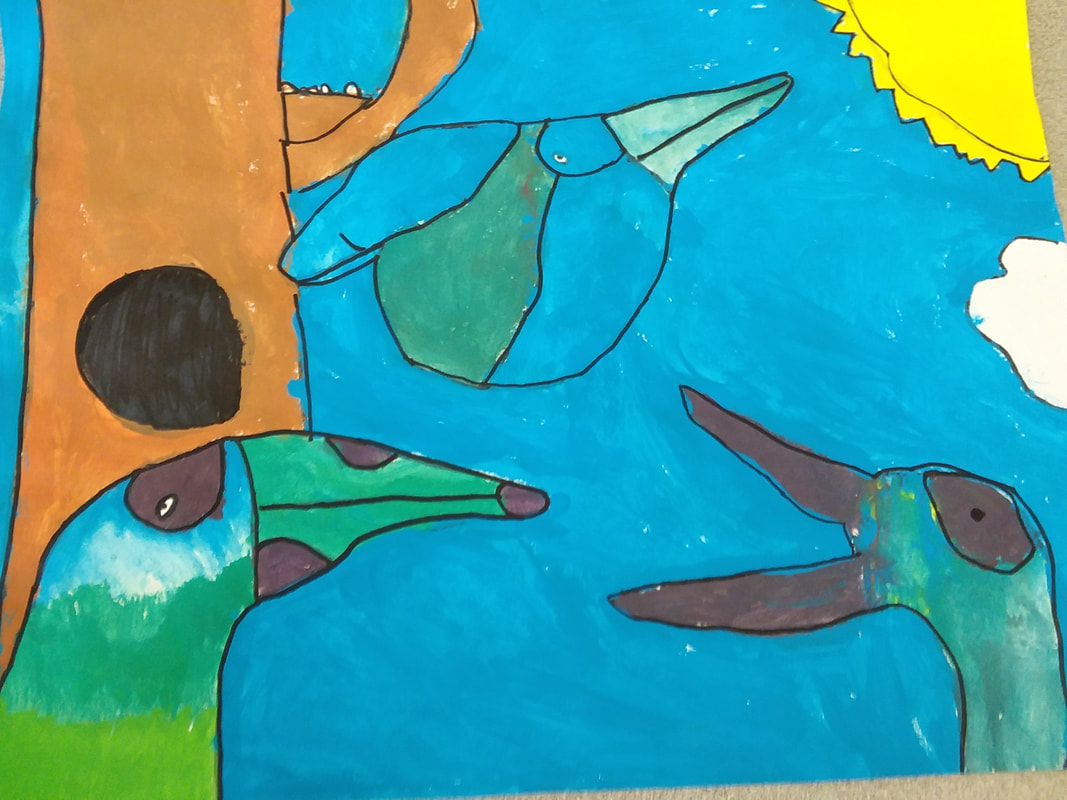
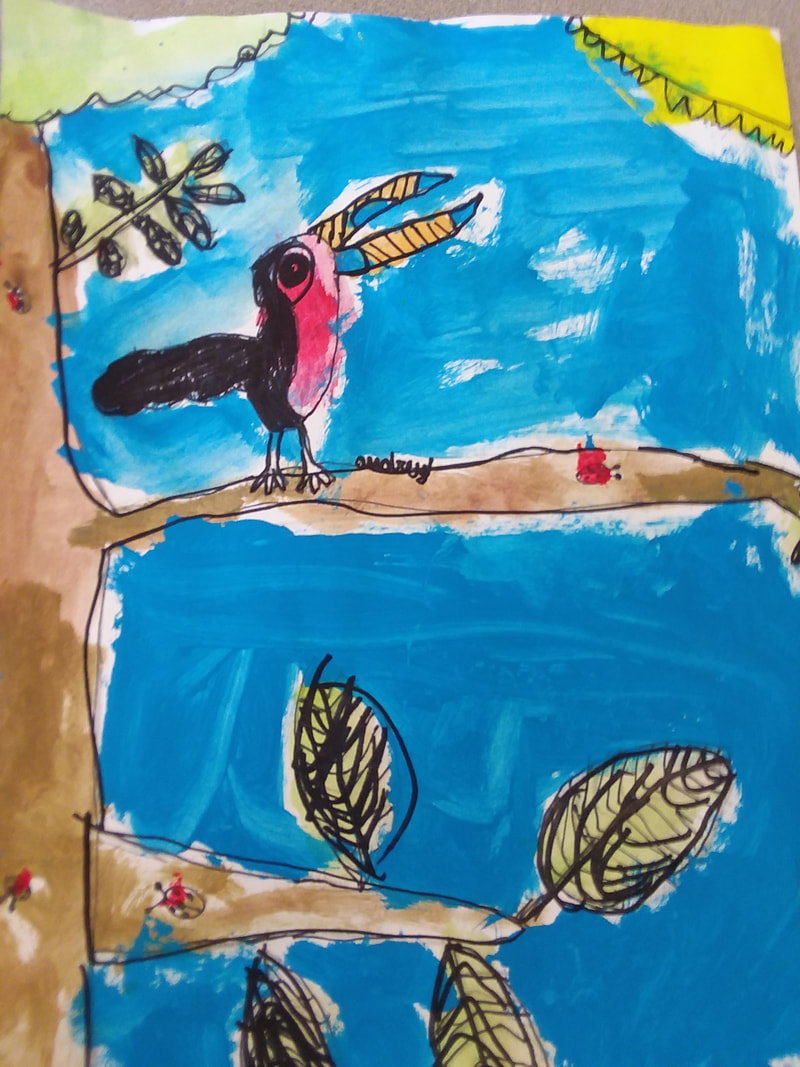
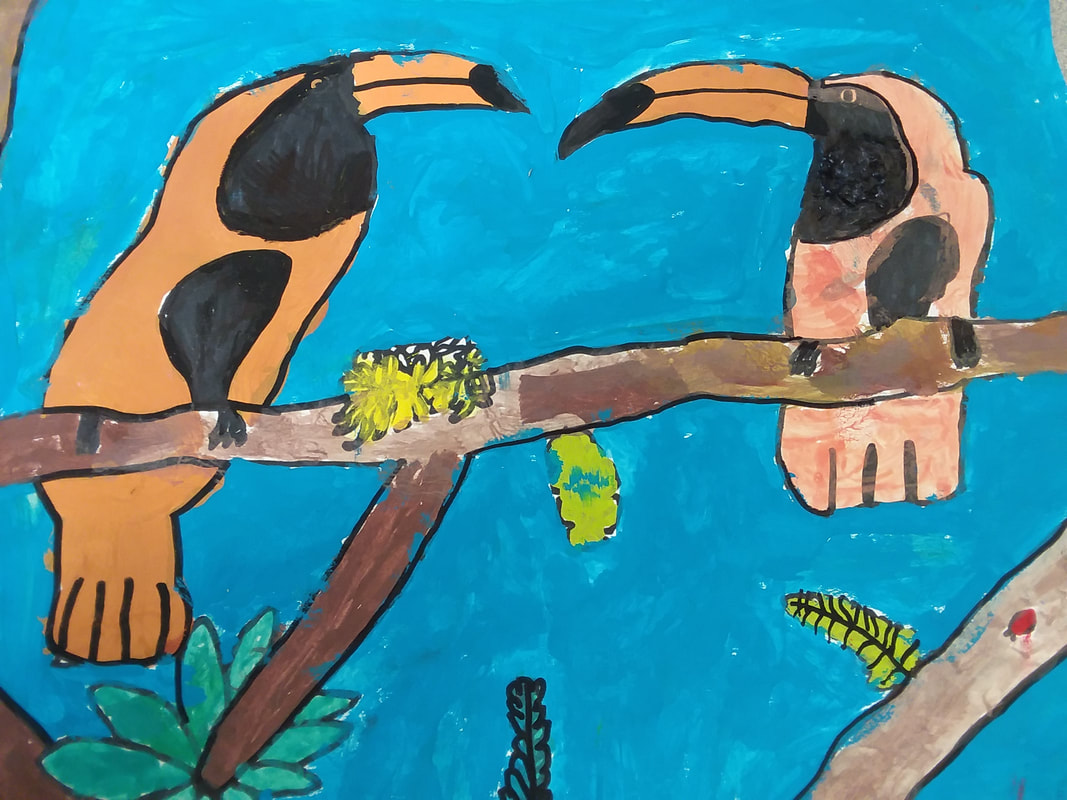
Unit Overview: Students create themed art using video references, oil pastel blending technique, and glitter. First grade smelled spring break in the air and caught spring fever. They were jumpy, and I was bored with typical art lesson. So, without further ado, the Easter Peep Poster project was born. We tied writing into the unit by having student write bunny and egg puns on their posters. For example: "Hoppy Easter", "Have an egg-cellent spring break", and "Don't worry, be hoppy". Finally, we get to discuss a sore subject of mine . . . glitter. I know most art teachers are all about the glitter. But not me. In fact, I can think of only one thing more aggravating than glitter . . . intense, blistering poison ivy covering the entire body. Nonetheless, I tried glitter, on this crazy day, for the first time in my entire teaching history. After a prayer for help from above, I set off, reminding the students that glitter was a privilege. And privileges are earned, not given. My advice for using glitter is to do it by a sink, or in a sink. Line the sink with large pieces of paper to prevent the majority of going down the drain. Then, apply the glitter to the wet glue and give it a super shake to remove any excess glitter. Also, be sparing with the glitter. This is one thing where "more IS NOT merrier". Also, when applying glitter, never use the same color glitter on the same paper. It blends in too much and doesn't look good. Glitter is meant to highlight, to sparkle! Use it with love and care, and sparingly. 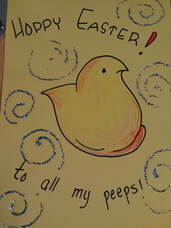 My teacher example Unit Overview: Students learned how to create a closed ceramic vessel using clay, clay tools, and pinch pot technique in order to create a personal ceramic cupcake. Fourth grade made ceramic cupcakes. For this project, we reviewed how to make a pinch pot by making both the bottom and lid using a pinch pot form. Next, we studied how to properly "score and slip". I have a special rhyme I use to get students to remember how to score and slip. It goes, "Scratch, scratch, water, attach". For every piece of clay that is used to attach, the score and slip method must be used. Otherwise, the whole project falls into one giant mess. These cupcakes are so cute! Mine is a chicken. I plan on buying little chocolate eggs to put inside the vessel so when you lift the lid, the chicken has left you some eggs. Unit Overview: Students experimented with color mixing using the primary colors in order to create a painted picture of a toucan(s). Toucans . . . because they're tropical and colorful. I was feeling some cold weather blues and was looking for something bright and colorful. Toucans fit the bill (ha! get it?). With third grade, I wanted them to review primary and secondary colors. We did so in this project by only using primary colors. Students made all their secondary colors. This was also a good review in keeping a paint palette organized (if you mix the colors messy, you will end up with icky colors). I didn't give the students white or black paint because I wanted the colors to be as crisp as possible. Often, I find that white and black paint takes over a painting instead of adding to it. The toucans were colored in dark with the sharpie if they wanted them to be black. 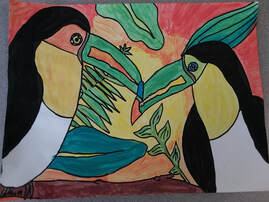 My toucan example |